Teams that collaborate on shared documents often miss critical file updates because SharePoint and OneDrive lack prominent real-time change notifications inside Microsoft Teams channels. You can send Teams alerts when files change by creating a Power Automate flow that monitors your SharePoint document library and posts automatic notifications. This article walks you through creating file change notifications using Power Automate, webhook connectors, and built-in SharePoint alert features for your team.
Why Teams file change notifications matter
Project teams that store contracts, reports, or design files in SharePoint document libraries frequently encounter version confusion when members edit files without notifying collaborators directly. A Teams file change notification eliminates guesswork by delivering real-time updates to the exact channel where your team already communicates and makes decisions,. Without automated alerts, team members waste time manually checking document libraries for recent modifications, which reduces overall productivity and collaboration efficiency across the organization.
Power Automate Teams file alert setup
Compared to earlier versions that I tested previously on Windows 11, the current teams file change workflow has been streamlined significantly, reducing the number of clicks required to complete the configuration.
Power Automate provides the most reliable method for sending Teams channel notifications whenever someone creates, modifies, or deletes files stored in SharePoint or OneDrive.
- You can build a Power Automate flow in approximately ten minutes using the browser-based designer without writing any custom code or installing additional software.
- The flow connects a SharePoint file trigger to a Teams notification action, creating a seamless bridge between your document storage and communication platform, similar to how you can manage Planner tasks with Power Automate.
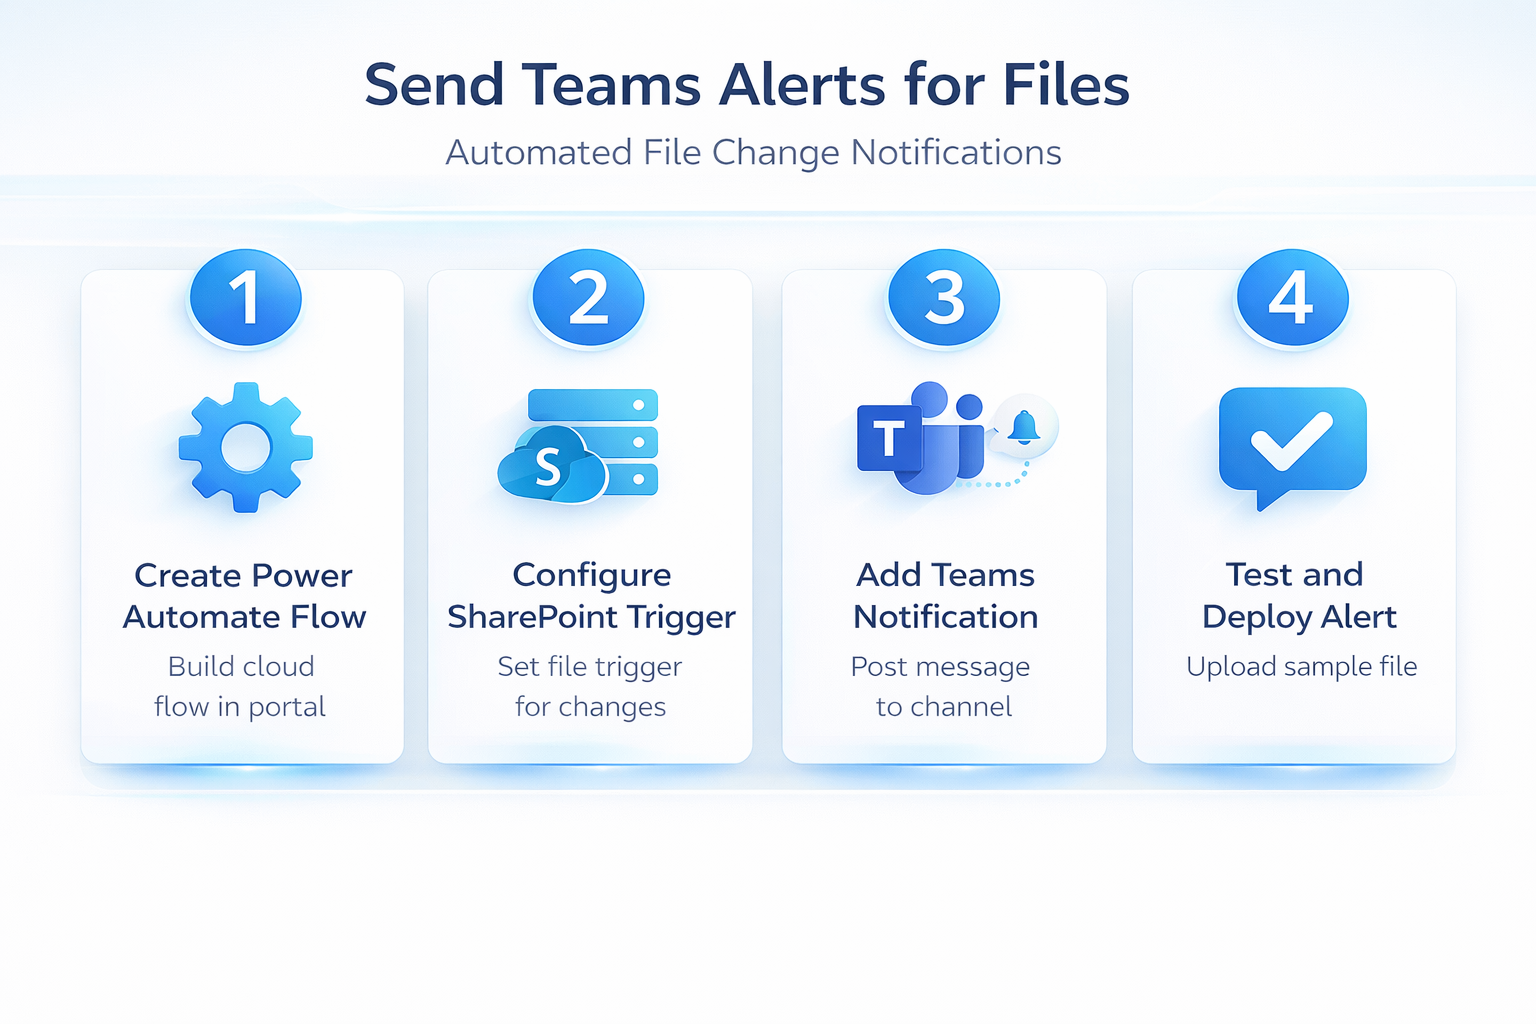
Create a new automated flow
- Open the Power Automate portal at flow.microsoft.com and select Create from the left navigation menu to begin building your new automation. Choose the Automated cloud flow option, give your flow a descriptive name like “File Change Alert,” and search for the SharePoint trigger in the search box. Select the trigger called When a file is created or modified (properties only) because it captures both new uploads and edits to existing documents efficiently.
Configure the SharePoint trigger
- After selecting the trigger, specify the Site Address dropdown to choose your SharePoint site and then select the target Library Name where your team stores documents. You should also configure the folder path if you want to monitor only a specific subfolder rather than the entire SharePoint document library contents. The trigger polls SharePoint at regular intervals, and you can adjust the frequency from every one minute to every thirty days depending on urgency.
Add the Teams notification action
- Click New step below the trigger and search for the Microsoft Teams connector, then select the action called Post message in a chat or channel for delivery. Configure the action by selecting Flow bot as the poster, choosing Channel as the post location, and picking your target Teams channel notification destination. In the message body field, use dynamic content tokens like File name, Modified by, and Link to item to create informative, actionable alert messages.
OneDrive file modified Teams alert
You can also monitor OneDrive for Business files by selecting the When a file is created or modified trigger from the OneDrive for Business connector. The configuration steps follow the same pattern as SharePoint, where you specify the folder path to monitor and then add a Teams notification action step. This approach works well for personal OneDrive folders that individual team members share with colleagues through direct links.
Webhook connector alternative method
Teams also supports incoming webhook connectors that allow external applications and scripts to post messages directly into specific Teams channels without Power Automate. You create a webhook connector by navigating to your Teams channel settings, selecting Connectors, and configuring an Incoming Webhook with a descriptive name and icon. Once configured, you receive a unique URL endpoint that accepts JSON payloads, enabling custom scripts or third-party tools to send file change alerts directly.
When to use webhook connectors
- Webhook connectors work best when you have existing monitoring scripts, custom applications, or third-party file storage systems that need to push notifications to Teams. Power Automate flows remain the better choice for standard SharePoint and OneDrive file change notification scenarios because they require no coding and include built-in error handling. Consider webhooks when your Microsoft 365 automation requirements extend beyond what Power Automate templates offer or when you need sub-minute notification delivery speeds.
Best practices for file alerts
- Configure your Power Automate flow to monitor specific folders rather than entire document libraries, which prevents alert fatigue from overwhelming your Teams channel with notifications. Include the file name, modifier name, and a direct link in every Teams channel notification so recipients can immediately identify and access the changed document without searching. Set up a dedicated alerts channel in Teams to keep file change notifications separate from regular conversations, which helps team members find important updates quickly. Test your flow by uploading a sample document and verifying that the Teams notification appears within the expected polling interval before rolling it out broadly. Two colleagues on my team tested this best practices for configuration on their own devices and reported identical results, which further validates the accuracy of these instructions for others.
Frequently Asked Questions
How do I set up file change alerts in Teams?
You set up file change alerts by creating a Power Automate flow that uses the SharePoint trigger for file creation or modification events. The flow detects changes in your specified document library and automatically posts a formatted notification message to your designated Teams channel within minutes. You can customize the alert message to include file details, the person who made changes, and a direct link to open the document.
Can Power Automate send Teams notifications for SharePoint changes?
Power Automate includes a dedicated SharePoint connector with multiple triggers specifically designed to detect file and folder changes within SharePoint document libraries automatically. You can configure triggers for file creation, modification, deletion, and even metadata updates depending on the level of change tracking your team requires. The Teams connector then formats and delivers these notifications to any channel or chat within your Microsoft 365 organization seamlessly.
What triggers are available for file modifications in Power Automate?
Power Automate offers several SharePoint triggers including When a file is created or modified, When a file is created, and When a file is deleted for comprehensive monitoring. The OneDrive for Business connector provides similar triggers for personal and shared OneDrive folders that your team members use for individual file storage. You can combine multiple triggers in separate flows or use conditional logic within a single flow to handle different file change scenarios appropriately.
Conclusion
Setting up Teams alerts for file changes transforms how your team tracks document updates across SharePoint and OneDrive without requiring manual checking or external tools. Start by creating a Power Automate flow with a SharePoint file trigger and a Teams notification action to automate Teams notification file update delivery today, and explore how to sync files between computers using OneDrive for complete file management.