
Network connectivity issues affecting your Windows 11 device
“My Windows 11 laptop suddenly stopped connecting to Wi-Fi networks, and I can’t figure out why it’s not detecting any available networks anymore.” This common scenario affects countless users who experience unexpected wireless connectivity issues after system updates, driver changes, or hardware conflicts on their Windows 11 devices.
Understanding Windows 11 wireless adapter malfunctions
Windows 11 wireless connectivity problems typically stem from outdated network drivers, corrupted system files, or misconfigured network settings that prevent your device from establishing stable connections. These issues can manifest as missing Wi-Fi networks, authentication failures, or complete adapter recognition problems that require systematic troubleshooting approaches.
We will go through comprehensive troubleshooting methods including network adapter diagnostics, driver reinstallation procedures, and system configuration adjustments to restore full wireless functionality. You will need administrative privileges on your Windows 11 device and basic familiarity with Windows Settings and Device Manager interfaces.
The resolution process involves using built-in Windows troubleshooting tools, manual driver management, and network reset procedures to identify and eliminate connectivity barriers affecting your wireless adapter performance.
Diagnosing network adapter issues in Windows 11
- Navigate to Windows Settings by pressing Windows key + I, then select Network & internet from the left sidebar to access comprehensive network configuration options.
- Click on Advanced network settings, followed by Network troubleshooter to launch Windows automatic diagnostic tools that identify common connectivity problems and apply standard fixes.
- Allow the troubleshooter to complete its analysis and implement suggested solutions, which may include resetting network adapters or clearing DNS cache entries automatically.
- Open Device Manager by right-clicking the Start button and selecting Device Manager from the context menu to examine your wireless adapter status and driver information.
- Expand the Network adapters section to locate your Wi-Fi adapter, which typically contains terms like “Wireless,” “Wi-Fi,” or your manufacturer’s name in the device description.
- Right-click your wireless adapter and select Properties to examine device status information, noting any error codes or warning indicators that suggest hardware or driver conflicts.
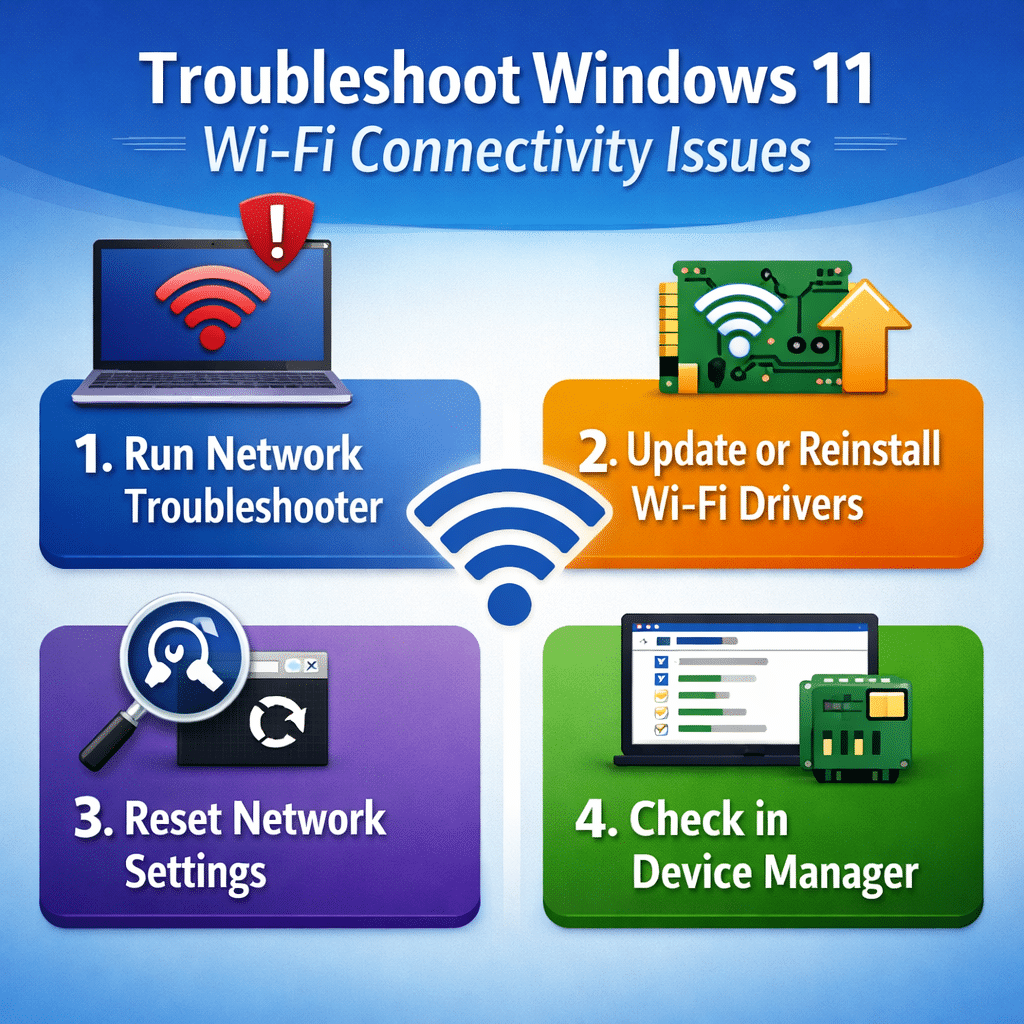
Updating and reinstalling wireless network drivers
- In Device Manager, right-click your wireless adapter and select Update driver to search for the latest compatible driver software through Windows Update services.
- Choose “Search automatically for drivers” to allow Windows to locate and install the most recent driver version available for your specific wireless hardware configuration.
- If automatic updates fail, visit your device manufacturer’s support website to download the latest Wi-Fi driver package specifically designed for your laptop or desktop model.
- Uninstall the current driver by right-clicking the wireless adapter in Device Manager and selecting “Uninstall device,” then check “Delete the driver software for this device” before confirming.
- Restart your computer to allow Windows to automatically reinstall generic drivers, or manually install the downloaded manufacturer driver package using administrator privileges.
Expert Tip: Always create a system restore point before making significant driver changes to ensure you can revert modifications if new drivers cause additional compatibility issues.
Resetting network configurations and wireless profiles
- Open Command Prompt as administrator by typing “cmd” in the Start menu, right-clicking Command Prompt, and selecting “Run as administrator” from the available options.
- Execute the command
netsh winsock resetto restore Windows socket configuration to default settings, which resolves corrupted network stack issues affecting connectivity protocols. - Run
netsh int ip resetto reset TCP/IP stack settings, followed byipconfig /releaseandipconfig /renewto refresh your network adapter’s IP address assignment. - Use
netsh wlan delete profile name="ProfileName"to remove specific Wi-Fi network profiles that may contain corrupted authentication credentials or outdated security configurations. - Navigate to Settings > Network & internet > Wi-Fi > Manage known networks to manually remove problematic wireless network profiles and clear stored connection preferences.
- Restart your computer after completing network reset procedures to ensure all configuration changes take effect and wireless adapter functionality is properly restored.
Resolving common Windows 11 wireless connectivity obstacles
- Wi-Fi adapter not detected in Device Manager: This usually indicates hardware failure or disabled adapter settings that require BIOS configuration changes or physical hardware inspection by qualified technicians.
- Limited connectivity or authentication failures: Clear stored network profiles using
netsh wlan delete profile name="NetworkName"command, then reconnect using current network passwords and security protocols. - Intermittent connection drops or slow speeds: Update wireless adapter drivers through manufacturer websites, adjust power management settings to prevent adapter sleep mode, and verify router compatibility with Windows 11 requirements.
- Network appears available but won’t connect: Reset network adapter by disabling and re-enabling it in Device Manager, check for conflicting VPN software, and verify network security settings match router configuration exactly.