
Are you struggling with your camera not being detected in Microsoft Teams? This frustrating issue often occurs during important meetings, leaving you unable to share video with colleagues. Whether you’re using Windows 10, Windows 11, or another operating system, camera detection problems can significantly impact your ability to collaborate effectively and maintain a professional presence during virtual meetings.
Understanding camera detection issues in Teams
When your camera isn’t detected in Microsoft Teams, it creates immediate communication barriers. Similar to when screen sharing stops working in Teams, camera issues can significantly impact your ability to collaborate effectively during meetings. These problems affects both individual contributors and meeting organizers who need to maintain visual connection with their teams. Microsoft Teams relies on proper camera configuration and permissions to function correctly across different Windows versions.
How to resolve Teams camera detection problems?
This tutorial will walk you through a comprehensive troubleshooting process to get your camera working properly in Microsoft Teams. We’ll cover solutions that work for both Windows 10 and Windows 11 users. The steps include checking camera permissions, verifying hardware connections, updating drivers, and adjusting Teams-specific settings. These solutions apply to both the desktop application and web versions of Teams.
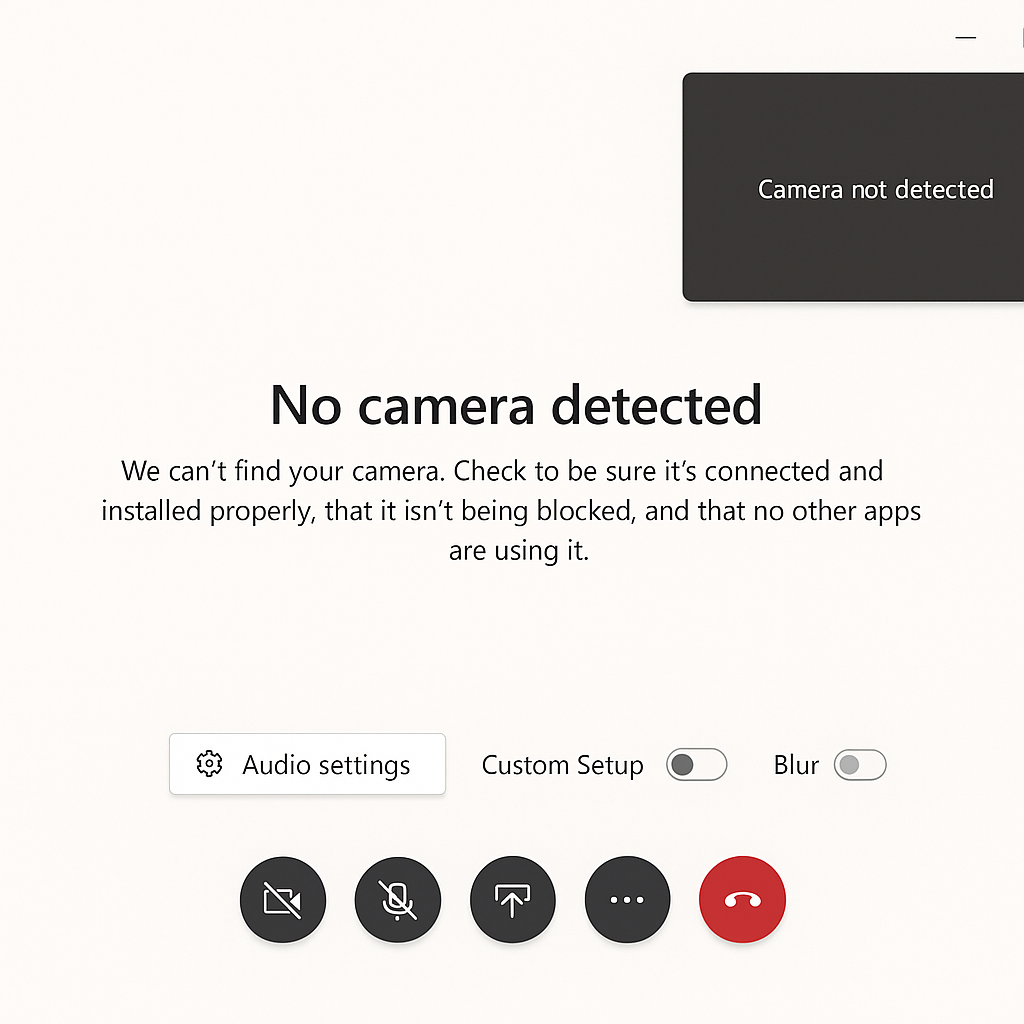
Troubleshooting for Teams meetings
Check camera permissions in Windows settings
- Navigate to Windows Settings by clicking the Start menu and selecting the gear icon or by pressing Windows key + I on your keyboard.
- In Windows 10, select “Privacy” and then “Camera” from the left sidebar to access camera permission settings for your applications.
- For Windows 11 users, go to “Privacy & Security” and then select “Camera” to view and manage app permissions for your device’s camera.
- Ensure that “Allow apps to access your camera” is turned on, and specifically verify that Microsoft Teams has permission to use the camera.
- If permissions were previously denied, toggle the switch to grant Teams access to your camera and restart the application to apply changes.
Verify camera hardware and connections
- Examine your external webcam connections to ensure cables are properly seated in the correct USB ports on your Windows device.
- For laptops with built-in cameras, check if there’s a physical privacy shutter that might be closed or a function key that enables/disables the camera.
- Try connecting your camera to a different USB port if you’re using an external webcam, as some ports may have power or driver compatibility issues.
- Test your camera in another application like Camera app in Windows 10/11 to determine if the problem is specific to Teams or affects the entire system.
- For USB cameras, try unplugging the device, waiting 10 seconds, and then reconnecting it to trigger Windows to recognize the hardware again.
Update camera drivers in Windows Device Manager
- Right-click on the Start button and select “Device Manager” from the context menu that appears on your Windows 10 or 11 system.
- Expand the “Cameras” or “Imaging devices” category to locate your webcam in the device list.
- Right-click on your camera device and select “Update driver” to search automatically for updated driver software for your specific camera model.
- Alternatively, select “Uninstall device,” restart your computer, and let Windows reinstall the camera drivers automatically during the boot process.
- For manufacturer-specific cameras, visit the manufacturer’s website to download the latest compatible drivers for your Windows version.
Configure Microsoft Teams camera settings
- Open Microsoft Teams and click on your profile picture in the top-right corner, then select “Settings” from the dropdown menu.
- Navigate to the “Devices” section where you can manage your audio and video hardware configurations.
- Under the “Camera” dropdown menu, ensure the correct camera is selected if you have multiple cameras connected to your Windows device.
- Test your camera by checking the preview window, which should display your camera feed if the device is properly detected by Teams.
- If using Teams web version, ensure you’ve granted browser permissions when prompted to allow camera access during meeting setup.
Other common Teams camera detection problems
- Camera shows as unavailable in Teams despite working in other applications: This often indicates a Teams-specific configuration issue. Sign out of Teams completely, clear the Teams cache by navigating to %appdata%\Microsoft\Teams and deleting the contents, then restart Teams and test again.
- Camera works intermittently during Teams meetings on Windows 10/11: This typically suggests resource conflicts or background processes interfering with camera access. Close other applications that might be using the camera, check for resource-intensive programs running in the background, and ensure your system has the latest Windows updates installed.
- Camera detected but shows black screen in Teams meetings: This problem frequently occurs due to outdated graphics drivers or conflicts with security software. Update your graphics drivers through Device Manager, temporarily disable antivirus software to test if it’s causing interference, and check if Windows Defender Firewall is blocking Teams’ camera access.
- If you’re experiencing persistent camera problems, you may want to connect an external webcam to Microsoft Teams as an alternative solution. This can help determine if the issue is with your built-in camera or the Teams application itself.