“I need to document a software issue for our IT team, but I’m not sure how to take screenshots on my new Windows 11 laptop. What’s the fastest way to capture my screen? Are there different options for capturing the whole screen versus just a portion of it? I’ve tried pressing Print Screen, but nothing seems to happen.”
Mastering screenshot shortcuts for Windows 11 users
Taking screenshots is an essential skill for troubleshooting, documentation, and communication in today’s digital workplace. Windows 11 offers several built-in methods to capture your screen without installing additional software. Understanding these options helps you communicate more effectively with colleagues and support teams. The right screenshot method can save time and reduce frustration when explaining technical issues or sharing information.
Aside: Taking screenshots is essential for documentation and troubleshooting, similar to how you might need to fix display issues in PowerPoint presentations. Windows 11’s built-in tools make this process straightforward and efficient.
Windows 11 screenshot capabilities and options
Windows 11 provides multiple ways to capture screenshots, from basic keyboard shortcuts to more advanced tools. This tutorial covers the primary screenshot methods available in Windows 11, including full-screen captures, active window captures, and the Snipping Tool for more precise selections. You’ll need a Windows 11 device with a keyboard, and no additional software is required to use these built-in screenshot features.
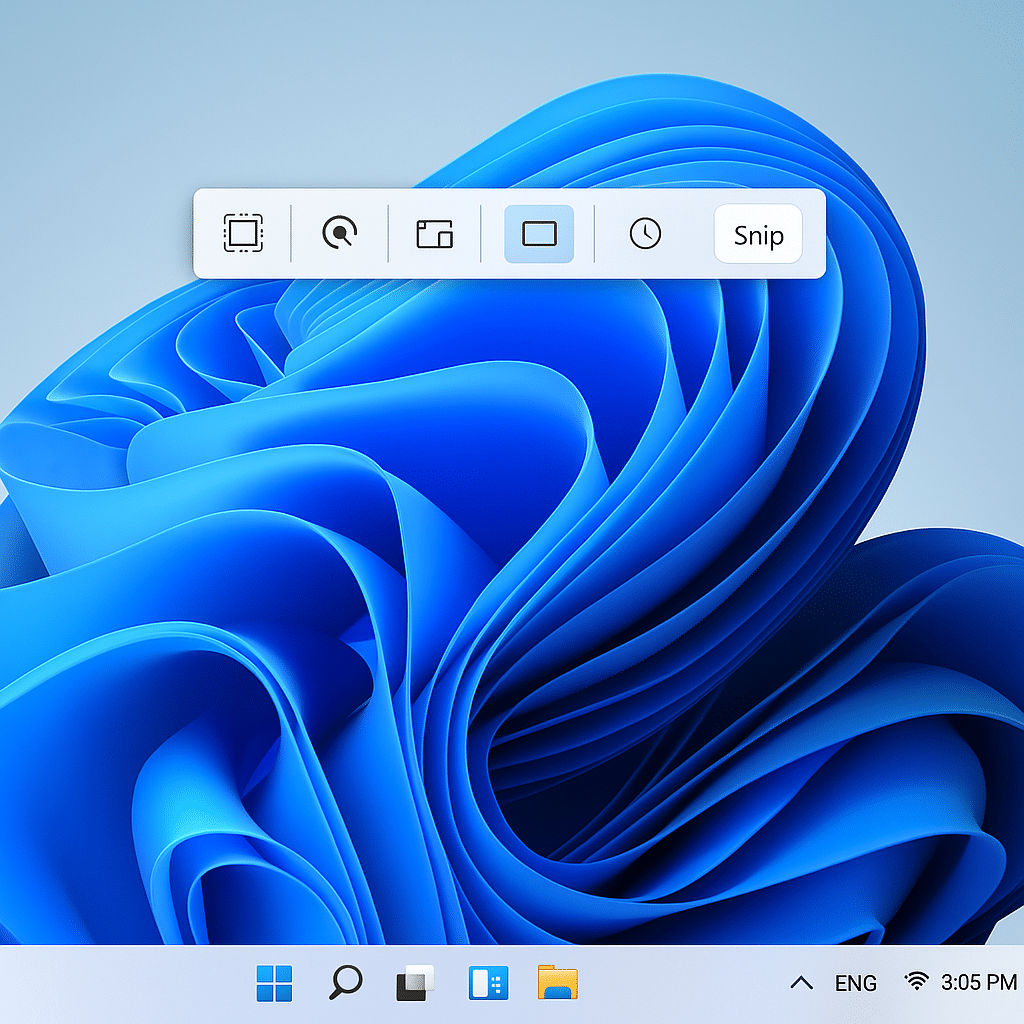
Essential screenshot keyboard shortcuts
- PrtScn (Print Screen): Press this key to capture your entire screen, which copies the image to your clipboard but doesn’t save it automatically to a file unless configured otherwise.
- Alt + PrtScn: This combination captures only the currently active window, copying it to your clipboard for pasting into documents or image editors without capturing your entire desktop.
- Windows key + PrtScn: Use this shortcut to capture your entire screen and automatically save it as a PNG file in the Pictures > Screenshots folder, eliminating the need to paste and save manually.
- Windows key + Shift + S: This activates the Snipping Tool in selection mode, allowing you to drag and select a specific portion of your screen, after which the screenshot is copied to your clipboard.
- Windows key + Alt + PrtScn: For gamers with Xbox Game Bar enabled, this shortcut captures the entire screen and saves it to the Videos > Captures folder without interrupting your gameplay.
- Open the Snipping Tool by searching for it in the Start menu or using the keyboard shortcut Windows key + Shift + S to access more screenshot options including delayed captures and annotation tools.
- Configure automatic screenshot saving by opening Settings > Accessibility > Keyboard and turning on “Use the Print screen button to open screen snipping” to make the PrtScn key launch the Snipping Tool instead of its default behavior.
Know whether the shortcut saves a file or copies an image
Windows screenshot shortcuts do not all produce the same result. Windows+Shift+S opens the capture overlay and normally places the selection on the clipboard so you can open or save it through Snipping Tool. Print Screen behavior can depend on the keyboard and accessibility setting. Windows+Print Screen is the shortcut most associated with saving a full-screen image automatically.
After using Windows+Shift+S, select the Snipping Tool notification and save the capture to a deliberate folder. If the notification disappears, open Snipping Tool and check the current capture before taking another screenshot. Clipboard contents can be replaced by the next copy action.
Locate an automatically saved capture
Open File Explorer and check Pictures and its Screenshots folder. If Pictures is redirected to OneDrive, inspect the OneDrive Pictures location and the OneDrive backup settings. Sort by Date modified to find the newest image.
Laptop keyboards may require the Fn key with Print Screen. On multi-monitor systems, a full-screen capture can include every display, which makes the resulting image wider than expected. Use the rectangular snip when only one application area is needed.
Review before sharing
Screenshots can expose notifications, browser tabs, customer names, email addresses, and background windows. Crop or redact a working copy and verify that hidden metadata or adjacent monitors are not included. Store sensitive captures only in an approved location.
If no screenshot appears, test Snipping Tool directly from Start, then test Windows+Shift+S. Confirm that another application is not remapping the shortcut and that the keyboard’s Print Screen key works. Check clipboard history only if it is permitted for the device.
For repeatable documentation, create a dedicated project folder and rename captures immediately. Confirm that OneDrive sync completed before deleting the local copy. When an organization manages screenshot tools or clipboard history, a disabled control may be intentional; provide the shortcut used, keyboard model, Windows version, and expected save location to IT instead of changing policy settings.
What to do if screenshots are not taken?
- Screenshots not saving properly might occur if your Pictures folder location has changed or has permission issues; verify your screenshot folder location in File Explorer and ensure you have write permissions to that location.
- Keyboard shortcuts not working could be due to function key settings on some laptops; try pressing the Fn key together with PrtScn or check your keyboard settings to see if you need to enable function keys in your BIOS or keyboard settings.
- Black or blank screenshots when capturing media content happen due to DRM protection on streaming services or protected content; this is normal behavior and not a bug, as Windows respects content protection and prevents capturing of protected media.
- Screenshots appearing cropped or incorrect on multi-monitor setups can be resolved by using the Snipping Tool (Windows key + Shift + S) for more precise control over what gets captured across multiple displays.
- Game screenshots not working might require enabling the Xbox Game Bar first; press Windows key + G to open Game Bar, then check its settings to ensure screenshot functionality is properly configured for your games.
- Tip: For better organization of your screenshots, consider mapping your OneDrive to Windows to automatically sync and backup your captured images to the cloud.
Note: For frequent screenshot takers, consider using OneDrive’s automatic screenshot upload feature. When enabled, your screenshots are automatically saved to OneDrive and a link is copied to your clipboard for easy sharing.