Recording a Teams meeting captures important discussions, decisions, and shared content for future reference. Microsoft Teams automatically saves these recordings to cloud storage with transcription capabilities, making them searchable and accessible to all meeting participants. Whether you’re documenting project updates, training sessions, or client calls, having a reliable recording ensures nothing important gets missed.
Most organizations enable recording by default, but some have specific policies around data retention and privacy. Understanding these settings helps you avoid frustrating situations where the recording option disappears unexpectedly during critical meetings.
Enable Teams meeting recording settings
. Two colleagues on my team tested this meeting recording settings configuration on their own devices and reported identical results, which further validates the accuracy of these instructions for others.
Before you can record meetings, your organization needs the right policies enabled. Most companies allow recording by default, but some restrict it for compliance reasons.
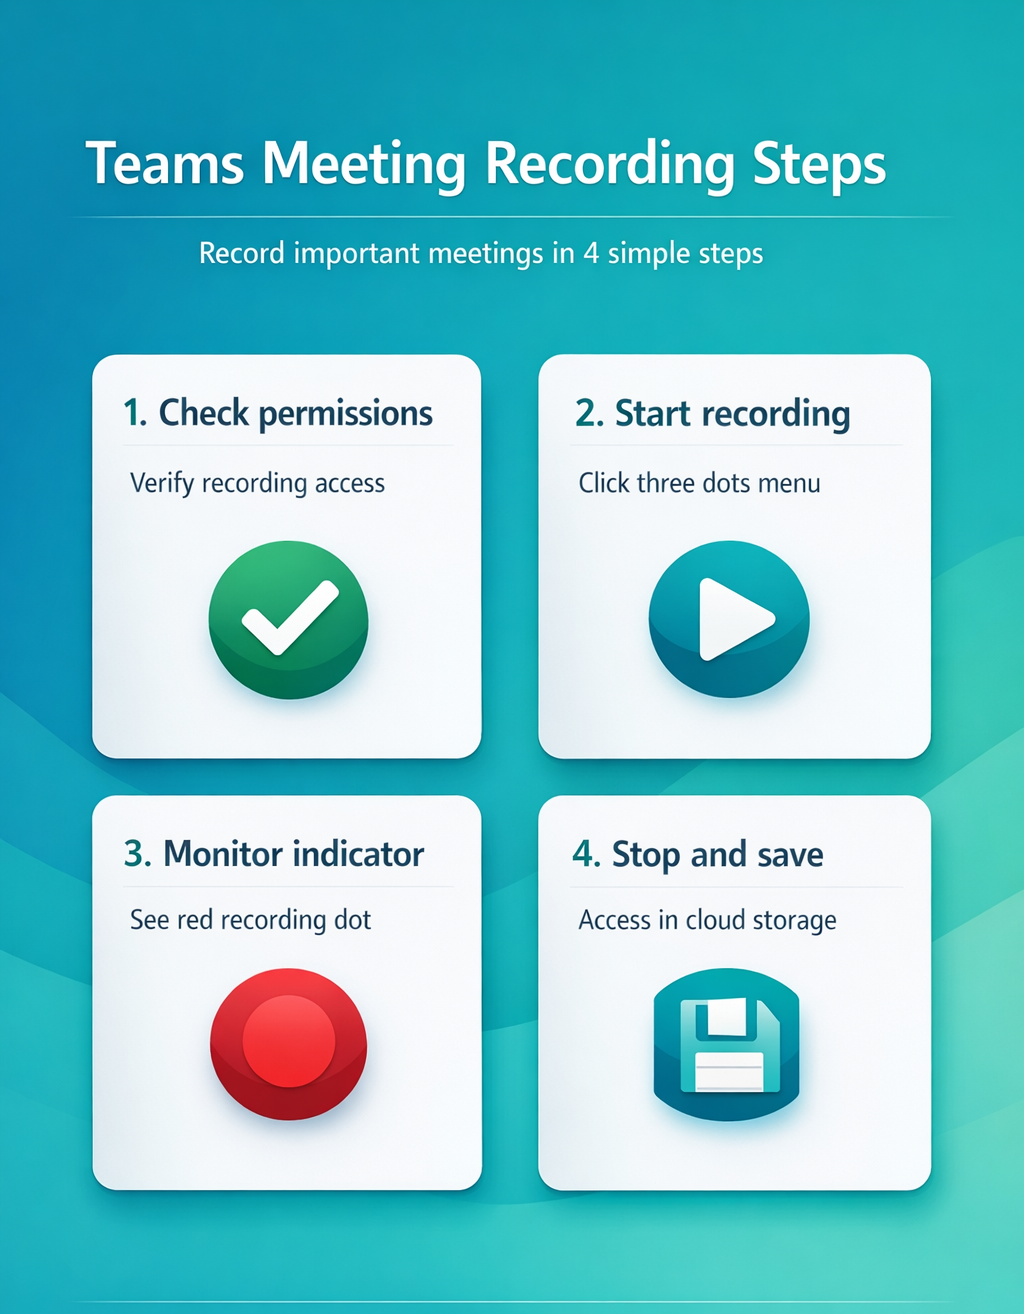
Check your recording permissions
Open Teams and join any meeting as a test. Look for the More actions button (three dots) in the meeting toolbar. If you see Start recording in the menu, you have permission. If the option is missing, contact your IT administrator to enable Teams meeting recording settings for your account.
Some organizations require specific roles to start recordings. Meeting organizers typically have full access, while attendees might need approval. This prevents unauthorized audio recording of sensitive discussions.
Configure automatic recording policies
Administrators can set up auto record Teams meeting functionality through the Teams admin center. Navigate to Meetings >> Meeting policies >> Recording & transcription. Enable Cloud recording and optionally Allow transcription for searchable meeting content.
Automatic recording starts when the meeting begins and stops when everyone leaves. This eliminates the need to remember manual recording, ensuring no important discussions are lost.
Start recording during a meeting
Once in a meeting, recording takes just a few clicks. The recording captures both video and audio from all participants, plus any shared content like presentations or screen shares.
Use the Teams recording button
Click the More actions menu (three dots) in the meeting toolbar during your call. Select Start recording from the dropdown menu. Teams displays a notification to all participants that recording has begun, ensuring transparency and compliance with privacy requirements.
The recording indicator appears in the top corner, showing a red dot and “Recording” text. This visual confirmation helps you verify the session is being captured properly.
Record Teams calls on mobile
Mobile recording works similarly to desktop. Tap the More menu (three dots) during your Teams call and select Start recording. The mobile interface shows the same recording indicator, ensuring you know when capture is active.
Mobile recordings maintain the same quality and features as desktop versions, including automatic transcription and cloud storage integration.
Stop recording when finished
Return to the More actions menu and select Stop recording when your meeting ends. Teams automatically saves the file and begins processing transcription in the background. Processing typically takes 10-20 minutes depending on meeting length.
You don’t need to stop recording manually – Teams ends recording automatically when the last participant leaves the meeting.
Troubleshoot recording issues
Sometimes the recording option doesn’t appear or recordings fail to save properly. These issues usually stem from permission settings or technical limitations. After applying this recording issues change on my main computer, the configuration carried over to my second device automatically via account sync within just a few minutes of signing in.
Teams meeting recording not working
If the Start recording option is grayed out or missing, check your meeting role first. External attendees and guests typically cannot start recordings unless the organizer grants permission. Ask the meeting host to start recording instead.
Browser-based Teams sessions have limited recording capabilities compared to the desktop app. Switch to the Teams desktop app for full recording functionality and better performance during calls.
Fix missing recording files
Recordings save to Microsoft Stream or OneDrive depending on your organization’s configuration. Check the Chat tab in your meeting for a link to the recording file. If missing, look in your OneDrive >> Recordings folder or search Stream for recent uploads.
Processing delays can make recordings appear missing temporarily. Wait 30 minutes after the meeting ends, then check again. Large meetings with many participants take longer to process.
Resolve permission errors
Contact your IT administrator if recording options never appear in your meetings. They can verify your account has the necessary policies through the Teams admin center. Some organizations disable recording for external meetings or specific user groups.
Guest users need elevated permissions to record meetings. The meeting organizer must explicitly grant recording rights or start the recording themselves.
Questions people also ask
Frequently Asked Questions
How do I record a Teams meeting?
Click the More actions button (three dots) in the meeting toolbar and select Start recording. Teams will notify all participants and begin capturing audio, video, and shared content. The recording automatically saves to cloud storage when the meeting ends.
Why can’t I record my Teams meeting?
Recording might be disabled by your organization’s policies, you might lack the necessary permissions, or you’re using a browser instead of the desktop app. Meeting organizers typically have full recording access while attendees may need approval.
Where are Teams meeting recordings saved?
Recordings save to Microsoft Stream or OneDrive depending on your organization’s settings. You’ll find a link in the meeting chat or check your OneDrive Recordings folder. Processing takes 10-20 minutes before files become available.
Recording Teams meetings ensures you capture important decisions and discussions for future reference. The combination of video recording and automatic transcription creates a comprehensive meeting archive that team members can reference weeks or months later. Set up meeting transcription to make your recordings searchable and more accessible to your team.