Microsoft Teams has become a core collaboration tool for millions of users, but the Teams file upload error remains one of the most frustrating problems people encounter daily. When you try to share a large document, presentation, or video recording through Teams, the upload can fail silently or display a vague error message on your screen.
This article walks you through every proven method to fix Teams cannot upload large files, covering size limits, cache fixes, and configuration changes that resolve the issue. Whether your uploads are stuck, failing, or timing out, these solutions address the most common causes behind Microsoft Teams file sharing issues across desktop and web clients.
Understanding the Teams upload size limit
Before troubleshooting, you need to understand the specific file size restrictions that Microsoft enforces across its cloud file sharing platform for Teams and SharePoint. The current maximum upload size for a single file in Teams is 250 GB, which matches the SharePoint storage limit applied to files uploaded through any channel. However, your organization’s IT administrators may have configured a lower Teams file size restriction, which can prevent uploads well below that default maximum threshold.
Checking your organization’s upload policy
You can verify your current file size limits by contacting your Microsoft 365 administrator or checking the SharePoint admin center settings for your specific tenant. The admin center displays the maximum upload size, storage quotas, and any custom restrictions that your organization has applied to Teams channels and shared document libraries. If your files exceed the configured Teams upload size limit, you will need to either compress them or request a policy change from your administrator.
Clear the Teams cache to fix upload errors
A corrupted local cache is one of the most common reasons why Teams upload failed messages appear, even when your file size falls within acceptable limits. Clearing the cache forces Teams to rebuild its temporary data, which often resolves persistent file upload errors that other troubleshooting steps cannot address effectively.
Follow these steps to clear your Teams cache on Windows:
- Close Microsoft Teams completely by right-clicking the Teams icon in your system tray and selecting the quit option to ensure the application fully stops.
- Open File Explorer and navigate to the
%appdata%\Microsoft\Teamsfolder, then delete all files and subfolders contained within that cache directory location entirely. - Restart Teams by launching the application again from your Start menu or desktop shortcut, then sign in and attempt your file upload once more.
If you need additional help with files in Teams, review this overview of managing files in Microsoft Teams for detailed instructions on storage and sharing.
Check your network connection and OneDrive sync status
Network instability and OneDrive sync conflicts can both cause Teams file upload not working errors, particularly when you attempt to share files that are stored locally. A slow or intermittent internet connection may cause the upload to time out before the file transfer completes, especially with larger files that require sustained bandwidth.
Resolve OneDrive sync conflicts
The OneDrive sync client must be running and fully synchronized before you upload files through Teams, because Teams uses SharePoint and OneDrive as its backend. If you notice sync errors in your OneDrive system tray icon, right-click it and select the option to view sync problems and resolve any pending conflicts. You can also learn how to sync your Teams files with File Explorer to manage your cloud file sharing workflow more efficiently.
Test your network bandwidth
Try uploading a smaller test file first to confirm that your network connection supports file transfers to Microsoft 365 collaboration services without interruption or timeout errors. If the smaller file uploads successfully but larger files still fail, your network may have bandwidth throttling or firewall rules that block sustained large transfers.
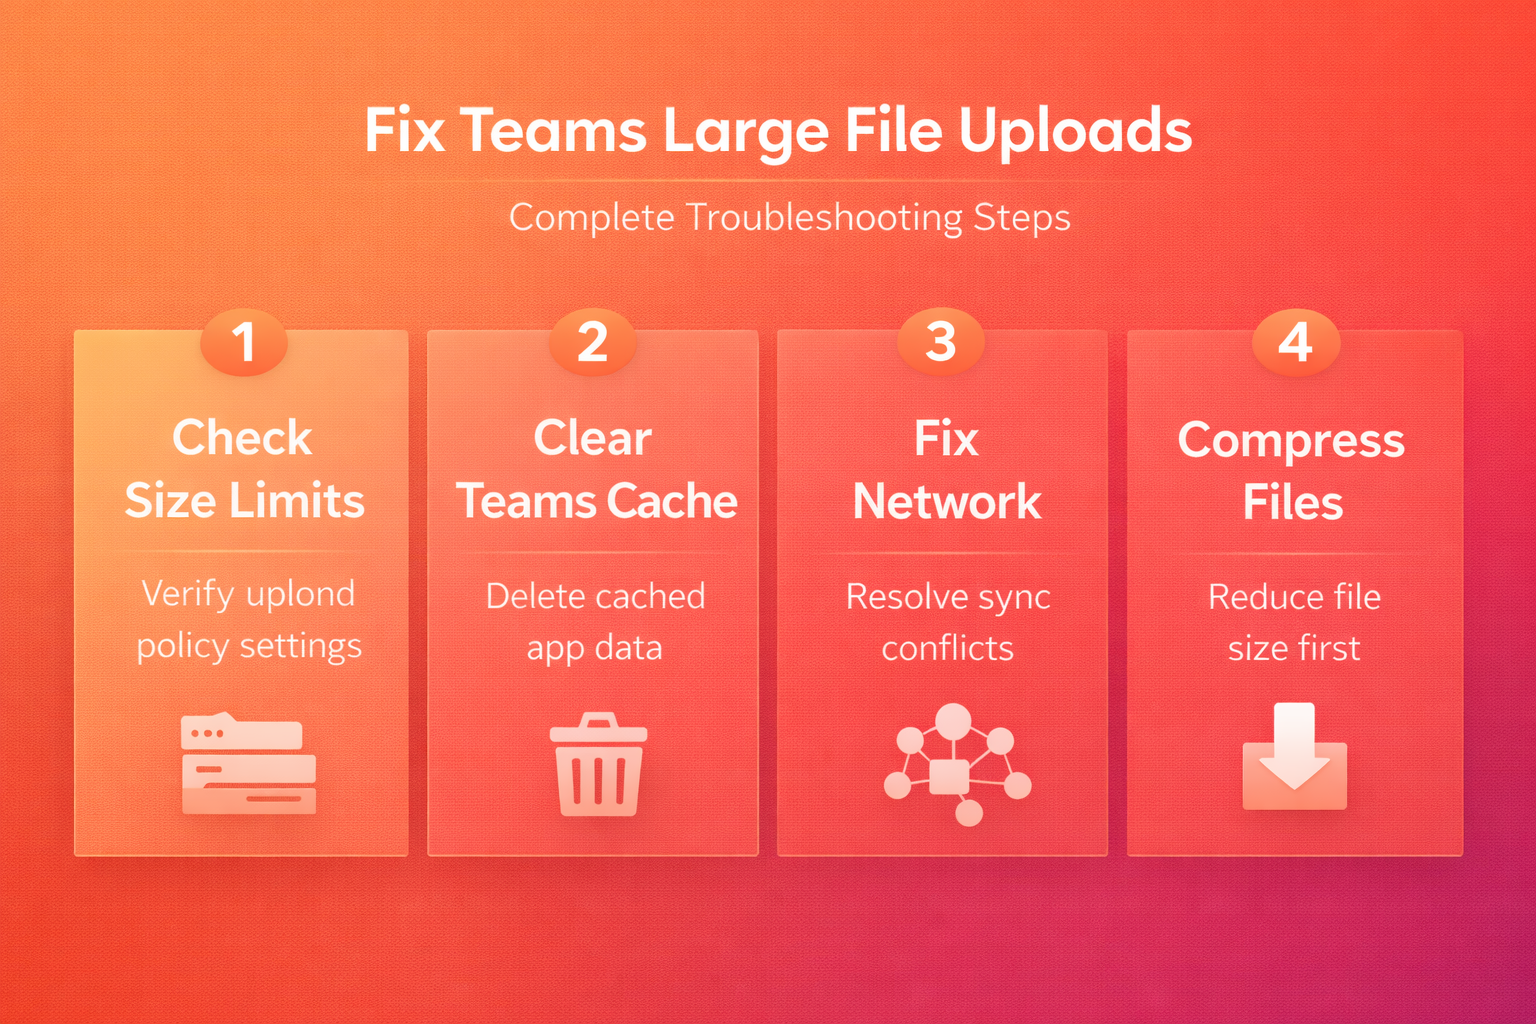
Compress large files before uploading to Teams
File compression reduces the overall size of your upload and can help you stay within any Teams file size restriction that your organization or SharePoint storage quota enforces. Using a built-in compression tool or a third-party application, you can significantly reduce file sizes before sharing them through your Teams channels and group chats.
- ZIP compression in Windows allows you to right-click any file or folder, select the send-to compressed folder option, and create a smaller archive for uploading. This built-in feature requires no additional software and works well for documents, spreadsheets, and presentation files that contain compressible text and image data within them.
- Split large archives into multiple smaller parts using tools like 7-Zip, which lets you specify a maximum size per segment for easier uploading through Teams. This approach works especially well for video recordings and large datasets that exceed your configured upload limit even after standard file compression has been applied.
Fix Teams file access and permission problems
Sometimes the Teams upload failed error occurs not because of file size but because of permission conflicts or restricted access settings on the destination channel. You should verify that your Teams account has contributor or owner permissions on the SharePoint site that backs the specific channel where you are trying to upload files.
If you encounter recurring permission errors, this article on fixing Teams file access problems provides step-by-step solutions for resolving common access restrictions quickly. You may also want to review solutions for fixing upload files in Microsoft Teams not working if the issue persists after checking permissions.
Verify SharePoint site storage capacity
Each Teams channel stores its files in a corresponding SharePoint document library, and that library has a storage quota that limits total capacity for all users. When the SharePoint storage quota is full, no team member can upload new files regardless of individual file size, and the Teams client may display a generic error message. Contact your Microsoft 365 administrator to check current storage usage and request additional SharePoint storage capacity if your team has reached its allocated limit.
Link Teams folders to OneDrive for easier file management
Connecting your Teams folders directly to OneDrive provides an alternative upload method that bypasses some of the common issues encountered with the standard Teams upload interface. You can follow this article on connecting Teams folders to OneDrive to set up this integration and improve your Microsoft 365 collaboration workflow.
This approach lets you drag and drop files into synced OneDrive folders on your local computer, which then automatically appear in your Teams channels without manual uploading. The OneDrive sync client handles large file transfers more reliably than the Teams web interface because it supports automatic retry, differential sync, and background uploading features.