Have you joined a Teams meeting only to find your camera icon greyed out, preventing you from turning on your video? This frustrating situation often occurs when Teams cannot access your camera due to permission conflicts, driver issues, or system settings blocking the connection between your device and the application.
Why the Teams camera shows grey screen or won’t connect?
When Microsoft Teams displays a greyed-out camera icon or shows a grey screen instead of your video feed, the application cannot establish a connection with your camera hardware. This issue commonly affects Windows 11 users due to the operating system’s enhanced privacy controls and permission requirements that restrict application access to camera devices by default.
The workflow we will address involves diagnosing permission conflicts, verifying hardware connections, updating device drivers, and configuring both Windows 11 and Teams settings to restore camera functionality. This tutorial covers troubleshooting steps for built-in laptop cameras, external USB webcams, and scenarios where Teams displays “no camera is connected” messages despite functional hardware.
Note: In many instances the issue stems from two main reasons:
- Your camera is covered with a camera cover/protector(specifically if you are using a laptop).
- There is an issue with Teams, so restart Teams would probably solve it.
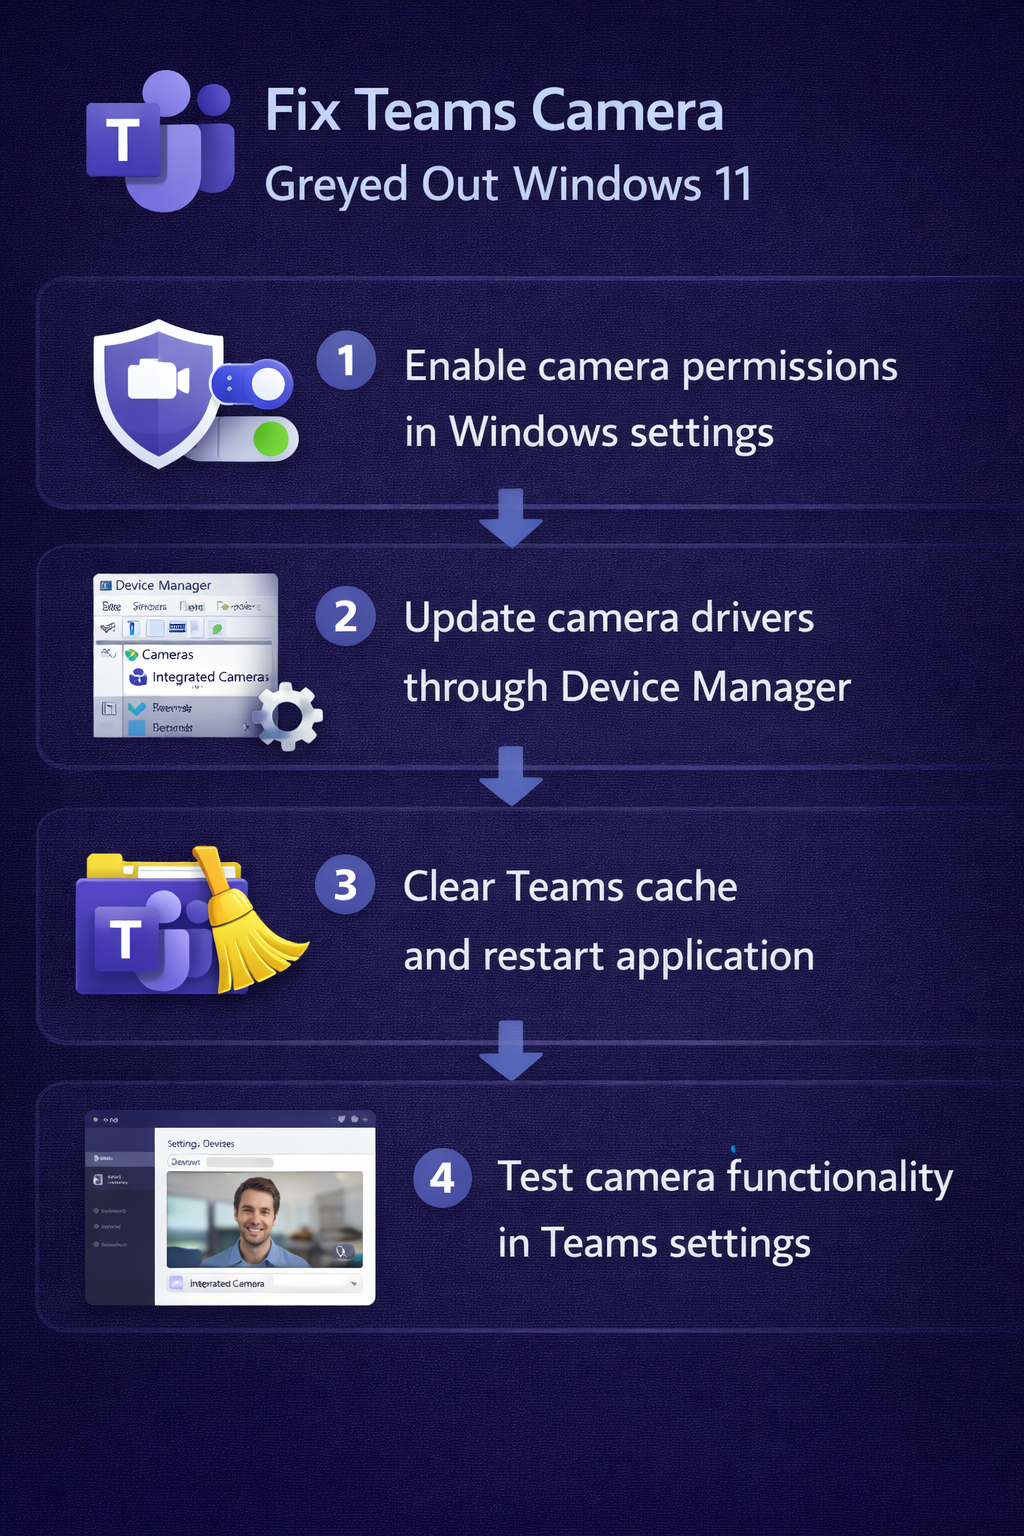
Verify Windows 11 camera permissions and privacy settings
Windows 11 implements strict privacy controls that can prevent Teams from accessing your camera even when the hardware functions correctly in other applications. Begin by confirming that system-level permissions allow desktop applications to use camera devices, then verify that Teams specifically has camera access enabled in your privacy configuration.
- Open Windows Settings by pressing Windows key plus I, then navigate to Privacy and Security in the left sidebar menu to access camera permission controls.
- Select Camera from the privacy options list, then ensure the toggle for “Camera access” is turned On to allow applications on your device to use camera hardware.
- Scroll down to “Let apps access your camera” and verify this toggle is also enabled, which permits individual applications to request camera permissions from the operating system.
- Locate Microsoft Teams in the application list under “Let desktop apps access your camera” and confirm the toggle next to Teams is set to On position.
- If using Teams web app in Microsoft Edge or Chrome, check the “Let apps access your camera” section and ensure your browser has camera permissions enabled as well.
- Restart Microsoft Teams completely by right-clicking the Teams icon in the system tray, selecting Quit, then relaunching the application to apply permission changes.
Check camera functionality in Windows Camera app
Before proceeding with Teams-specific troubleshooting, confirm that your camera hardware functions correctly at the operating system level by testing it in the native Windows Camera application. This step isolates whether the issue stems from Teams configuration or broader system problems affecting all applications.
- Press the Windows key and type “Camera” to locate and open the Windows Camera app from the search results that appear in the Start menu.
- Allow the Camera app to access your camera device when prompted, then observe whether your video feed displays correctly in the application window without grey screens.
- If the Camera app shows your video feed successfully, the hardware and Windows drivers function properly, indicating a Teams-specific configuration issue requires resolution.
- If the Camera app displays error messages or grey screens, proceed to update camera drivers through Device Manager as described in the following section.
Update camera drivers to resolve Teams camera not recognized
Outdated or corrupted camera drivers frequently cause Teams to display greyed-out camera options or fail to recognize connected camera devices entirely. Windows 11 occasionally installs generic drivers that lack full compatibility with specific camera models, requiring manual driver updates to restore functionality.
- Right-click the Start button and select Device Manager from the power user menu to access hardware configuration tools and driver management options.
- Expand the “Cameras” or “Imaging devices” section to display all camera hardware detected by Windows, including built-in webcams and external USB camera devices.
- Right-click your camera device name and select “Update driver” from the context menu to launch the driver update wizard for that specific hardware component.
- Choose “Search automatically for drivers” to allow Windows to query Microsoft servers for the latest compatible driver software for your camera model and install updates.
- If automatic search finds no updates, select “Browse my computer for drivers” then “Let me pick from a list of available drivers” to choose alternative driver versions.
- After driver installation completes, restart your computer to ensure the new driver loads properly and Windows establishes fresh connections with the camera hardware.
- Open Device Manager again after restart and verify no yellow warning icons appear next to your camera device, which would indicate persistent driver problems.
Configure Teams camera settings and device selection
Microsoft Teams maintains independent camera settings that may conflict with Windows configurations or select incorrect camera devices when multiple webcams are connected to your system. Accessing Teams device settings allows you to manually specify which camera the application should use and verify that Teams recognizes available hardware.
- Launch Microsoft Teams and click your profile picture in the top-right corner, then select Settings from the dropdown menu to access application configuration options.
- Navigate to Devices in the left sidebar menu to display audio and video device configuration panels where Teams lists all detected camera hardware.
- Locate the Camera dropdown menu and verify that your preferred camera device appears in the list of available options rather than showing “No camera detected” messages.
- Select your camera from the dropdown menu if multiple devices are listed, then observe the preview window below to confirm video feed displays without grey screens.
- Click “Make a test call” under the Audio devices section to launch Teams test call feature, which allows you to verify camera functionality in a simulated meeting environment.
- During the test call, click the camera icon to toggle video on and off, confirming the icon responds and is not greyed out during the test session.
If Teams won’t recognize camera on Windows 11
Several specific scenarios cause Teams camera recognition failures that require targeted solutions beyond standard permission and driver troubleshooting. Understanding these edge cases helps resolve persistent issues that don’t respond to conventional fixes.
- Camera works in other apps but Teams shows no camera connected: This indicates Teams-specific permission issues where the application lacks access despite system-wide permissions being enabled. Navigate to Windows Settings, then Privacy and Security, select Camera, scroll to “Let desktop apps access your camera” and verify Microsoft Teams appears in the list with permissions granted. If Teams is missing from this list, reinstall the application using the official installer from Microsoft’s website to re-register camera permissions properly.
- External USB camera not detected after Windows 11 update: Windows updates occasionally reset USB device permissions or install incompatible drivers for external webcams. Open Device Manager, expand Universal Serial Bus controllers, right-click each USB Root Hub entry, select Properties, navigate to Power Management tab, and uncheck “Allow the computer to turn off this device to save power” for all USB hubs. Disconnect your external camera, restart Windows, then reconnect the camera to force driver reinstallation with proper power management settings.
- Teams camera greyed out only in specific meetings or channels: Meeting organizers can disable participant cameras through meeting options or organizational policies may restrict camera usage in certain contexts. Before the meeting starts, click the meeting link, select Meeting options, and verify that “Who can present” and “Who can bypass the lobby” settings don’t inadvertently restrict your camera access. Contact your IT administrator if organizational policies consistently prevent camera usage across multiple meetings.
- Grey screen appears briefly then camera disconnects: This behavior suggests hardware conflicts or insufficient USB power delivery to external cameras. Connect external webcams directly to your computer’s USB ports rather than through USB hubs or docking stations which may not provide adequate power. For built-in laptop cameras, update your computer manufacturer’s chipset drivers and camera firmware from their support website, as generic Windows drivers may not fully support integrated camera hardware on newer laptop models.