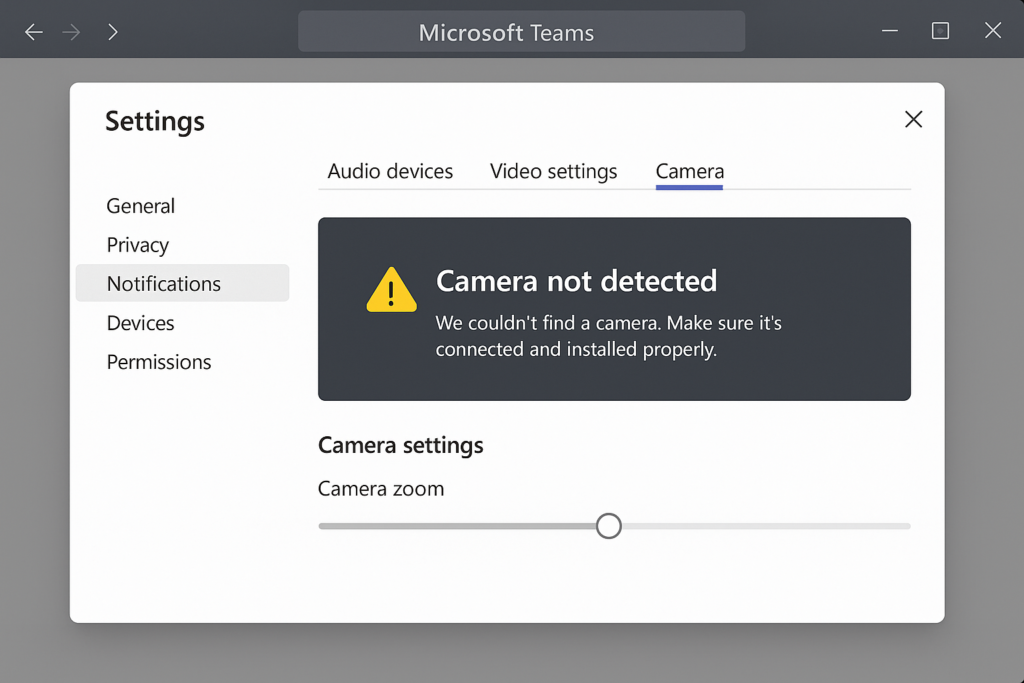
Here’s a question from a reader:
“I’ve been having trouble with my video calls in Microsoft Teams lately. When I try to start my camera during meetings, Teams displays a message saying ‘We can’t find your camera’ or simply shows a black screen where my video should be. I’ve checked that my laptop camera works in other applications, but Teams specifically won’t detect or access it. How can I fix this camera detection issue in Microsoft Teams?”
Solutions to troubleshoot Teams camera detection issues
Camera functionality in Microsoft Teams is essential for effective remote collaboration and virtual meetings. When Teams isn’t recognizing your camera, it prevents face-to-face communication, limiting your ability to fully engage with colleagues. This technical glitch can disrupt important presentations, client meetings, and team collaborations. Camera issues in Microsoft Teams often stem from permission settings, driver problems, or conflicts with other applications. We’ll explore several solutions using Windows settings and Teams configurations to resolve this frustrating problem.
Before diving into more advanced troubleshooting, we’ll verify your camera is working properly and that Teams has the necessary permissions to access it. We’ll also check for driver issues and conflicts with other applications that might be using your camera. These steps apply to both the desktop app and web versions of Microsoft Teams on Windows 10 and other supported operating systems.
Resolving Teams camera recognition problems
Check camera permissions in Windows
- Open your Windows Settings by clicking the Start menu and selecting the gear icon, or by pressing Windows+I on your keyboard.
- Navigate to Privacy settings and select Camera from the left sidebar to access all camera-related permissions on your device.
- Ensure that “Allow apps to access your camera” is turned ON, as this master setting controls camera access for all applications installed on your Windows system.
- Scroll down to find Microsoft Teams in the list of apps and verify that the toggle is switched ON to grant Teams specific permission to use your camera.
- If you’re using Teams in a browser, make sure that your browser (Edge, Chrome, etc.) also has camera permissions enabled in this same settings panel.

Verify camera functionality in other applications
- Open the Windows Camera app by searching for “Camera” in the Start menu to test if your webcam works outside of Teams.
- If the Camera app doesn’t display video, your issue likely involves the camera hardware or drivers rather than Microsoft Teams itself.
- Try using your camera in another video conferencing application like Zoom or Skype to further isolate whether the problem is Teams-specific.
- Check if any physical privacy shutters or keyboard function keys (often F8 or F10) might have disabled your camera at the hardware level.
- For external webcams, try connecting it to a different USB port or using a different USB cable to rule out connection problems.
Update or reinstall camera drivers
- Right-click on the Start menu and select Device Manager to access all hardware drivers currently installed on your Windows system.
- Expand the “Cameras” or “Imaging devices” category to locate your webcam in the device list.
- Right-click on your camera and select “Update driver” to have Windows search automatically for updated driver software for your specific camera model.
- If updating doesn’t resolve the issue, try right-clicking the camera again, selecting “Uninstall device,” then restarting your computer to have Windows reinstall fresh camera drivers.
- For laptop users, visit your manufacturer’s support website to download the latest camera drivers specifically designed for your laptop model.
Reset Microsoft Teams application
- Completely close Microsoft Teams by right-clicking the Teams icon in your system tray and selecting “Quit” or “Exit” to ensure the application fully terminates.
- Press Windows+R to open the Run dialog, then type “%appdata%\Microsoft\Teams” and click OK to open the Teams application data folder.
- Delete the “Cache” and “GPU Cache” folders to clear potentially corrupted application data that might be affecting camera recognition.
- Restart your computer to ensure all processes are completely reset, then relaunch Microsoft Teams and test your camera again.
- If using Teams web client, clear your browser cache or try using an InPrivate/Incognito window to rule out browser-related issues.
- If basic troubleshooting doesn’t work, you might need to clear your Teams cache. This process is similar to when you clear or remove Teams cache to resolve other performance issues, and it often helps with camera recognition problems as well.
Common Teams camera issues
- Camera being used by another application – Teams displays a black screen or error message when another program is already accessing your camera. Close all other applications that might be using your webcam, including browser tabs with active camera permissions, before attempting to use your camera in Teams.
- Outdated Teams application causing compatibility problems – An outdated Teams client may contain bugs affecting camera recognition. Check for updates by clicking your profile picture in Teams, selecting “Check for updates,” and installing any available updates before restarting the application completely.
- Antivirus or security software blocking camera access – Some security programs block camera access as a privacy protection measure. Check your antivirus settings for camera permissions or temporarily disable the security software to test if it’s interfering with Teams’ ability to detect your camera.
Pro tip: If you’re using Teams on a managed corporate device, your IT department may have implemented policies restricting camera usage. Contact your IT support team if none of these solutions resolve your camera detection issues in Microsoft Teams.
