
Authoring Copilot in SharePoint site
“How can I connect Microsoft Copilot to my SharePoint site so my team can access AI assistance directly within our collaboration workspace? We want to streamline document creation and content management without switching between multiple applications.” This common question reflects the growing need for seamless AI integration within existing Microsoft 365 workflows.
Connect Copilot to SharePoint site setup and requirements
Organizations increasingly rely on SharePoint Online as their central content hub, making the integration of Microsoft Copilot essential for modern workplace productivity. When you connect Copilot to your SharePoint environment, you enable intelligent document assistance, automated content generation, and enhanced search capabilities directly within your team sites.
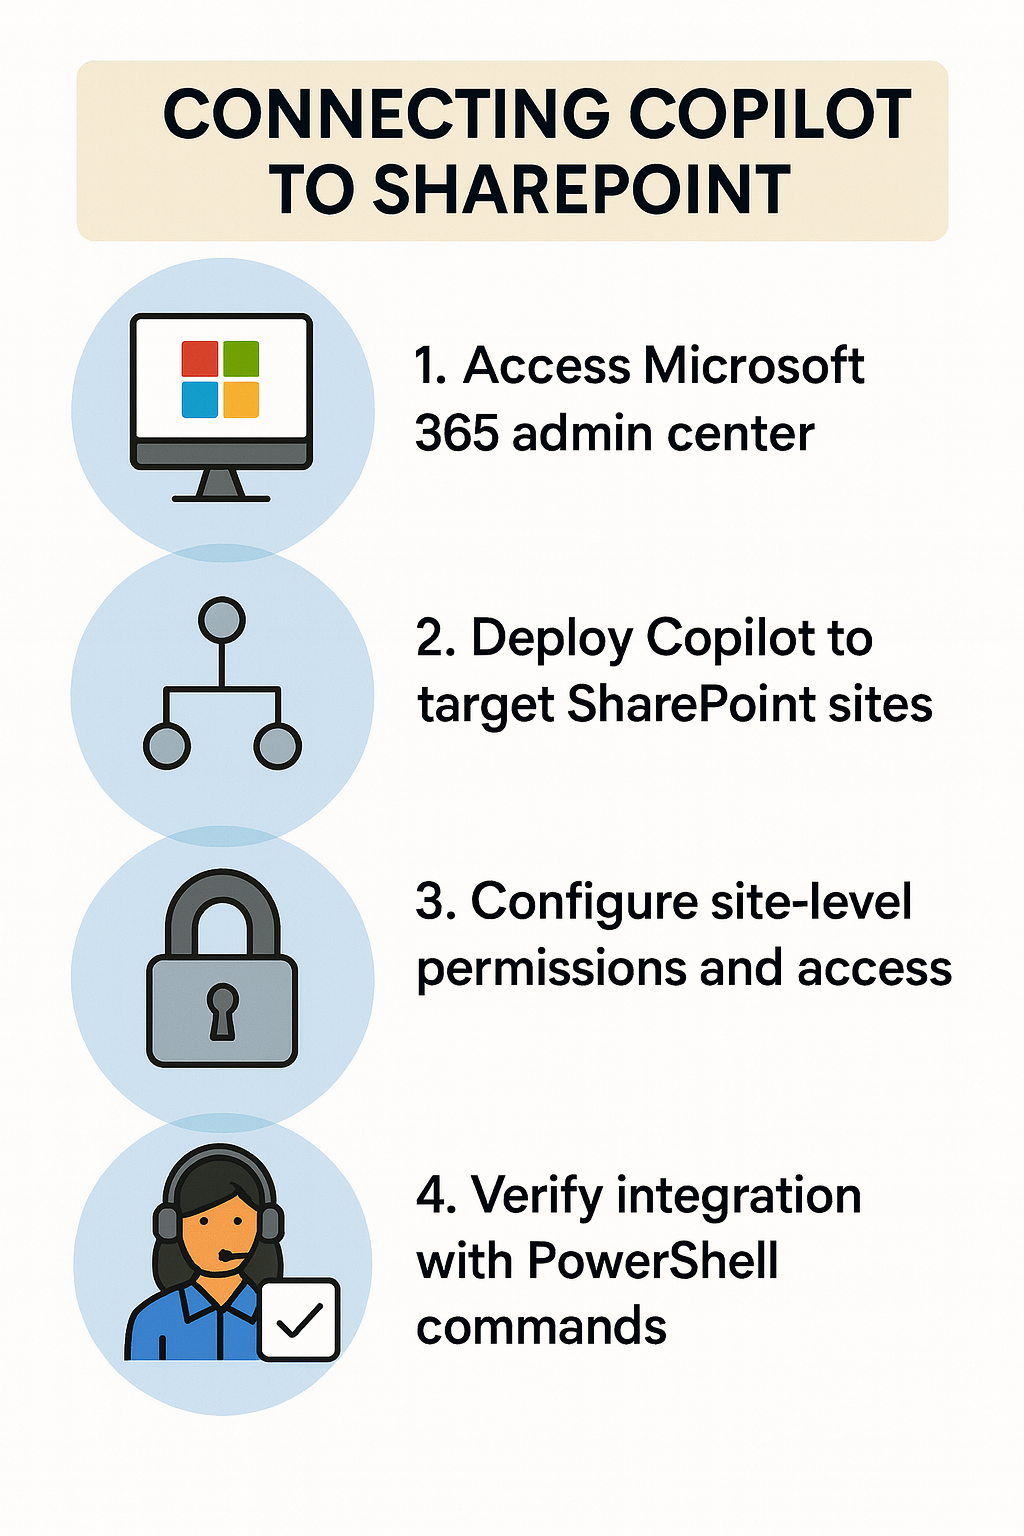
Today we will cover the complete process of integrating Microsoft Copilot with SharePoint Online, including site-level configurations, permission management, and deployment strategies. You will learn to establish secure connections between Copilot services and your SharePoint sites, configure appropriate access controls, and optimize the integration for your organizational needs.
You will need: SharePoint administrator permissions, Microsoft 365 E3 or E5 licensing with Copilot access, and basic familiarity with SharePoint site administration. The integration process utilizes SharePoint Online management tools, Microsoft 365 admin center, and PowerShell where necessary.
Copilot SharePoint access configuration
Deploy Copilot to SharePoint through admin settings
- Navigate to the Microsoft 365 admin center and select “Settings” from the left navigation menu, then click on “Integrated apps” to access application management options for your tenant.
- Locate Microsoft Copilot in the available applications list and click “Deploy” to begin the SharePoint integration process, ensuring your organization meets the licensing requirements for Copilot services.
- Select “Specific users/groups” or “Entire organization” based on your deployment strategy, then choose the SharePoint sites where you want to enable Copilot functionality for targeted rollout management.
- Configure the deployment settings by selecting “SharePoint Online” as the target service and specify which site collections should receive Copilot integration capabilities during the initial deployment phase.
Expert Tip: Start with a pilot group of power users to test Copilot functionality before rolling out to your entire organization.
Add Copilot to SharePoint site through site settings
- Access your target SharePoint site as a site owner or administrator and navigate to the site settings page by clicking the gear icon in the top-right corner.
- Select “Site app permissions” from the site settings menu to manage application integrations and verify that Microsoft Copilot has the necessary permissions to access site content and user interactions.
- Click “Add an app” and search for “Microsoft Copilot” in the SharePoint app catalog, then select the appropriate Copilot application that matches your organizational licensing and feature requirements.
- Configure the Copilot app settings by specifying which document libraries and lists should be accessible to the AI assistant, ensuring appropriate content boundaries are established for security purposes.
Integrate Copilot with SharePoint Online permissions
- Open PowerShell as an administrator and connect to SharePoint Online using the command
Connect-SPOService -Url https://yourtenant-admin.sharepoint.comreplacing “yourtenant” with your actual tenant name. - Execute the following PowerShell command to enable Copilot services at the site collection level:
Set-SPOSite -Identity "https://yourtenant.sharepoint.com/sites/yoursite" -CopilotEnabled $trueensuring the site URL matches your target location. - Verify the integration by running
Get-SPOSite -Identity "https://yourtenant.sharepoint.com/sites/yoursite" | Select CopilotEnabledto confirm that Copilot services are properly activated for the specified site collection. - Configure user permissions by navigating to the SharePoint site permissions page and ensuring that users who need Copilot access have at least “Contribute” permissions to the relevant document libraries and content areas.
Copilot agent in SharePoint customization options
- Access the SharePoint site where Copilot is deployed and navigate to “Site contents” to locate the Copilot web part or application that was installed during the integration process.
- Click on the Copilot application settings and configure the AI assistant’s behavior by specifying which content types it should prioritize, such as documents, lists, or specific metadata fields within your site structure.
- Customize the Copilot interface by selecting appropriate display options, including whether the assistant should appear as a sidebar, embedded web part, or floating chat interface based on your team’s workflow preferences.
- Configure content scope settings to determine which SharePoint libraries, folders, and file types the Copilot agent can access and analyze when providing assistance to users within the site environment.
Important Tip: Regularly review and update Copilot permissions to ensure the AI assistant maintains appropriate access levels as your site content evolves.
Copilot in SharePoint site troubleshooting
- Copilot not appearing in SharePoint site: Verify that your Microsoft 365 license includes Copilot services and check the deployment status in the Microsoft 365 admin center under “Integrated apps” to ensure successful installation. If issues persist, you may need to fix Copilot not appearing in Teams meetings or chat as similar solutions often apply across Microsoft 365 services.
- Permission denied errors when accessing Copilot: Confirm that users have appropriate SharePoint site permissions and that the Copilot application has been granted necessary API permissions through the SharePoint app permissions management interface.
- Copilot responses limited or inaccurate: Review the content scope configuration to ensure the AI assistant has access to relevant document libraries and verify that indexed content is up-to-date through SharePoint search settings.
- Integration fails during PowerShell deployment: Check that you are using the latest SharePoint Online Management Shell module and verify tenant administrator permissions before executing Copilot enablement commands for site collections.
Remember: Allow up to 24 hours for Copilot integration changes to fully propagate across your SharePoint environment and appear for all users.