Have you opened Word or Outlook expecting to use Microsoft Copilot, only to find the icon missing or completely unresponsive? You’re not alone in facing this challenge, and the good news is that most loading issues stem from configuration settings, licensing problems, or version mismatches that can be resolved with the right troubleshooting steps.
Why Microsoft Copilot is not enabled in Word and Outlook
Microsoft Copilot’s availability depends on several interconnected factors that must align properly for the feature to appear and function correctly. Understanding these requirements helps you identify where the breakdown occurs and how to address it systematically.
Before Copilot can load in Word or Outlook, your organization must have active Copilot licenses assigned to your account, and your Microsoft 365 Apps must be updated to a compatible version that supports the feature. Additionally, your IT administrator needs to have Copilot enabled at the tenant level through the Microsoft 365 admin center, and your network must allow connections to the necessary Microsoft cloud services. This tutorial walks you through verifying each of these prerequisites and provides actionable solutions when Copilot fails to appear or load in your desktop applications.
Important Tip: Always check your license status first before diving into technical troubleshooting, as missing or unassigned Copilot licenses account for the majority of cases where users cannot see the feature.
Verifying your Microsoft Copilot license and enabling settings
Your first priority when Copilot is not showing on Word or Outlook involves confirming that you actually have the proper license assigned and that organizational policies permit its use.
- Sign into the Microsoft 365 admin center using administrator credentials and navigate to Users then Active users to locate your account in the directory listing.
- Click on your username to open the account details panel and select the Licenses and apps tab where all assigned licenses appear with checkboxes indicating their status.
- Verify that Microsoft 365 Copilot or Copilot for Microsoft 365 appears in the license list with a checked box confirming active assignment to your user account.
- If the license is missing or unchecked, select the checkbox next to the Copilot license and click Save changes at the bottom of the panel to complete the assignment process.
- Navigate to Settings then Org settings in the admin center and click on Copilot under the Services tab to access tenant-wide configuration options for the feature.
- Ensure that the toggle switch for allowing Copilot in your organization is set to the enabled position and that no specific user groups are excluded from access.
- Wait approximately thirty minutes to two hours after making license or policy changes before testing again, as Microsoft 365 services require time to synchronize permissions across all systems.
- If you’re also experiencing issues with Copilot in Outlook specifically, learn more about how to turn on Copilot in Outlook email. Navigate to Settings then Org settings in the admin center and click on Copilot under the Services tab to access tenant-wide configuration options for the feature.
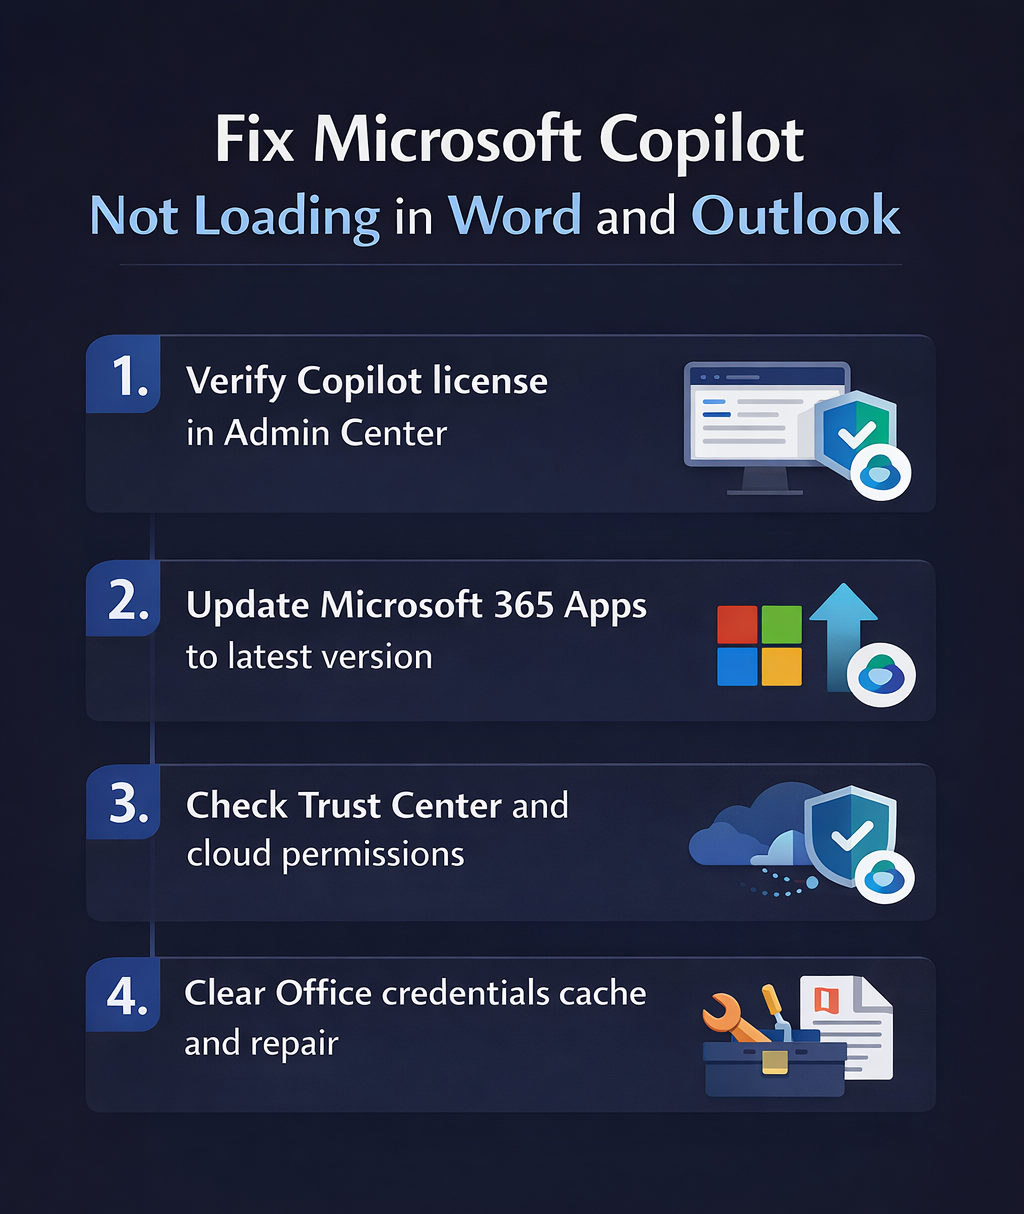
Updating Microsoft 365 Apps to support Copilot features
Outdated application versions frequently cause Copilot to fail loading even when licensing and policies are correctly configured, making version updates essential for resolving most compatibility issues.
- Open Word or Outlook and click on File in the top menu bar then select Account from the left navigation pane to view your application and subscription information.
- Look for the About Word or About Outlook button and click it to display the complete version number and build information for your currently installed application.
- Verify that your version number is 16.0.16827.20000 or higher for Windows or 16.78 or higher for Mac, as earlier versions do not include the necessary Copilot integration components.
- Return to the Account page and locate the Update Options button under the Product Information section then click it and select Update Now to begin downloading available updates.
- Allow the update process to complete fully without interrupting it and restart Word and Outlook after installation finishes to ensure all new components load properly into memory.
- If automatic updates are disabled in your organization, contact your IT administrator to request manual deployment of the Current Channel or Monthly Enterprise Channel update packages.
Expert Tip: Switching from Semi-Annual Enterprise Channel to Current Channel or Monthly Enterprise Channel gives you faster access to new features like Copilot, though this change should be coordinated with your IT department.
Troubleshooting common Microsoft Copilot loading problems
Even after verifying licenses and updating applications, you might encounter specific errors or scenarios that prevent Copilot from functioning as expected in your workflow.
- If Copilot appears grayed out or displays a message stating the feature is unavailable, open the Trust Center by clicking File then Options then Trust Center and clicking Trust Center Settings to verify that all required cloud services are permitted through your security policies.
- When you see error messages referencing network connectivity or service unavailability, check that your firewall or proxy allows connections to the domains *.microsoft.com, *.office.com, and *.office365.com, as Copilot requires consistent access to Azure-hosted AI services to process requests and return results.
- For situations where Copilot worked previously but suddenly stopped loading, clear your Office credentials cache by closing all Microsoft 365 applications and deleting the contents of the folder located at C:\Users\YourUsername\AppData\Local\Microsoft\Office\16.0\Wef on Windows systems, then restart the applications and sign in again with your organizational credentials.
- If Copilot loads in Word but not Outlook or vice versa, perform an Online Repair of Microsoft 365 by opening Control Panel then Programs and Features, right-clicking on Microsoft 365 and selecting Change then Online Repair to restore missing or corrupted application components without losing your customization settings or data.
Remember: Changes made by administrators at the tenant level can take several hours to propagate fully, so patience is important when testing after configuration modifications have been applied to your environment.