
Struggling with Copilot activation in Windows 10?
“I recently heard about Microsoft Copilot and want to try it on my Windows 10 computer, but I can’t figure out how to turn it on. I’ve looked through my settings and searched online, but the instructions seem confusing. Is Copilot even available for Windows 10? If so, how do I activate it properly and get it working on my system?”
Why enabling Copilot matters for Windows 10 users
Microsoft Copilot represents a significant advancement in how users interact with their Windows systems. For Windows 10 users, activating Copilot provides access to AI-powered assistance directly within your operating system. Unlike Windows 11, where Copilot comes more tightly integrated, Windows 10 requires specific steps to enable this functionality. Understanding how to properly install and activate Copilot ensures you can leverage its capabilities for improved productivity and system interaction.
Copilot installation and activation process overview
Before proceeding with the activation steps, you’ll need to ensure your Windows 10 is updated to version 22H2 or later. Copilot functionality requires recent Windows updates to work properly. This tutorial will guide you through downloading, installing, and activating Microsoft Copilot on your Windows 10 system. We’ll also cover how to deactivate it if needed and troubleshoot common installation issues.
Installing and activating Copilot in Windows 10
- Update Windows 10 to the latest version by going to Settings > Update & Security > Windows Update and clicking “Check for updates” to ensure you have at least version 22H2, which is required for Copilot compatibility.
- Enable the Windows web experience pack by visiting the Microsoft Store, searching for “Web Experience Pack,” and making sure it’s installed and updated on your system as this component is essential for Copilot functionality.
- Download Microsoft Copilot by visiting the official Microsoft website (microsoft.com/copilot) or searching for “Microsoft Copilot” in the Microsoft Store, then click the “Get” or “Download” button to begin the installation process.
- Complete the installation process by following the on-screen prompts after downloading, which typically involves accepting terms of service and waiting for the installation to complete without interrupting the process.
- Restart your computer after installation to ensure all components are properly initialized and the system recognizes the newly installed Copilot application.
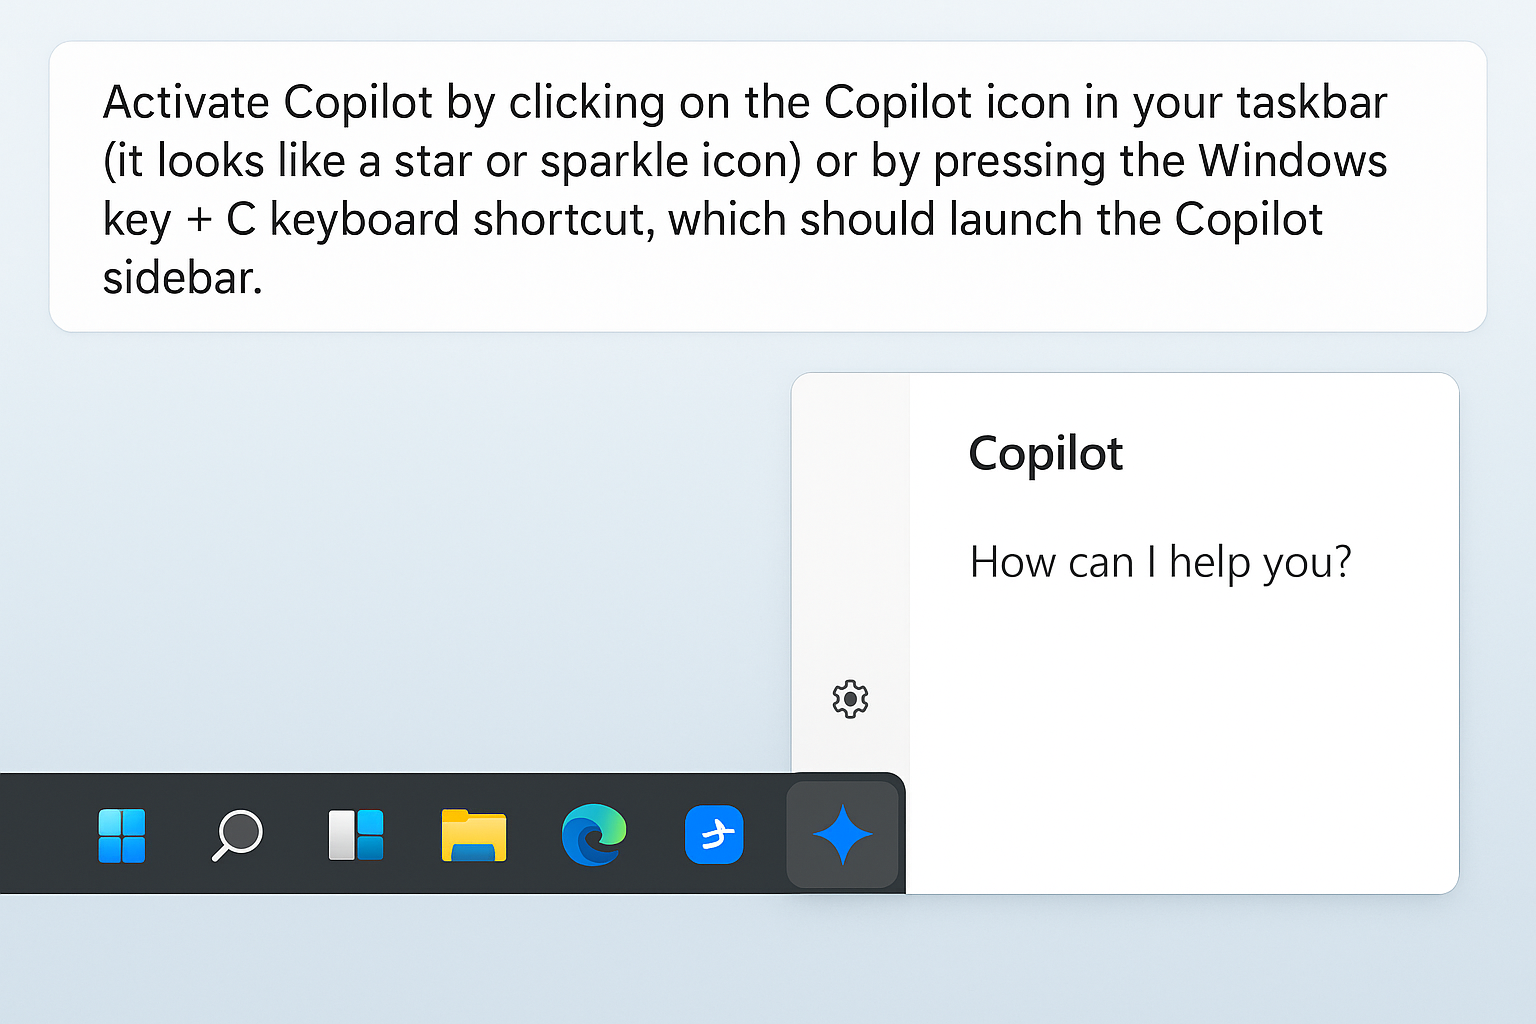
- Activate Copilot by clicking on the Copilot icon in your taskbar (it looks like a star or sparkle icon) or by pressing the Windows key + C keyboard shortcut, which should launch the Copilot sidebar.
- Sign in with your Microsoft account when prompted, as Copilot requires a Microsoft account to access its full range of features and personalized assistance capabilities.
- Grant necessary permissions when asked, including access to your location, browsing history, or other data that Copilot needs to provide contextual assistance and relevant responses.
- Customize your Copilot experience by clicking on the settings gear icon within the Copilot interface, where you can adjust privacy settings, language preferences, and interaction modes.
Common Copilot activation issues in Windows 1 & 11
- Copilot icon not appearing in taskbar can often be resolved by right-clicking on the taskbar, selecting “Taskbar settings,” and ensuring that the “Copilot” option is toggled on in the list of taskbar items that appear.
- Installation fails with error messages typically indicates either insufficient system requirements or conflicting software, so try temporarily disabling startup programs during installation and ensure your system meets the minimum 4GB RAM and 1GHz processor requirements.
- Copilot appears but doesn’t respond to queries usually means there’s a connectivity issue, so check your internet connection and verify that your firewall isn’t blocking Copilot’s access to Microsoft’s servers.
- “This feature is not available in your region” message indicates that Copilot may not be supported in your location yet, in which case you might need to wait for Microsoft to expand availability or try changing your region settings temporarily.
- Performance issues after enabling Copilot could mean your system resources are strained, so try closing other resource-intensive applications when using Copilot or consider upgrading your RAM if you frequently use multiple applications simultaneously.
How to disable or deactivate Copilot in Windows 10?
If you decide Copilot isn’t for you or want to temporarily disable it, you have several options:
- Hide the Copilot icon by right-clicking on your taskbar, selecting “Taskbar settings,” and toggling off the “Copilot” option, which removes it from view without uninstalling the feature.
- Disable Copilot startup by pressing Ctrl+Shift+Esc to open Task Manager, clicking on the “Startup” tab, finding Copilot in the list, right-clicking it, and selecting “Disable” to prevent it from launching automatically.
- Uninstall Copilot completely by going to Settings > Apps > Apps & features, searching for “Copilot” or “Web Experience Pack,” selecting it, and clicking “Uninstall” to remove it from your system entirely.
- Revert to previous Windows version if you’ve updated specifically for Copilot but find it unsatisfactory, by going to Settings > Update & Security > Recovery and selecting “Go back to the previous version of Windows 10” within the first 10 days after updating.
- Adjust Copilot permissions instead of completely disabling it by opening Copilot, clicking the settings gear, and modifying what information it can access, which lets you maintain functionality while enhancing privacy.
Copilot Functionality Differences Across Windows Versions
Windows 10 Copilot operates primarily as a standalone application with limited system integration compared to Windows 11. In Windows 11, Copilot can directly modify system settings like dark mode or display configurations through voice commands, while Windows 10 users must manually adjust these settings after receiving Copilot’s guidance.
The sidebar experience also differs significantly. Windows 11 features a persistent docked sidebar that overlays applications, whereas Windows 10 typically launches Copilot as a separate window or browser-based interface. This means Windows 10 users may need to switch between windows more frequently when following Copilot suggestions.
Can I use Copilot offline on Windows 10?
No, Copilot requires an active internet connection to function because it processes queries through cloud-based AI servers. Without connectivity, the application will display an error message and cannot provide responses. For offline assistance, consider using Windows 10’s built-in Help system accessible through F1 or the Settings app.
Does Copilot work with Windows 10 Home edition?
Yes, Copilot supports both Windows 10 Home and Pro editions, provided you’re running version 22H2 or later. However, enterprise-managed devices may have Copilot disabled through group policies set by IT administrators, preventing installation even on compatible systems.