
Streamlining excel data input using Copilot
“I manage inventory for a mid-sized retail business, and I spend hours each week manually entering product data into Excel spreadsheets. This process is time-consuming and prone to errors. Is there a way to use Microsoft Copilot to automate or assist with this repetitive data entry work in Excel? I’d like to improve accuracy and save time.”
Excel Copilot automate data entry challenges
Businesses across industries struggle with manual data entry in Excel. This repetitive task consumes valuable time, introduces human error, and prevents staff from focusing on higher-value work. For inventory managers, sales teams, and financial analysts, efficient data entry is crucial for maintaining accurate records and making informed decisions.
Microsoft Copilot integration with Excel offers a powerful solution to transform how you handle data entry tasks. By leveraging AI assistance, you can significantly reduce manual input while improving accuracy and consistency across your spreadsheets.
Using Microsoft Copilot to input data in Excel
This tutorial will demonstrate how to use Copilot in Excel to automate various data entry tasks, including populating cells with structured information, formatting data, and creating formulas. We’ll focus on practical applications for business users who regularly work with spreadsheets containing product information, financial data, or customer records.
You’ll need a Microsoft 365 subscription with Copilot access and the latest version of Excel.Before diving into Copilot’s data entry capabilities, ensure you know how to properly add Microsoft Copilot to Excel and have it configured correctly. For complex spreadsheets, you may also want to learn how to export Excel spreadsheets to CSV files for backup purposes.
Leveraging Copilot for Excel data entry tasks
Setting up your Excel environment for Copilot
- Access Excel through your Microsoft 365 account and open a new or existing spreadsheet where you need to perform data entry tasks.
- Ensure Copilot is activated by looking for the Copilot icon in the top ribbon or side panel of your Excel interface.
- Before using Copilot, organize your spreadsheet with appropriate column headers that clearly describe the type of data each column should contain.
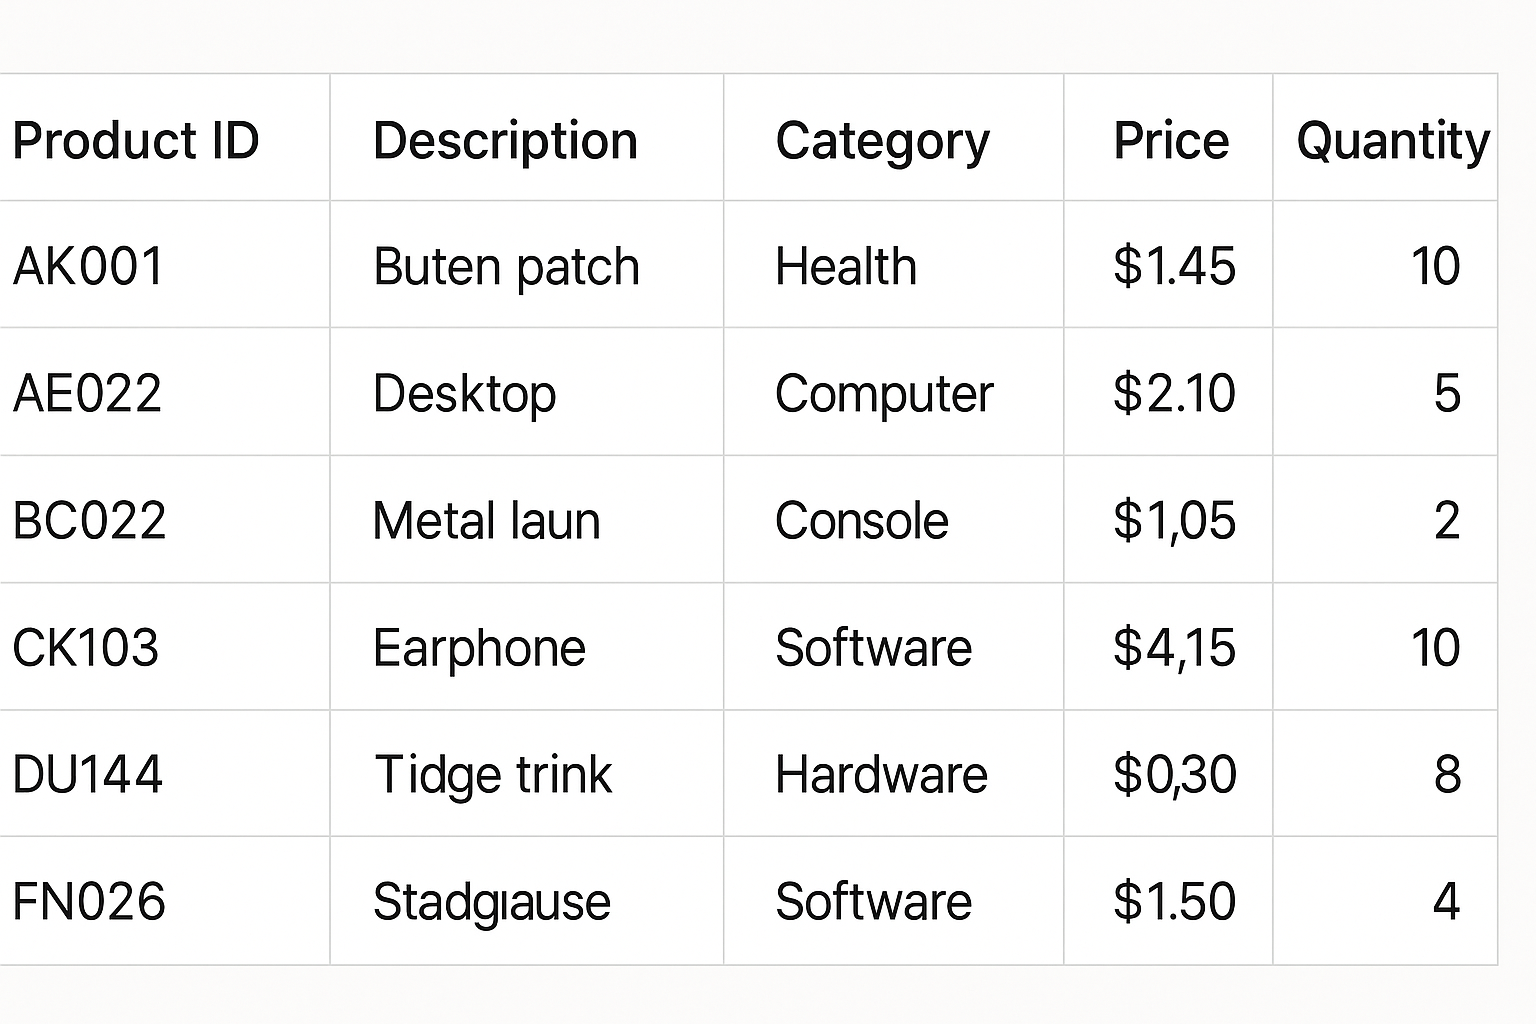
- Consider creating a simple table structure with headers like “Product ID,” “Description,” “Category,” “Price,” and “Quantity” to help Copilot understand your data structure.
- If working with existing data, ensure at least some rows contain sample data that represents the pattern you want Copilot to follow.
Copilot assist filling spreadsheets with natural language commands
- Click on the Copilot icon in Excel to open the Copilot pane, which typically appears on the right side of your screen.
- Type a clear instruction describing the data you need to enter, such as: “Create a product inventory table with 10 office supplies including ID numbers, descriptions, categories, prices, and stock quantities.”
- For more specific data entry, provide details in your prompt: “Fill column B with product descriptions for office chairs that include color, material, and adjustability features.”
- Use Copilot to transform unstructured data by asking: “Convert this list of customer information into a properly formatted table with separate columns for name, email, and purchase date.”
- When you have data in one format but need it restructured, try: “Take the product information in columns A-C and create a new table that groups items by category with subtotals.”
Excel data entry automation with Copilot formulas
- Ask Copilot to create formulas that automatically calculate values based on your entered data: “Create formulas to calculate total value by multiplying price and quantity for each product.”
- Use Copilot to generate conditional formatting rules: “Highlight inventory items with quantities below 10 in red and set up conditional formatting.”
- Request data validation rules to ensure accurate entry: “Set up data validation for the price column to only accept values between $5 and $500.”
- Have Copilot create dropdown lists for consistent data entry: “Create a dropdown list in the Category column with options for Office Supplies, Furniture, Technology, and Stationery.”
- Ask Copilot to generate timestamps or auto-updating information: “Add a column that automatically records the date when inventory quantities are updated.”
Copilot-powered spreadsheet data entry tips
- For bulk data entry, provide Copilot with a sample of the pattern you want followed: “Generate 20 more rows following the pattern of the first three rows in my table.”
- Use Copilot to clean and standardize existing data: “Standardize all product names in column A to follow proper capitalization and remove any special characters.”
- Ask Copilot to fill in missing values based on patterns: “Look at my customer data and fill in any missing zip codes based on the city and state information.”
- Have Copilot generate realistic test data for your spreadsheet templates: “Create sample sales data for the last 12 months with realistic seasonal variations.”
- Combine Copilot with Excel’s data types: “Convert the product names in column A to Stock data type and pull in current price information.”
Copilot guided data input in Excel troubleshooting
- If Copilot generates data that doesn’t match your expected format or structure, try refining your prompt with more specific details about the exact format needed, including examples of correctly formatted entries.
- When Copilot seems to misunderstand the context of your spreadsheet, ensure your column headers are clear and descriptive, and consider providing a brief explanation of what the spreadsheet represents in your prompt.
- For complex data entry tasks where Copilot produces incomplete results, break down your request into smaller, more manageable chunks and build your spreadsheet incrementally rather than attempting to generate everything at once.
- If you encounter permission or access issues when using Copilot features, verify that your Microsoft 365 subscription includes Copilot access and that your organization hasn’t restricted any AI features through admin policies.
- When working with sensitive business data, remember that information processed through Copilot may be transmitted to Microsoft servers, so review your organization’s data handling policies before using Copilot with confidential information.
Pro tip: Create a library of effective Copilot prompts for your recurring data entry tasks. This allows you and your team to consistently generate properly formatted data across multiple spreadsheets.