iPhone email configuration made simple
A colleague recently asked me how to access their work Outlook emails on their iPhone while traveling for business meetings. They needed immediate access to important client communications but weren’t sure whether to use the built-in Mail app or download the Microsoft Outlook app. This is a common scenario for professionals who need seamless email access across devices while maintaining security and functionality.
Email setup challenges and available solutions
Setting up Outlook email on iPhone can seem complex due to multiple configuration options and varying security requirements across organizations. Many users struggle with choosing between the native iOS Mail app and the dedicated Microsoft Outlook app, each offering different features and integration levels.
We will go over a couple of different methods for adding your Outlook email account to iPhone, covering personal Outlook.com accounts and business Microsoft 365 accounts. You’ll learn the complete configuration process, understand the differences between approaches, and discover which method best suits your workflow needs.
Prerequisites include having your Outlook email address and password ready, ensuring your iPhone runs iOS 12.0 or later, and having administrator approval for business accounts if required. We’ll use both the native iOS Mail app and the Microsoft Outlook app to provide comprehensive setup options.
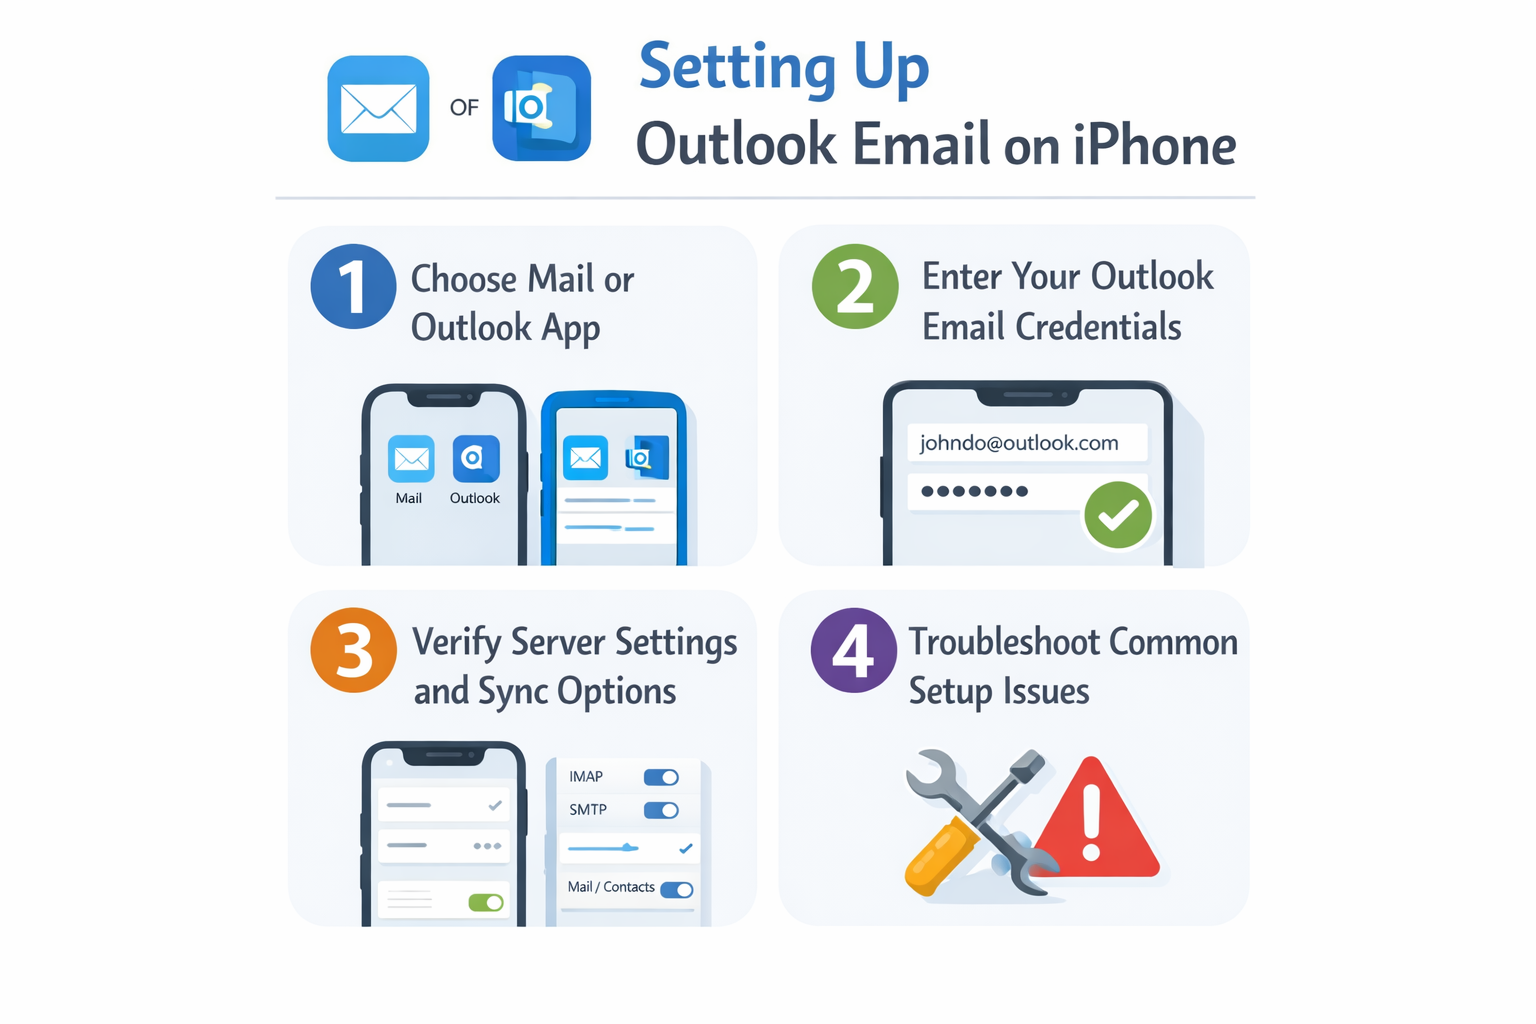
Access Outlook in iPhone Native Mail app
The iPhone’s built-in Mail app provides a streamlined approach to adding Outlook accounts with automatic configuration for most scenarios.
- Open the Settings app on your iPhone and scroll down to locate the Mail option in the main settings menu.
- Tap on Mail, then select Accounts to view your current email account configuration and available setup options.
- Choose Add Account from the account list, which will display various email provider options including Microsoft Exchange and Outlook.com.
- Select Microsoft Exchange for business accounts or Outlook.com for personal accounts, depending on your specific email account type.
- Enter your complete Outlook email address in the email field, ensuring you include the full domain name for accuracy.
- Input your password in the designated field, then tap Next to allow iOS to automatically detect your server settings and configuration.
- iOS will attempt to verify your credentials and configure the account settings automatically using Microsoft’s autodiscovery service for optimal setup.
Account verification and customization options
- Review the account information screen that displays your email address, server settings, and available sync options for calendar and contacts integration.
- Toggle on or off the services you want to sync, including Mail, Contacts, Calendars, and Reminders based on your workflow requirements.
- Tap Save to complete the account setup process and begin syncing your Outlook emails to the native iPhone Mail app.
- Wait for the initial sync to complete, which may take several minutes depending on your mailbox size and internet connection speed.
- Open the Mail app to verify that your Outlook emails are displaying correctly and that you can send test messages successfully.
Microsoft Outlook app for IPhone installation and setup
The dedicated Microsoft Outlook app offers advanced features and better integration with Microsoft 365 services compared to the native Mail app.
- Download the Microsoft Outlook app from the App Store by searching for “Microsoft Outlook” and tapping the Get button to install.
- Launch the Outlook app once installation completes and tap Get Started to begin the account configuration process.
- Select Add Account from the welcome screen, then choose your account type from the available options including personal and business accounts.
- Enter your complete Outlook email address and tap Add Account to proceed with the automatic configuration detection process.
- Input your password when prompted and tap Sign In to authenticate your credentials with Microsoft’s servers for account verification.
- The app will automatically detect your account settings and configure the appropriate server connections for optimal email synchronization and security.
Advanced configuration and feature activation
- Review the permissions screen and tap Allow to grant the app access to send notifications for new emails and calendar events.
- Configure your notification preferences by selecting which types of alerts you want to receive and setting quiet hours for uninterrupted focus time.
- Explore the app’s integrated features including focused inbox, calendar integration, and file attachment capabilities that enhance your mobile productivity workflow.
- Set up additional accounts if needed by tapping the profile icon and selecting Add Account to manage multiple Outlook or other email accounts.
- Customize your swipe actions and organize your inbox using the app’s built-in filtering and categorization tools for improved email management efficiency.
Common setup issues and solutions
Several challenges can arise during the Outlook email setup process on iPhone, but most have straightforward solutions that restore full functionality.
- Authentication failures often occur when two-factor authentication is enabled on your Microsoft account, requiring you to generate an app-specific password through your Microsoft account security settings instead of using your regular login credentials.
- Server connection errors typically indicate incorrect server settings or network restrictions, which you can resolve by manually entering server details or contacting your IT administrator for the correct Exchange server information and port configurations.
- Incomplete email synchronization problems usually stem from storage limitations or sync settings, requiring you to check your iPhone storage space and adjust the mail sync period in account settings to download more or fewer messages.
- Missing calendar or contact integration issues occur when sync options are disabled during setup, which you can fix by returning to Settings > Mail > Accounts, selecting your Outlook account, and enabling the desired services like Calendars and Contacts for full feature integration.
Expert Tip: If you’re using a business account with strict security policies, your organization may require the Microsoft Outlook app instead of the native Mail app to ensure compliance with corporate data protection requirements.