
Setting up automatic email responses for better communication
“I’m going on vacation next week and need to let people know I won’t be responding to emails immediately. How do I set up an automatic reply in Outlook so everyone gets notified when they email me?”
Turn on automatic email responses in Outlook’s M365
Managing email communication while you’re away is essential for maintaining professionalism and keeping business relationships running smoothly. Whether you’re on vacation, attending an event, or focusing on a long-term project, automatic replies help set expectations and reassure senders that their messages have been received.
This guide explains how to set up automatic replies in different versions of Outlook, including the new Outlook M365 interface and the classic desktop applications on WIndows 10 and 11. You’ll learn how to craft clear, professional out-of-office messages that work with Exchange Online, Outlook.com, and on-premises Exchange servers. To follow along, ensure you have an active Outlook account with access to Exchange Online or an Exchange Server, administrative permissions for your mailbox, and a basic understanding of Outlook’s interface.
Enable auto reply in Outlook with step-by-step configuration
Setting up automatic replies on new Outlook interface
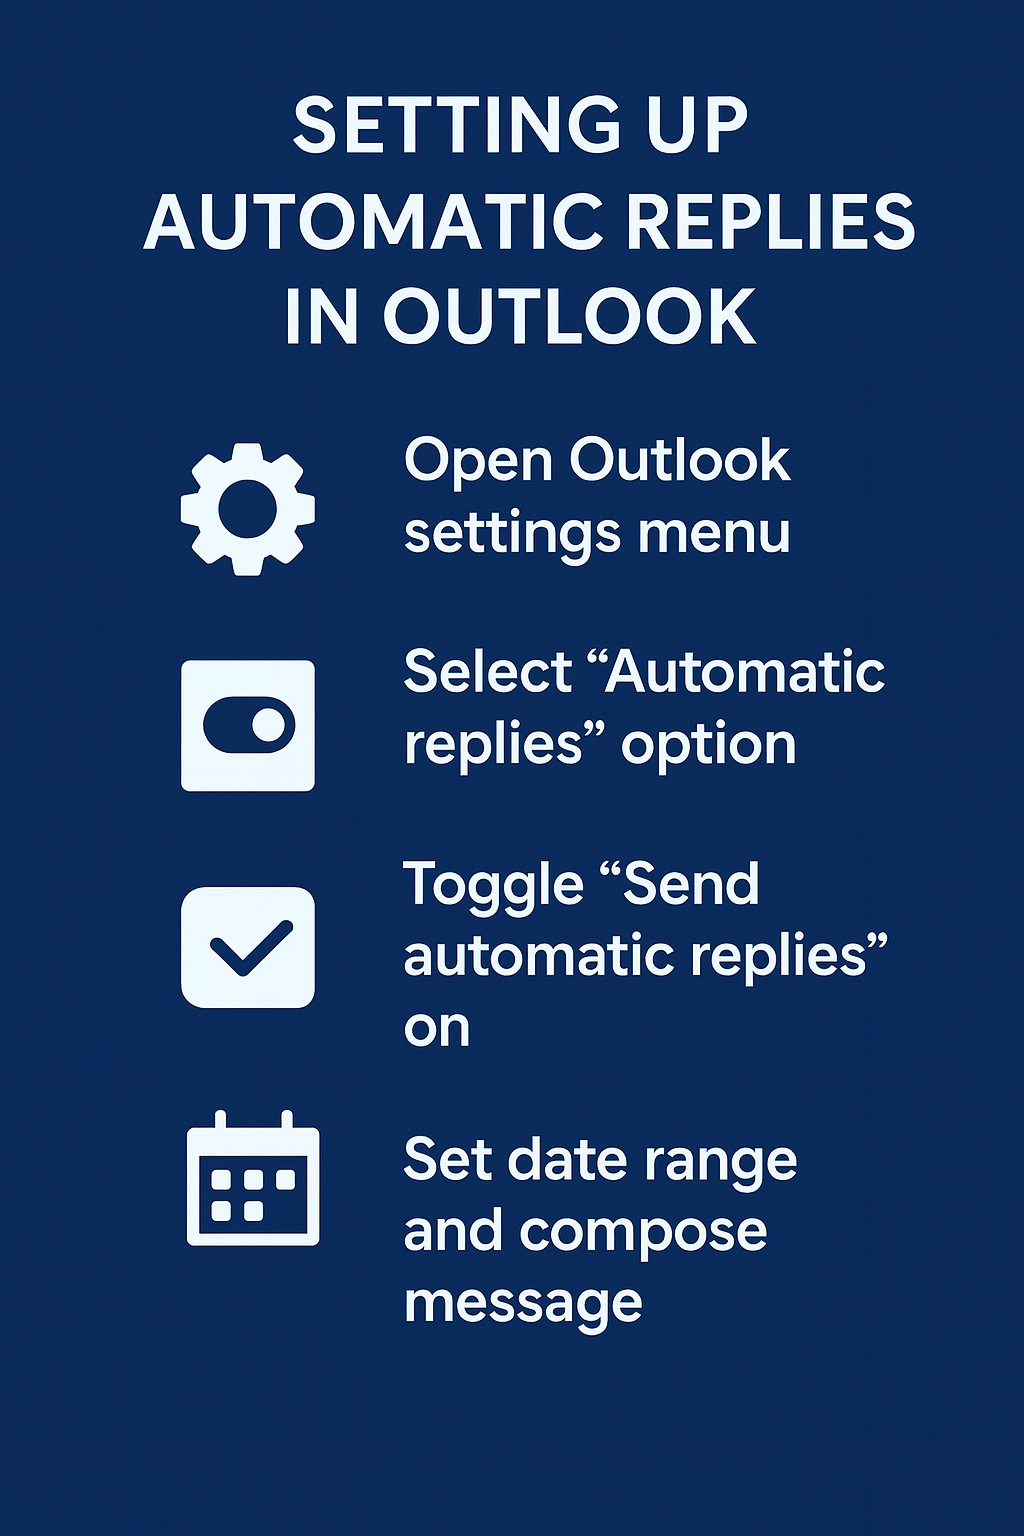
- Open the new Outlook application and navigate to the Settings gear icon located in the upper-right corner of the interface.
- Select “Mail” from the settings menu, then scroll down to find the “Automatic replies” section within the mail configuration options.
- Click the toggle switch next to “Send automatic replies” to activate the feature, which will reveal additional configuration options for your out-of-office messages.
- Configure the date range by selecting “Send replies only during this time period” and specify your start and end dates using the calendar picker interface.
- Compose your automatic reply message in the text box, ensuring it includes essential information such as your return date, alternative contacts, and urgency instructions for immediate matters.
- Choose whether to send automatic replies to people inside your organization only, or include external senders by checking the appropriate radio button options.
- For external recipients, you can create a separate message by enabling “Send automatic reply messages to senders outside my organization” and composing a different response.
Automatic replies windows 11 setup through classic Outlook
- Launch Outlook desktop application and click on the “File” tab in the ribbon menu to access backstage view with account and configuration options.
- Select “Automatic Replies (Out of Office)” from the Info section, which opens a dedicated dialog box for configuring your absence notifications.
- Choose “Send automatic replies” radio button and optionally set specific time parameters by selecting “Only send during this time range” with appropriate dates.
- Type your out-of-office message in the “Inside My Organization” tab, crafting a professional response that communicates your availability status and expected return timeline.
- Switch to the “Outside My Organization” tab to create a separate message for external contacts, which often requires more formal language and limited personal information.
- Configure advanced options such as rules for specific senders or message types by clicking “Rules” button if you need granular control over automatic responses.
Expert Tip: Create different messages for internal and external contacts to maintain appropriate professional boundaries while providing relevant information to each audience.
How to put out of office on Outlook email through web interface?
- Access Outlook on the web by navigating to outlook.office.com or outlook.com and signing in with your Microsoft account credentials.
- Click the Settings gear icon in the top-right corner, then select “View all Outlook settings” from the dropdown menu to access comprehensive configuration options.
- Navigate to “Mail” in the left sidebar, then select “Automatic replies” from the expanded menu to access out-of-office configuration settings.
- Toggle the “Turn on automatic replies” switch to enable the feature, which will display additional fields for message composition and scheduling options.
- Set your automatic reply schedule by selecting “Send replies only during a specific time period” and choosing appropriate start and end dates from the calendar interface.
- Compose your automatic reply message using the rich text editor, which supports formatting options like bold text, bullet points, and hyperlinks for professional presentation.
- Configure separate messages for internal and external recipients by using the respective tabs, allowing you to customize communication based on the sender’s relationship to your organization.
Automatic reply option in Outlook troubleshooting and common solutions
- Automatic replies not sending to external contacts: Verify that your Exchange administrator has enabled external automatic replies in the organization’s mail flow settings, as some companies restrict this feature for security reasons.
- Out-of-office messages appearing in sent items folder: This behavior is normal for Outlook automatic replies, but you can create a rule to automatically delete these messages or move them to a specific folder for organization.
- Automatic replies continuing after scheduled end date: Check your system clock and time zone settings, as incorrect local time can cause scheduling conflicts with Exchange server time, resulting in extended automatic reply periods.
- Recipients receiving multiple automatic reply messages: Outlook typically sends only one automatic reply per sender during the configured period, but cached data or multiple email addresses can trigger duplicate responses requiring mailbox rule adjustments.
Frequently Asked Questions
Does enabling automatic replies in Outlook affect calendar availability?
Automatic replies and calendar availability are managed independently in Outlook. Enabling an out-of-office message does not automatically block your calendar or set your status to “Out of Office” in Teams. You need to separately update your calendar by creating an all-day event and setting the status to “Out of Office” to reflect your absence across Microsoft 365 services.
Can I set up automatic replies using PowerShell for multiple mailboxes?
Yes, administrators can configure automatic replies across multiple mailboxes using the Exchange Online PowerShell module. This is particularly useful for shared mailboxes or when onboarding departing employees.
Set-MailboxAutoReplyConfiguration -Identity "user@domain.com" -AutoReplyState Enabled -InternalMessage "Internal reply text" -ExternalMessage "External reply text"To set a scheduled time range, add the -StartTime and -EndTime parameters with ISO 8601 formatted datetime values.