
Introduction
“I just upgraded to Windows 11, and I need to recover some files from my previous installation, but I can’t find the Windows.old folder anywhere on my system.” This common question arises when users upgrade their operating system and realize they need access to files or settings from their previous Windows installation. Understanding where Windows stores this backup folder and how to work with it effectively can save you from potential data loss and streamline your upgrade experience.
Understanding the Windows.old folder location in Windows 11
When you upgrade from an earlier version of Windows to Windows 11, the system automatically creates a Windows.old folder to preserve your previous installation files, user data, and settings. This folder serves as a safety net, allowing you to roll back to your previous operating system or retrieve important files you may have forgotten to back up before the upgrade process began. In a way, it’s similar to how you can recover deleted files and folders in Windows 11; with the Windows.old folder provides a recovery mechanism for your entire previous system installation.
The Windows.old folder is located directly in your system drive, typically at C:\Windows.old. This folder contains subdirectories mirroring your previous Windows installation structure, including Users, Program Files, and Windows system folders. The folder remains on your system for a limited time (usually 10 days for rollback purposes) before Windows automatically removes it to free up disk space.
How to access and navigate the Windows.old folder?
- Open File Explorer by pressing Windows + E on your keyboard, or click the folder icon on your taskbar to launch the file management interface.
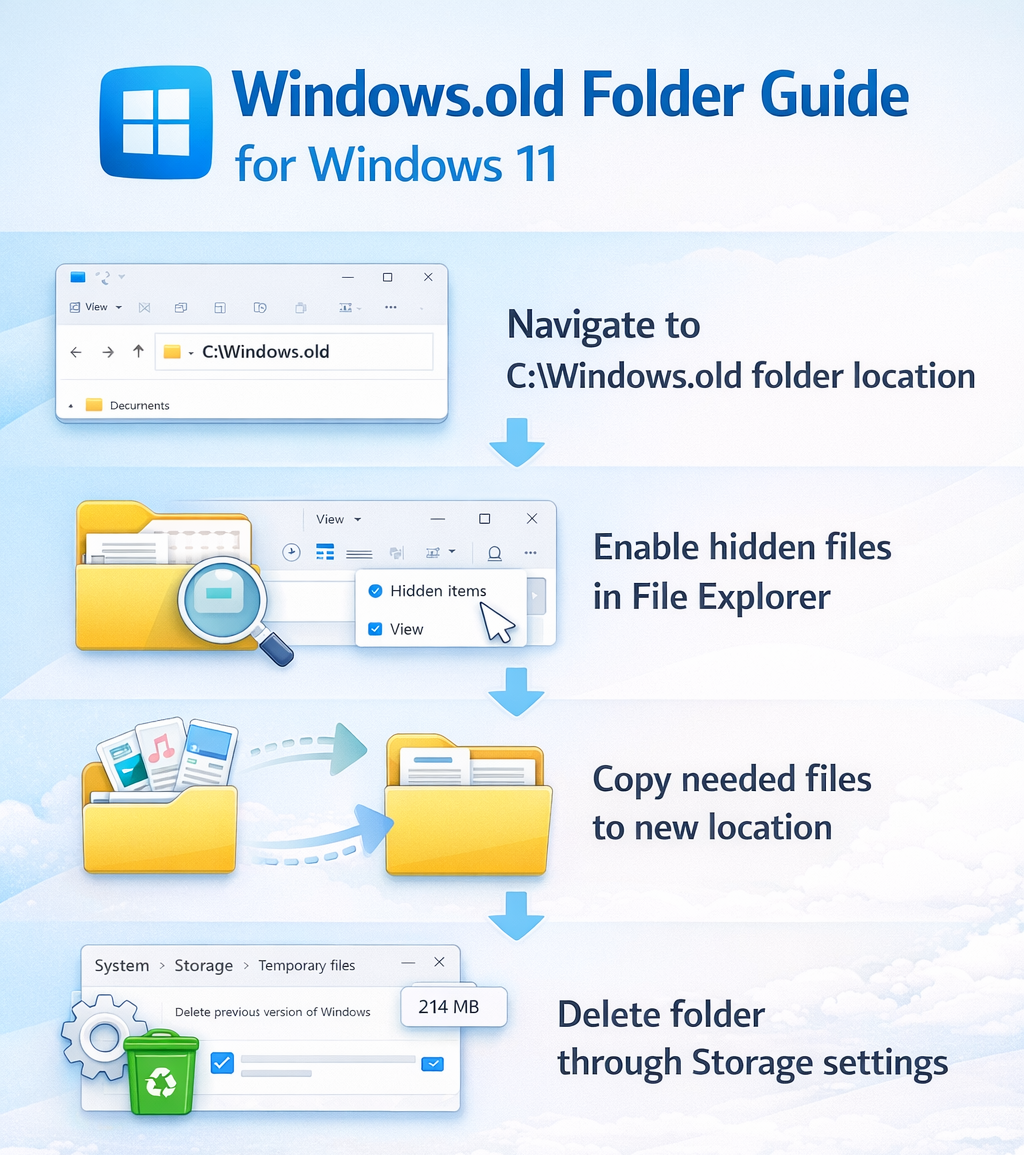
- Navigate to your system drive by clicking on This PC in the left sidebar, then double-clicking the drive where Windows is installed, which is typically labeled as (C:) or Local Disk (C:).
- Scroll through the folders in your C: drive until you locate the Windows.old folder, which appears as a standard folder icon with the name “Windows.old” displayed beneath it.
- If you cannot see the Windows.old folder, you need to enable hidden files and folders by clicking the View menu at the top of File Explorer, then selecting Show and checking the Hidden items checkbox.
- Double-click the Windows.old folder to open it and view its contents, which include subdirectories such as Users, Program Files, Program Files (x86), and Windows that mirror your previous installation structure.
- To access your personal files from the previous installation, navigate to Windows.old > Users > [Your Username], where you’ll find familiar folders like Documents, Desktop, Downloads, Pictures, and Videos containing your previous data.
Expert Tip: Before browsing through Windows.old, take note of the folder’s creation date by right-clicking it and selecting Properties, as this helps you verify it corresponds to your most recent upgrade.
Retrieving specific files from the Windows.old folder
- Identify the specific files or folders you need to recover by navigating through the Windows.old directory structure, paying particular attention to the Users folder where most personal data resides.
- Select the files or folders you want to retrieve by clicking on them while holding the Ctrl key to select multiple items, or use Ctrl + A to select all items within a folder.
- Copy the selected items by right-clicking on them and choosing Copy from the context menu, or use the keyboard shortcut Ctrl + C to copy the files to your clipboard.
- Navigate to the destination location in your current Windows 11 installation where you want to restore these files, such as your new Documents folder or Desktop, by using the address bar or left sidebar in File Explorer.
- Paste the copied files into the destination folder by right-clicking in an empty space and selecting Paste, or use the keyboard shortcut Ctrl + V to complete the file transfer process.
- Verify that the files have been successfully copied by checking their file sizes and modification dates, ensuring they match the original files from your Windows.old folder before considering deletion of the old folder.
Remember: Some files may require administrator permissions to copy, in which case you’ll need to click “Continue” when prompted or run File Explorer as an administrator by right-clicking its icon and selecting “Run as administrator.”
Restoring Windows 11 from the old folder through system recovery
- Access Windows Settings by pressing Windows + I on your keyboard, or click the Start button and select the gear icon to open the Settings application.
- Navigate to the recovery options by clicking System in the left sidebar, then scrolling down and selecting Recovery from the list of system settings available.
- Locate the Go back option under Recovery options, which appears only if you’re within the 10-day rollback window and the Windows.old folder remains intact on your system.
- Click the Go back button next to “Previous version of Windows” to initiate the rollback process, which will restore your system to its state before the Windows 11 upgrade was installed.
- Follow the on-screen prompts that ask why you’re going back, provide feedback if desired, and confirm that you want to proceed with restoring your previous Windows installation from the old folder.
- Wait for the system to complete the restoration process, which typically takes 20 to 60 minutes depending on your hardware specifications and the amount of data being restored to your previous configuration.
- After the rollback completes and your system restarts, verify that your previous Windows version is running correctly and that your files and applications are accessible as they were before the upgrade.
Important Tip: Before initiating a rollback, ensure your device is connected to a power source and that you have backed up any new files created since upgrading to Windows 11, as these will not be preserved during the restoration process.
Troubleshooting common Windows.old folder issues in Windows 11
- The Windows.old folder is not visible in File Explorer even after enabling hidden items: Navigate to File Explorer Options by clicking the three-dot menu, selecting Options, then clicking the View tab and ensuring “Show hidden files, folders, and drives” is selected while “Hide protected operating system files” is unchecked, then click Apply and OK to save changes.
- Access denied errors when trying to copy files from Windows.old: Right-click the Windows.old folder, select Properties, navigate to the Security tab, click Advanced, then click Change next to the owner name, type your username, click Check Names, then OK, and check “Replace owner on subcontainers and objects” before clicking Apply to gain full access permissions.
- The Go back option is grayed out or missing from Recovery settings: This occurs when the 10-day rollback period has expired, the Windows.old folder has been manually deleted, or Disk Cleanup has removed it, in which case you’ll need to perform a clean installation of your previous Windows version using installation media if you want to downgrade.
- Insufficient disk space warnings when working with Windows.old: Check the folder size by right-clicking Windows.old and selecting Properties to see how much space it occupies, then consider moving recovered files to an external drive before deleting the folder, or extend the rollback period by opening Command Prompt as administrator and typing “DISM /Online /Set-OSUninstallWindow /Value:30” to extend it to 30 days.
How to delete the old Windows folder in Windows 11
- Open Windows Settings by pressing Windows + I, then navigate to System > Storage to access the storage management interface where you can view disk usage and cleanup options.
- Click on Temporary files in the storage breakdown list, which displays various categories of files that can be safely removed to free up disk space on your system drive.
- Scroll through the temporary files list until you find Previous Windows installation(s), which represents the Windows.old folder and displays the amount of disk space it currently occupies on your drive.
- Check the box next to Previous Windows installation(s) to mark it for deletion, ensuring you’ve already recovered any needed files since this action is permanent and cannot be undone through normal means.
- Click the Remove files button at the top of the Temporary files screen to initiate the deletion process, which will permanently remove the Windows.old folder and free up the associated disk space.
- Wait for Windows to complete the deletion process, which may take several minutes depending on the folder size, and verify the space has been reclaimed by checking your available storage in the Storage settings.
Suggestion: If you prefer using traditional tools, you can also delete Windows.old through Disk Cleanup by searching for “Disk Cleanup” in the Start menu, selecting your system drive, clicking “Clean up system files,” checking “Previous Windows installation(s),” and clicking OK to remove the folder.
Alternative method using Command Prompt for advanced users
- Open Command Prompt as administrator by searching for “cmd” in the Start menu, right-clicking on Command Prompt, and selecting Run as administrator from the context menu that appears.
- Type the command rd /s /q C:\Windows.old and press Enter to forcefully remove the Windows.old folder and all its contents without prompting for confirmation on each file or subdirectory.
- Wait for the command to execute completely, which may take several minutes without providing visual feedback, then type dir C:\ /a and press Enter to verify the Windows.old folder no longer appears in the directory listing.
- If you encounter permission errors, use the takeown command by typing takeown /f C:\Windows.old /r /d y followed by icacls C:\Windows.old /grant administrators:F /t to take ownership and grant full permissions before attempting the deletion command again.
The Windows.old folder serves as an essential safety mechanism during Windows upgrades, providing both a rollback option and access to files from your previous installation. By understanding its location at C:\Windows.old, knowing how to retrieve files from it, and learning the proper methods to delete it when no longer needed, you can confidently manage your Windows 11 system storage while maintaining access to important data during the transition period.