“My VPN keeps disconnecting on Windows 11 – what’s happening?”
I recently upgraded to Windows 11 24H2, and my VPN connection has become unreliable. Sometimes it won’t connect at all, other times it disconnects randomly during meetings. I’ve tried reinstalling the VPN client, but the problems persist. Our team relies on secure connections to access company resources, and these disruptions are affecting productivity. What steps can I take to troubleshoot and fix these VPN connection issues in Windows 11?
Common Windows 11 VPN problems and their impact
VPN connection issues in Windows 11 have become increasingly common, especially after the 24H2 update. These problems range from complete connection failures to intermittent disconnections that disrupt workflow. For businesses, reliable VPN access is essential for remote workers accessing internal resources, maintaining security protocols, and ensuring productivity. Windows 11 includes built-in VPN capabilities and supports third-party VPN solutions, but configuration conflicts, network settings, and system updates can all contribute to connection problems.
Resolving Windows 11 VPN connection issues effectively
This guide will walk you through a systematic approach to diagnose and fix VPN connection problems in Windows 11. We’ll cover troubleshooting steps for both built-in Windows VPN connections and third-party VPN clients. The solutions range from basic network resets to more advanced configuration adjustments. These steps assume you have administrator access to your Windows 11 device and basic knowledge of network settings. Most issues can be resolved without advanced technical expertise.
Troubleshooting for Windows 11 VPN blocking issues
Note: Before diving into complex solutions, ensure you’ve properly configured your VPN by following our detailed VPN setup guide for Windows 11. Many connection issues stem from incorrect initial configuration.
- Verify your internet connection is working properly by opening a web browser and visiting a website to ensure your basic connectivity is functioning before attempting to troubleshoot the VPN specifically.
- Restart your networking components by right-clicking the network icon in the taskbar, selecting “Network and Internet settings,” then clicking on “Advanced network settings” and turning off both Wi-Fi and Ethernet, waiting 30 seconds, and turning them back on.
- Check if Windows 11 updates are pending by going to Settings > Windows Update and installing any available updates, as outdated system files can sometimes interfere with VPN functionality.
- Reset the Windows Network Stack by opening Command Prompt as administrator and executing these commands in sequence:
netsh winsock reset netsh int ip reset ipconfig /release ipconfig /renew ipconfig /flushdns - Verify VPN server address and credentials by opening VPN settings (Settings > Network & Internet > VPN) and checking that the server address is correct and your username/password combination is valid.
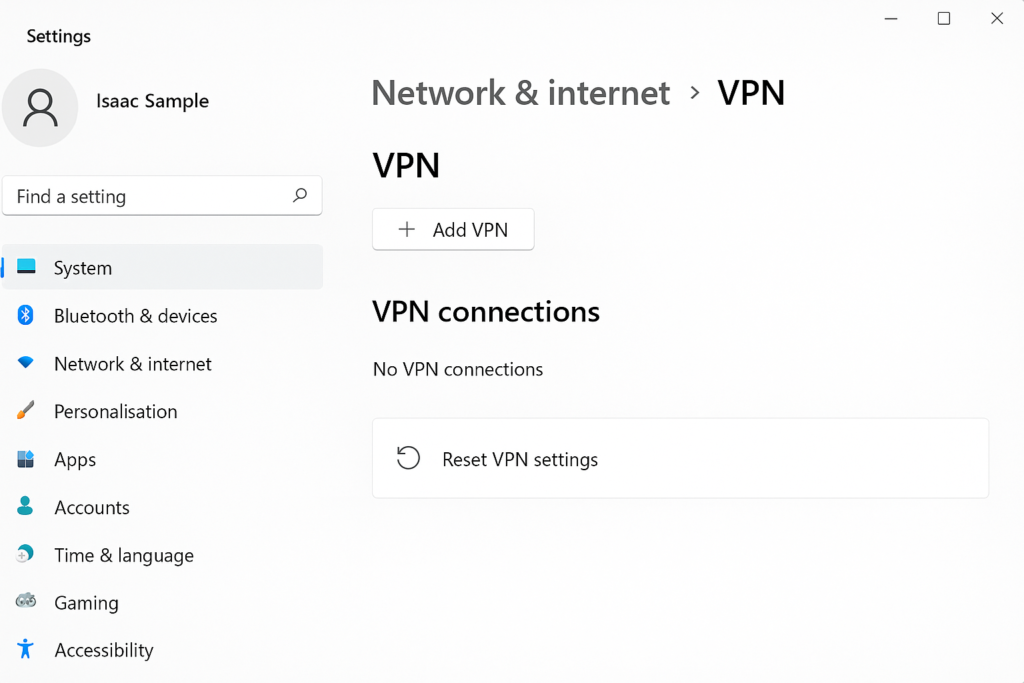
- Reset VPN settings in Windows 11 by going to Settings > Network & Internet > VPN, selecting your VPN connection, clicking “Remove,” and then setting up the connection again with fresh configuration details.
- Check for VPN client updates if you’re using a third-party VPN solution, as outdated clients may have compatibility issues with Windows 11 24H2.
- Temporarily disable Windows Defender Firewall by going to Control Panel > System and Security > Windows Defender Firewall > Turn Windows Defender Firewall on or off, to determine if it’s blocking your VPN connection.
- Review VPN protocol settings in your VPN client or Windows VPN settings, trying alternative protocols like IKEv2, OpenVPN, or WireGuard if your current protocol is experiencing issues.
- Adjust MTU settings if you’re experiencing connection drops by opening Command Prompt as administrator and using the “ping” command with different packet sizes to find the optimal MTU value for your connection.

Remember: Keep a record of any changes you make during troubleshooting so you can revert them if needed. This is especially important when modifying network settings or registry values.
Solving Windows 11 24H2 VPN connection problems
- If you receive “Unable to establish the VPN connection” errors, check your credentials and server address first, then try creating a new VPN connection with the same settings, as the connection profile might be corrupted.
- When experiencing frequent disconnections after the Windows 11 24H2 update, try adjusting your VPN client’s connection settings to use UDP instead of TCP protocol, which can provide more stability on some networks.
- For “VPN Service is not available” messages, restart the related Windows services by opening Services (Win+R, type “services.msc”), locating services like “Remote Access Connection Manager” and “Secure Socket Tunneling Protocol Service,” right-clicking each, and selecting Restart.
- If your VPN connects but you can’t access specific network resources, check your VPN’s split tunneling settings, which might be incorrectly configured after the Windows 11 update, preventing certain traffic from going through the VPN tunnel.
- If you’re experiencing slow performance or connection drops, try clearing temporary files that might be affecting system performance. Learn how to remove temporary files in Windows 11 to potentially improve VPN stability.
- When experiencing slow VPN performance in Windows 11, try changing your DNS settings to use public DNS servers like Google (8.8.8.8, 8.8.4.4) or Cloudflare (1.1.1.1, 1.0.0.1) instead of your ISP’s default servers.
