“How can I organize a professional virtual event where I control attendee registration, have presentation tools, and gather post-event analytics using Microsoft Teams?”
As organizations embrace hybrid work models, the need for professional virtual events has grown substantially. Microsoft Teams webinars offer a robust solution for hosting structured online gatherings with registration capabilities, presenter controls, and attendee management features not available in standard meetings.
Understanding the benefits of setting up a webinar in Teams
Many organizations struggle with delivering professional virtual events that balance accessibility with control. Microsoft Teams webinars solve this by offering registration forms, attendee management, presenter roles, and post-event analytics.
Unlike regular Teams meetings, webinars provide structured presenter-to-audience experiences designed for larger groups while maintaining engagement through interactive features like polls, Q&A, and chat moderation. These tools help create a more professional and controlled environment for your virtual events.
Microsoft Teams webinar setup guide overview
This tutorial will guide you through creating and configuring a Microsoft Teams webinar from start to finish. We’ll cover enabling webinar functionality, setting up registration, configuring presenter options, and managing the live event. You’ll need a Microsoft 365 account with Teams license that includes webinar capabilities (typically E3/E5, A3/A5, or Business Standard/Premium plans).
Step-by-step process for creating a webinar on Teams
Enabling webinar functionality in your Teams environment
- Navigate to the Microsoft Teams admin center by signing into admin.teams.microsoft.com with your administrator credentials to ensure webinars are enabled for your organization.
- Select “Meetings” from the left navigation menu, then choose “Meeting policies” to view your organization’s meeting settings configuration options.
- Look for the “Allow scheduling of webinars” setting and ensure it’s turned on for the relevant policy assigned to users who will create webinars in your organization.
- Consider reviewing related settings like “Who can register” and “Allow attendee registration information to be visible to users in your organization” for privacy control.
- Remember that policy changes may take several hours to propagate throughout your Microsoft 365 tenant before becoming fully effective for all users.

Setting up your first webinar in Microsoft Teams
- Open Microsoft Teams and click on the “Calendar” icon in the left navigation bar to access your scheduling options and create new meeting events.
- Select “New meeting” dropdown and choose “Webinar” option (if you don’t see this option, check that webinars are enabled for your account or contact your administrator).
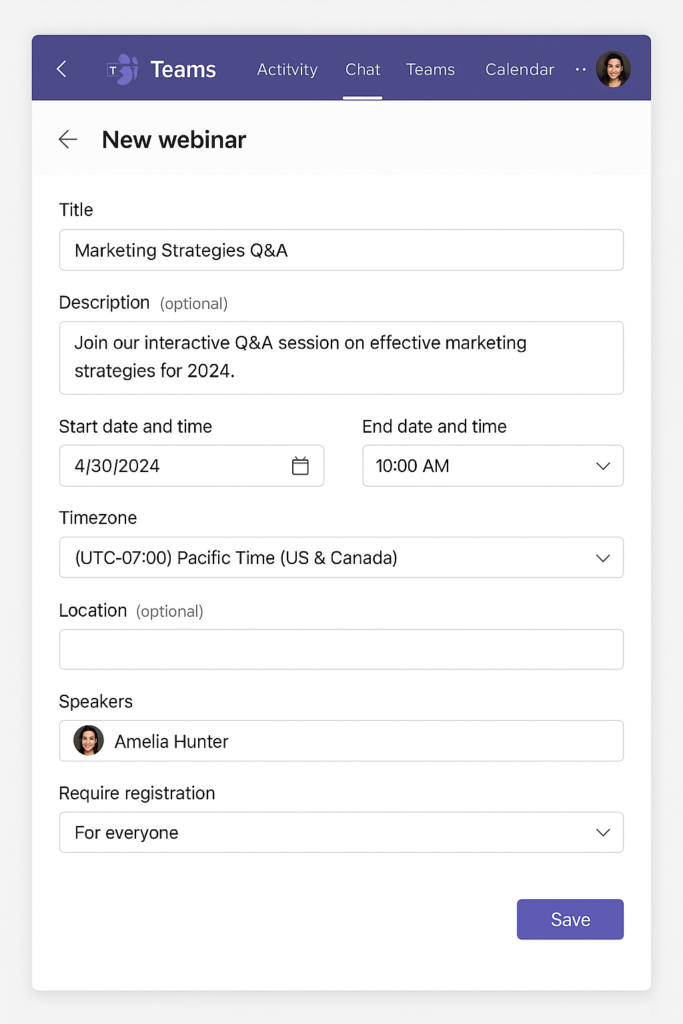
- Enter essential webinar details including title, date, time, and description that clearly communicates the purpose and value of your virtual event to potential attendees.
- Under “Require registration,” toggle this option on to collect attendee information and control access to your webinar through the registration process.
- Customize your registration form by clicking “Registration form” to add specific questions, company fields, or other information you want to collect from registrants.
Running a webinar in Teams with integrated engagement tools
- Before starting your webinar, it’s crucial to test your connection performance and audio-visual setup to ensure a smooth presentation experience. Join at least 15-30 minutes early to verify all systems are working properly and your presentation materials are ready to share.
- Designate co-organizers or presenters by clicking on “Meeting options” before the webinar or by changing participant roles during the event as needed.
- Use the Q&A feature to manage audience questions in an organized manner rather than through the chat function for more structured interaction.
- Leverage polls to increase engagement by preparing them in advance through the Forms integration or creating them on the fly during your presentation.
- Remember to record the webinar for those who couldn’t attend by clicking the three-dot menu and selecting “Start recording” when your event begins.
Solving common Teams webinar issues
- If webinar creation options aren’t available, verify your Microsoft 365 license includes webinar functionality and check with your administrator to ensure the feature is enabled in Teams admin settings for your account.
- When attendees report registration issues, consider checking if you’ve restricted registration to specific domains or if you’ve reached the maximum number of allowed registrants for your license tier.
- For presentation sharing problems during the webinar, try closing unnecessary applications, updating your Teams client to the latest version, or switching from wireless to wired internet connection for more stable performance.
- If attendees cannot access the webinar despite registration, confirm they’re using the same email address they registered with and check your lobby settings to ensure proper attendee admission.
- When experiencing audio or video quality issues, request attendees and presenters to turn off video when not speaking and consider using Microsoft’s network testing tool before important webinars.
