Are you experiencing slow performance, sign-in problems, or strange behavior in Microsoft Teams? A common question I hear from users is: “My Teams client keeps freezing during meetings and messages aren’t syncing properly. Would clearing the Teams cache help fix these issues without losing my data?”
Clearing the Teams cache to fix system performance issues
Microsoft Teams stores temporary data locally on your device to improve load times and provide offline functionality. Over time, this cache can become corrupted or bloated, leading to various performance issues like teams not syncing with desktop. Clearing the Teams cache is often a quick fix that resolves many common problems without requiring IT support This process removes temporary files while preserving your important conversations and files stored in the cloud.intervention.
Microsoft Teams cache cleanup options
Before proceeding, ensure Teams is completely closed on your device. The cache clearing process differs slightly depending on your operating system, but the concept remains the same. You’ll need to locate and delete specific cache folders that Teams uses to store temporary data. This operation takes only a few minutes and can significantly improve your Teams experience.
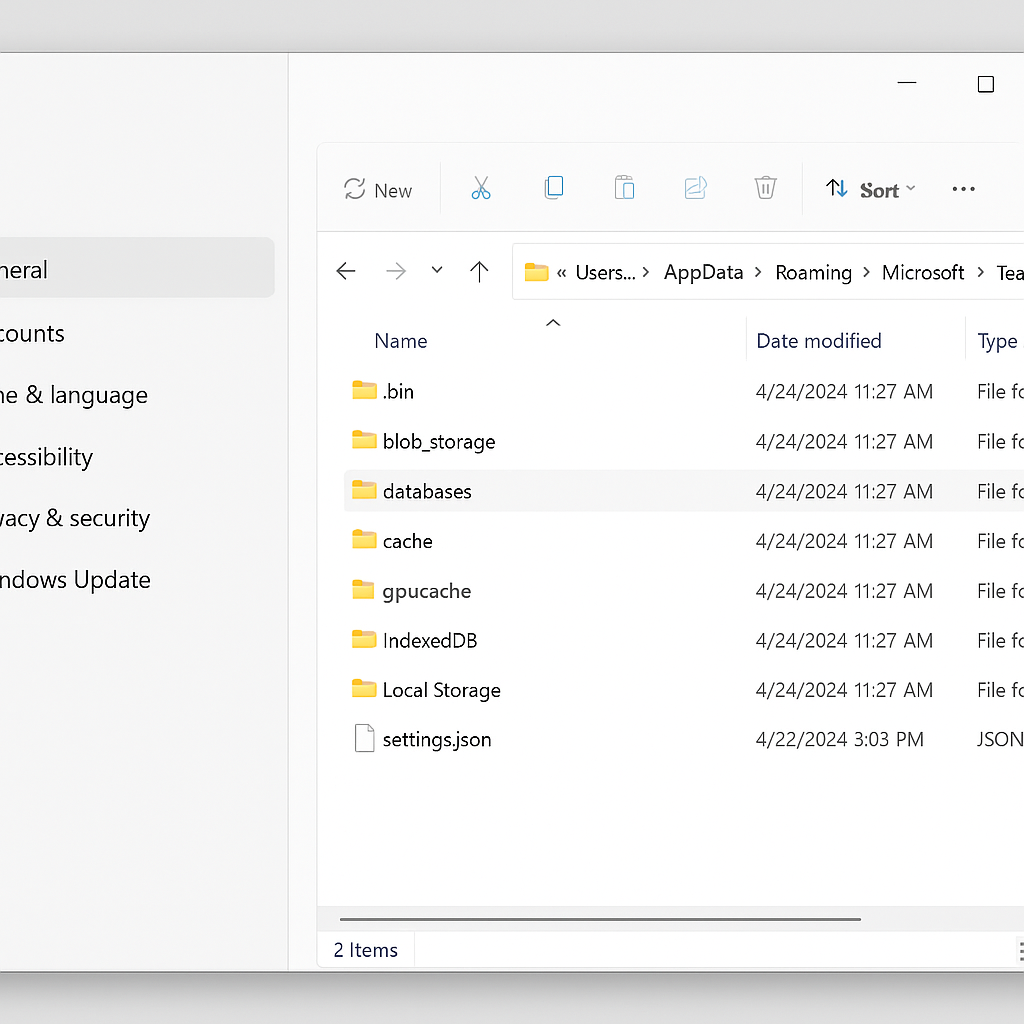
Manually delete Microsoft Teams cache files
For Windows Users:
- Close Microsoft Teams completely by right-clicking the Teams icon in the system tray and selecting “Quit” to ensure the application isn’t running in the background.
- Press Windows key + R to open the Run dialog box, which provides quick access to specific folders on your computer.
- Type %appdata%\Microsoft\Teams into the Run dialog and press Enter to open the Teams application data folder containing various cache files.
- Within this folder, locate and delete the following cache directories: Application Cache, Blob Storage, Cache, databases, GPUCache, IndexedDB, Local Storage, and tmp.
- Navigate back to the Run dialog (Windows key + R) and enter %localappdata%\Microsoft\Teams to access additional Teams cache files stored in a different location.
- Delete the same cache folders from this location if they exist, as Teams may store cache data in multiple locations depending on your configuration.
- Restart your computer to ensure all Teams processes are completely terminated before launching the application again.
- Relaunch Microsoft Teams and sign in with your credentials to test if the performance issues have been resolved.
For Mac Users:
- Quit Microsoft Teams by right-clicking the Teams icon in the Dock and selecting “Quit” or using Command+Q when Teams is active.
- Open Finder and click on the “Go” menu while holding the Option key to reveal the Library folder, which is hidden by default in macOS.
- Navigate to ~/Library/Application Support/Microsoft/Teams/ to access the Teams application data on your Mac.
- Similar to Windows, delete the following folders: Application Cache, Blob Storage, Cache, databases, GPUCache, IndexedDB, Local Storage, and tmp.
- Restart your Mac to clear any remaining Teams processes that might be running in the background.
- Launch Teams again and sign in to verify if clearing the cache has resolved your issues.
Reset Microsoft Teams cache using command-line methods
Using PowerShell (Windows):
- Close Teams completely including the background process by checking Task Manager and ending any Teams-related processes.
- Open PowerShell as administrator by right-clicking the Start button and selecting “Windows PowerShell (Admin)” or searching for PowerShell in the Start menu.
- Copy and paste the following command to remove Teams cache directories in one operation: powershell
Get-ChildItem -Path $env:APPDATA\Microsoft\Teams | Where-Object {$_.Name -in ('Application Cache','Blob Storage','Cache','databases','GPUCache','IndexedDB','Local Storage','tmp')} | ForEach-Object {Remove-Item $_.FullName -Recurse -Force}- The command will automatically locate and remove all Teams cache folders without requiring manual navigation through File Explorer.
- Restart your computer after the command completes to ensure all Teams processes are terminated properly.
- Launch Teams again to test if performance has improved after clearing the cache programmatically.
Teams Cache Management for Different Deployment Types
Teams Classic vs New Teams
The new Microsoft Teams app (rolled out in 2023-2024) stores cache in slightly different locations. For New Teams on Windows 11 or 10, also check %localappdata%\Packages\MSTeams_8wekyb3d8bbwe\LocalCache\Microsoft\MSTeams for additional cache files that may need clearing.
Teams Web App Cache
If you primarily use Teams through your web browser, clear your browser’s cache instead. In Chrome or Edge, press Ctrl+Shift+Delete, select “Cached images and files,” and choose the appropriate time range. This resolves similar performance issues for web-based Teams usage.
Teams Mobile App
On mobile devices, clearing Teams cache requires going to your device’s Settings > Apps > Microsoft Teams > Storage > Clear Cache (Android) or Settings > General > iPhone Storage > Teams > Offload App (iOS).
Common issues after clearing Teams cache on new installations
- If Teams fails to launch after clearing the cache, try running the Teams installer again which can rebuild necessary components that might have been accidentally removed during cache cleanup.
- When encountering sign-in problems after cache clearing, verify your network connection and try signing in with your browser first to ensure your credentials are working properly with Microsoft 365 services.
- For persistent issues where Teams shows a blank or frozen screen after cache clearing, consider completely uninstalling Teams and reinstalling it from the official Microsoft download page rather than from the Microsoft Store version.
Pro tip: Consider scheduling regular Teams cache clearing as part of your monthly maintenance routine to prevent performance issues before they impact your productivity.
Treat cache clearing as a scoped repair, not routine maintenance
Teams cache stores local application data that helps the client start and display content. Clearing it can force a rebuild, but it does not fix server-side permissions, policies, deleted messages, or a Microsoft 365 outage. First reproduce the issue in Teams for web. If the browser shows the same failure, investigate the account, content, network, or service before deleting local data.
Save work and close Teams completely
Copy any unsent message drafts or meeting notes that are not safely stored. Sign out when possible, then quit Teams and confirm that no Teams processes remain. On Windows, prefer the supported Apps settings repair or reset options for the installed Teams package. On macOS, use Microsoft’s current client troubleshooting guidance or your organization’s managed support process.
Avoid deleting paths copied from instructions for an older Teams generation. Current Teams packaging and storage can differ, and removing the wrong folder can affect another app or account.
Verify what the reset changed
After repair or reset, restart the computer, open Teams, and sign in to the correct organization. Allow the client time to rebuild local data. Test the exact failed action, such as loading one chat, opening a channel, or joining a meeting. Confirm notifications and device settings because some local preferences may need review.
If the issue returns immediately, record the Teams version, operating system, affected feature, web-client result, and time of failure. On a managed device, ask IT to inspect application-control, proxy, identity, and service-health evidence rather than repeating cache deletion. A good cache test has a clear before-and-after symptom; clearing it every week without a reproducible problem only hides the real cause and creates unnecessary sign-in and configuration work.
Keep the browser comparison available during testing so you can tell whether the cloud content changed while the desktop client rebuilt its state.