Opening large CSV files in Excel without performance issues
“I have a 6GB CSV file with millions of rows that I need to analyze, but Excel keeps crashing when I try to open it. How can I work with such large datasets without losing data or experiencing system freezes?”
Converting large CSV to Excel format
Excel has inherent limitations when working with massive datasets, particularly CSV files exceeding 1GB or containing more than 1,048,576 rows. The largest CSV file size that Excel can handle effectively depends on your system’s memory and processing power, but performance typically degrades significantly with files over 100MB.For users experiencing similar challenges with file management, our guide on how to show file extensions in Windows 11 file explorer can help you better identify and organize your data files before importing them into Excel.
Today we demonstrate how to import, convert, and manage large CSV files using Excel’s built-in tools, Power Query, and alternative approaches. You’ll learn to split oversized files, optimize memory usage, and leverage Excel’s data connection features to work with datasets that would otherwise crash the application.
Note that you will sufficient system RAM (8GB minimum recommended), and administrative permissions to modify Excel settings if needed.
Expert Tip: Before attempting to open any CSV file larger than 500MB, ensure you have at least 4 times that amount of free RAM available, as Excel loads the entire dataset into memory.
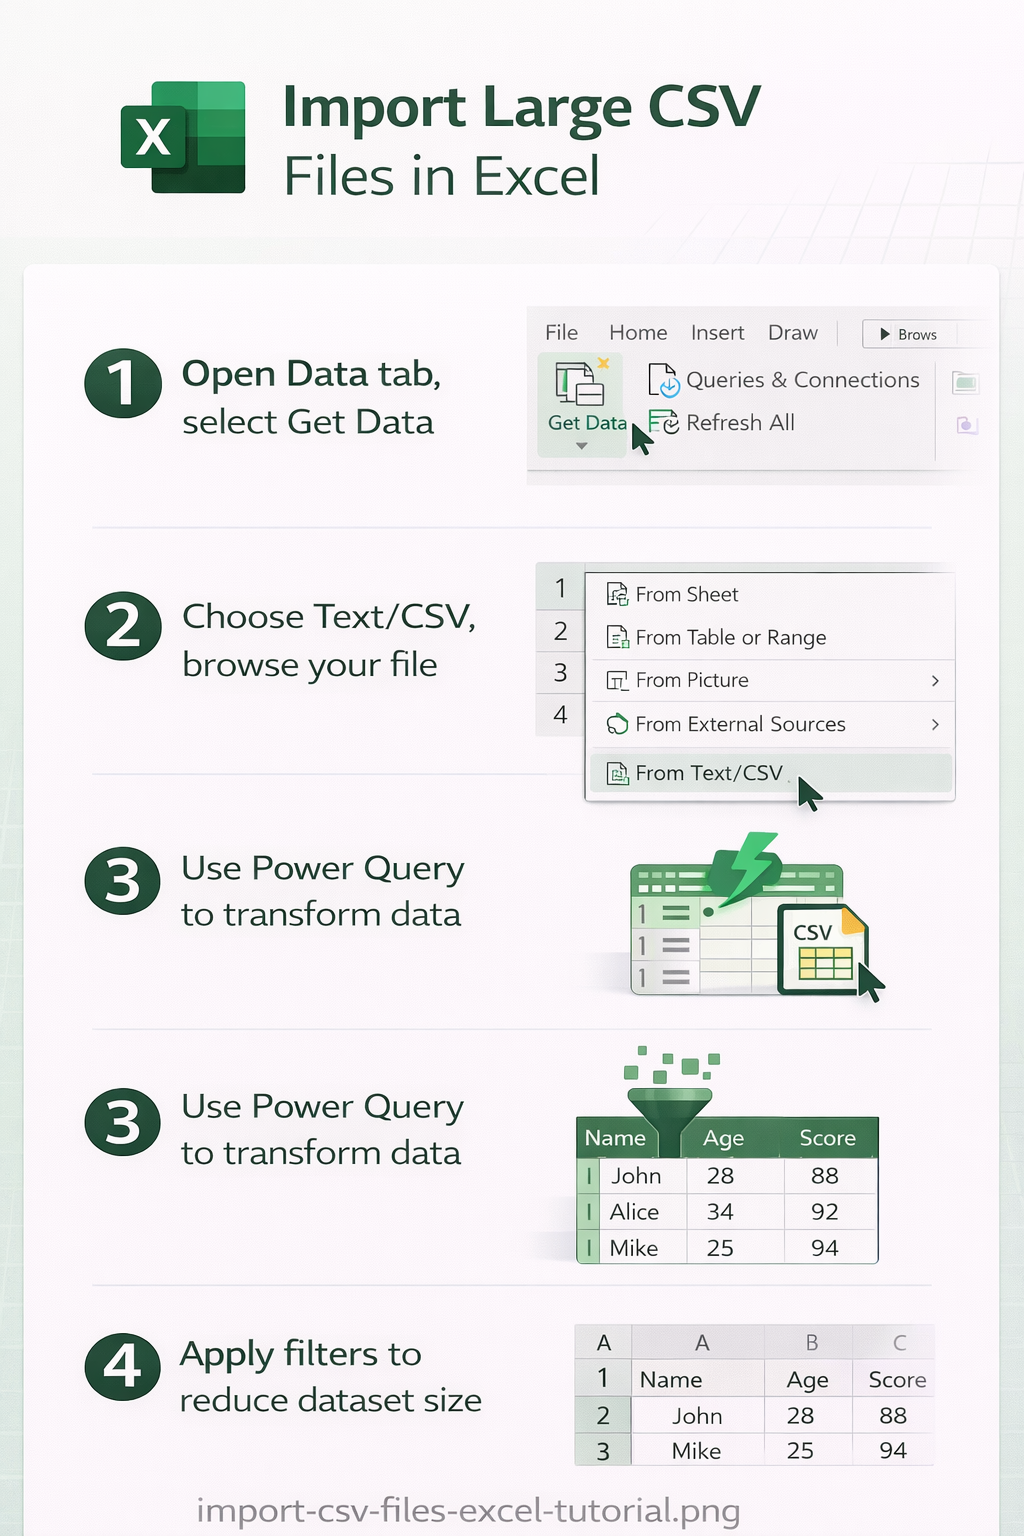
Working with large CSV files using Power Query
Opening CSV files through Power Query for better performance
- Navigate to the Data tab in Excel and select “Get Data” from the ribbon, then choose “From File” and click “From Text/CSV” to access the import wizard.
- Browse to your large CSV file location and select it, which will open the Power Query preview window showing the first 200 rows of your dataset without loading the entire file into memory.
- Review the data preview to ensure column headers are detected correctly and data types are appropriate, making any necessary adjustments using the dropdown arrows in each column header.
- Click “Transform Data” instead of “Load” to open the Power Query Editor, where you can apply filters, remove unnecessary columns, or split the data before importing it into Excel.
- Use the “Remove Columns” feature to eliminate any fields you don’t need for analysis, as this significantly reduces memory usage and improves performance when working with large datasets.
- Apply filters to reduce row count by clicking the dropdown arrow in any column and selecting only the data ranges you need for your current analysis task.
Converting large CSV to Excel workbook format
- After transforming your data in Power Query Editor, click “Close & Load To” in the Home tab to specify how you want to load the data into Excel.
- Select “Table” as the load option and choose “Existing worksheet” if you want to place the data in a specific location, or “New worksheet” for a fresh sheet.
- For files approaching Excel’s row limit, choose “Only Create Connection” to establish a data connection without immediately loading all rows into the worksheet.
- Save your workbook in Excel format (.xlsx) to preserve the data connection and transformations, allowing you to refresh the data without re-importing the entire CSV file.
- Use the “Load To” options to create multiple tables from different filtered views of the same large CSV file, effectively splitting your data across multiple worksheets.
How to open large text files exceeding Excel’s row limits
- When dealing with CSV files containing more than 1 million rows, use Power Query’s “Keep Top Rows” or “Keep Bottom Rows” features to work with manageable portions of your dataset.
- Create multiple queries from the same CSV file, each filtering different date ranges or categories, then load each query to separate worksheets within the same workbook.
- Utilize the “Group By” function in Power Query to aggregate large datasets into summary tables that fit within Excel’s limitations while preserving analytical value.
- For files exceeding 6GB, consider using Power Query’s “Folder” connector to split your large CSV into multiple smaller files first, then combine them using the “Append Queries” feature.
- Enable “Fast Data Load” in Excel options under Advanced settings to improve performance when importing large datasets, though this may reduce some formatting options.
Important Tip: Excel’s 32-bit version has stricter memory limitations than the 64-bit version, so ensure you’re using 64-bit Excel when working with files larger than 2GB.
Troubleshooting issues when opening massive CSV datasets
- Excel crashes or freezes during import: Close other applications to free up system memory, increase virtual memory settings in Windows, and try importing smaller portions of the file using Power Query filters to reduce memory load.
- “File too large” error message appears: Split your CSV file using command-line tools or text editors before importing, or use Power Query’s sampling features to work with representative portions of your complete dataset.
- Data appears corrupted or truncated after import: Verify that your CSV file uses consistent delimiters throughout, check for embedded line breaks within data fields, and ensure text qualifiers are properly formatted in the original file.
- Performance becomes extremely slow after loading data: Disable automatic calculation in Excel formulas, remove unnecessary formatting from imported data, and consider using Excel’s “Data Model” feature to handle large datasets more efficiently than standard worksheets.