Your monthly newsletter needs to reach 500 clients with personalized addresses and account details. Word mail merge with Excel data makes this possible in minutes rather than hours of manual copying and pasting.
Connecting an Excel spreadsheet as your data source transforms Word’s mail merge into a powerful automation tool. Whether you’re creating invoices, certificates, or mass correspondence, this method handles personalized content at scale.
Setting Up Excel Data Source for Word Mail merge
Your Excel spreadsheet structure determines merge field quality. Create column headers that match the information you want to insert into your Word document template. While working through these setting up excel configuration steps on my primary workstation, I noticed that the setting persists even after software updates install automatically in the background.
Prepare Excel Recipient List Structure
Open Excel and organize your data with clear column headers in the first row. Each column becomes a merge field in Word, so use descriptive names like First_Name, Last_Name, Company, and Address instead of generic labels.
Ensure every row contains complete information for each recipient. Empty cells create blank spaces in your final documents, disrupting professional formatting. Save the spreadsheet in .xlsx format for optimal compatibility with Word’s mail merge wizard. You can also integrate spreadsheet data directly for more advanced document needs.
Connect Excel Spreadsheet to Word Document
Launch Word and create your document template. Navigate to Mailings >> Start Mail Merge >> Step-by-Step Mail Merge Wizard to begin the connection process.
- Select Letters as your document type
- Choose Use an existing list for your recipient data source
- Click Browse and locate your Excel spreadsheet
- Select the worksheet containing your data when prompted
- Verify the column headers appear correctly in the preview
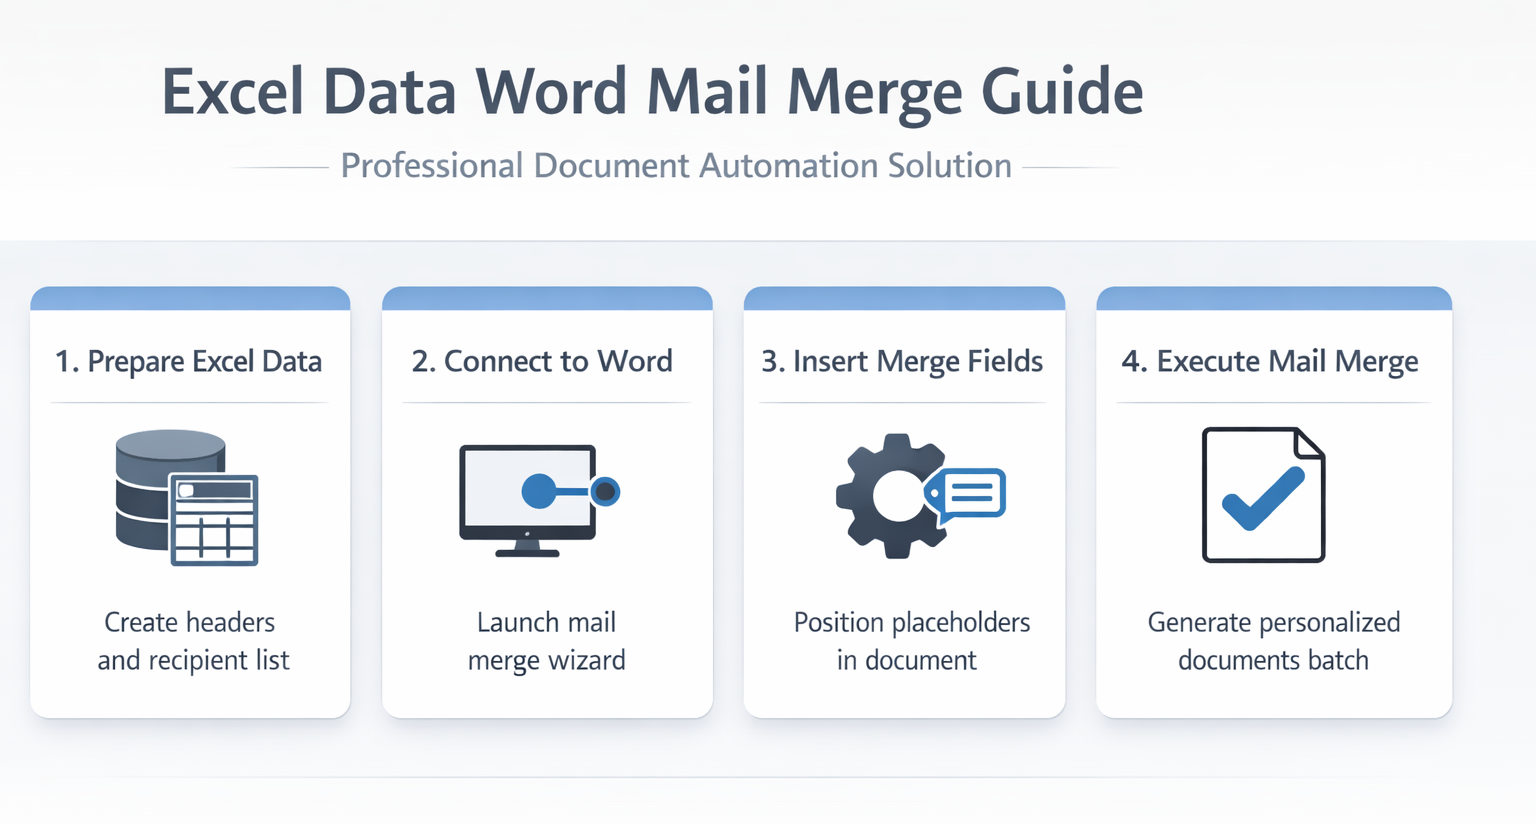
Configuring Word Mail Merge Fields
Merge fields act as placeholders that Word replaces with actual Excel data during the merge process. Strategic field placement ensures professional document formatting.
Insert Excel Data Fields into Word Template
Position your cursor where you want personalized information to appear. Click Insert Merge Field from the Mailings tab to see available Excel columns as selectable options.
Insert fields using natural spacing and punctuation. For addresses, place fields on separate lines: First_Name Last_Name on line one, Address on line two, City, State ZIP on line three. Word maintains this formatting across all merged documents.
Preview and Test Mail Merge Results
Click Preview Results to see how Excel data populates your Word template. Use the navigation arrows to cycle through different recipients and verify field placement looks correct.
- Check for proper spacing between merge fields
- Verify punctuation appears correctly around merged data
- Confirm all Excel columns are pulling data as expected
- Test with recipients that have longer or shorter names to check formatting
Completing Word Mail Merge Process
The final merge creates individual documents for each Excel row. Word offers several output options depending on your distribution needs. During my testing on Microsoft 365 Apps for Business, Windows 11, this particular completing word mail configuration applied correctly on the first attempt without requiring any troubleshooting or additional adjustments to complete the process.
Execute Excel to Word Mail Merge
Click Finish & Merge to access completion options. Edit Individual Documents creates a new Word file with separate pages for each recipient, allowing manual review before printing or saving.
Print Documents sends everything directly to your printer, while Send Email Messages requires Outlook setup for electronic distribution. Choose the method that matches your workflow requirements.
Troubleshoot Common Mail Merge Issues
Excel connection problems often stem from file format conflicts or worksheet selection errors. Address these common issues:
- Verify the Excel file isn’t open in another program when connecting
- Try selecting a different worksheet from the dropdown menu
- Ensure headers contain no special characters or spaces
- Check that column names are unique across the spreadsheet
- Convert text files properly if importing from other sources
Quick answers to common questions
Can you use Excel as data source for Word mail merge?
Yes, Excel spreadsheets work as primary data sources for Word mail merge. Save your Excel file in .xlsx format and ensure column headers are in the first row for optimal compatibility.
What happens if Excel data changes after starting mail merge?
Word maintains a live connection to your Excel file. Save changes in Excel, then click **Refresh** in Word’s mail merge wizard to update recipient data without restarting the process.
How many recipients can Word mail merge handle from Excel?
Word can process thousands of Excel rows in mail merge, but performance slows with very large datasets. For optimal results, keep recipient lists under 5,000 entries and split larger databases into multiple merge operations.
Mail merge transforms time-consuming personalization tasks into automated workflows. Start with small test batches to verify formatting before processing complete recipient lists. Your Excel data structure directly impacts merge quality, so invest time in clean, well-organized spreadsheets for professional results.