“I need to disconnect my personal OneDrive account from my work laptop running Windows 11, but I’m worried about losing my files. How can I safely unlink OneDrive without affecting my local documents?” This common scenario affects many users who need to separate personal and professional cloud storage or switch to different Microsoft 365 accounts on their Windows 11 devices.
Problem overview and Onedrive account separation solution
Organizations frequently require employees to use company-managed OneDrive accounts, creating conflicts when personal OneDrive accounts remain linked to work devices. Additionally, users switching between different Microsoft 365 subscriptions or troubleshooting sync issues need reliable methods to disconnect OneDrive accounts without data loss.
We will briefly go through three methods to turn off OneDrive on Windows 11 while preserving your local files and maintaining system stability. You will learn to disconnect through OneDrive settings, Windows account management, and complete account removal procedures. The process requires local administrator access and approximately 10-15 minutes to complete, depending on your current sync status and file count.
Remove OneDrive from Windows 11 File Explorer
The primary method involves using OneDrive’s built-in account management features to safely disconnect your account while maintaining local file access.
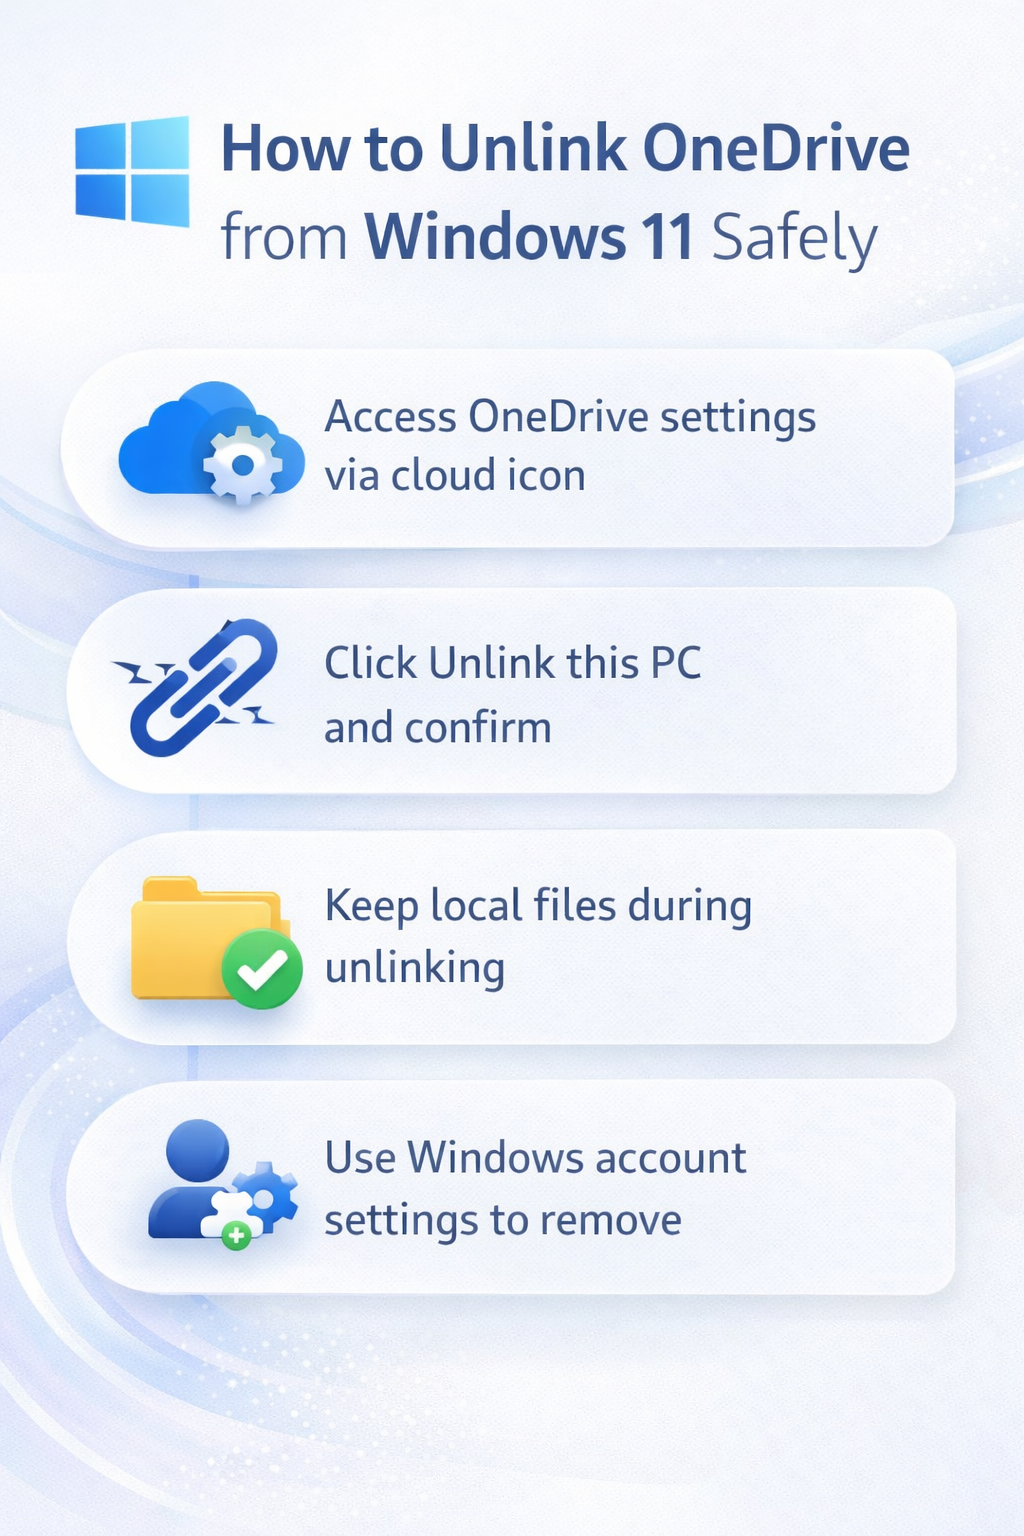
- Right-click the OneDrive cloud icon in your Windows 11 system tray located in the bottom-right corner of your screen near the clock and notification area.
- Select “Settings” from the context menu to open the OneDrive configuration window where you can manage account connections and sync preferences.
- Navigate to the “Account” tab within the OneDrive Settings dialog box to access your current account information and unlinking options.
- Click the “Unlink this PC” button located beneath your account details to initiate the disconnection process for your current OneDrive account.
- Confirm your decision by clicking “Unlink account” in the confirmation dialog that appears, acknowledging that this action will stop syncing files between your local device and OneDrive cloud storage.
Preserving local files during disconnection
- Choose “Keep files on this PC” when prompted about your synchronized OneDrive files to maintain local copies of all documents, photos, and folders currently stored in your OneDrive directory.
- Wait for the unlinking process to complete, which may take several minutes depending on your current sync status and the number of files being processed.
- Verify that your local OneDrive folder remains accessible through File Explorer after the disconnection process completes, ensuring your files remain available for offline use.
Expert Tip: Before unlinking, create a backup of critical files to an external drive or different local folder to prevent any potential data loss during the disconnection process.
Windows account management approach
Alternative unlinking methods involve Windows 11’s built-in account management system for users who cannot access OneDrive settings directly.
- Open Windows Settings by pressing Windows key + I or clicking the Start button and selecting the Settings gear icon from the power menu options.
- Navigate to “Accounts” in the left sidebar and select “Email & accounts” to view all Microsoft accounts currently linked to your Windows 11 system.
- Locate your OneDrive-associated Microsoft account in the accounts list and click on it to expand the available management options for that specific account connection.
- Select “Remove” next to the account you want to disconnect from OneDrive services, which will unlink the account from all Microsoft services including OneDrive file synchronization.
- Confirm the removal by clicking “Yes” in the confirmation prompt, understanding that this action will disconnect the account from OneDrive and other Microsoft 365 services on this device.
Complete OneDrive removal process
- Open the Start menu and type “Add or remove programs” to access the Windows 11 applications management interface where you can uninstall OneDrive entirely.
- Search for “Microsoft OneDrive” in the installed programs list and click on it to reveal the available management options including modification and removal.
- Click “Uninstall” to completely remove OneDrive from your Windows 11 system, which will eliminate all sync capabilities and local OneDrive integration features.
- Follow the uninstallation wizard prompts to complete the removal process, ensuring that all OneDrive components are properly removed from your system registry and file structure.
- Restart your computer after uninstallation to ensure all OneDrive services and background processes are completely terminated and removed from system memory.
Troubleshooting common OneDrive removal issues
- OneDrive continues syncing after unlinking attempts often indicates background services remain active, requiring you to end OneDrive processes through Task Manager and restart the unlinking procedure.
- Missing “Unlink this PC” option typically occurs when OneDrive is managed by organizational policies, necessitating contact with your IT administrator for proper account disconnection procedures.
- Files disappearing from local folders during unlinking usually results from choosing “Remove files” instead of “Keep files,” requiring you to restore files from OneDrive recycle bin or recent backups.
- OneDrive icon persisting in system tray after unlinking indicates incomplete disconnection, resolved by manually ending OneDrive.exe processes through Task Manager and clearing OneDrive startup entries from Windows settings.
Explore how to exclude folders from OneDrive to better manage storage and sync options.
Consider learning to move files between Windows 11 devices efficiently to optimize your work environment.