“My Windows 11 PC has become noticeably sluggish over the past few weeks. Applications take forever to open, switching between programs causes lag, and even simple tasks feel delayed. I’ve noticed my startup time is particularly slow. Are there specific settings or tweaks I can apply to optimize Windows 11 and restore its performance without upgrading my hardware?”
Optimize Windows 11 sluggish performance
Today we will guide you through practical methods to enhance your Windows 11 performance. We’ll focus on system settings adjustments, startup optimization, and resource management techniques. These solutions assume you’re using a standard Windows 11 installation with administrator privileges. No third-party software is required for these optimizations, as we’ll leverage Windows’ built-in tools.
Performance issues in Windows 11 can significantly impact your daily productivity. If you’re experiencing slow boot times, you may want to check out our guide on how to fix Windows 11 slow boot time. Additionally, managing startup programs is crucial – learn how to stop startup programs in Windows 11 for better performance.
Windows 11 performance tweaks step-by-step implementation
Clean up startup programs to fix slow startup in Windows 11
- Open Task Manager by right-clicking on the taskbar and selecting “Task Manager” or by pressing Ctrl+Shift+Esc on your keyboard.
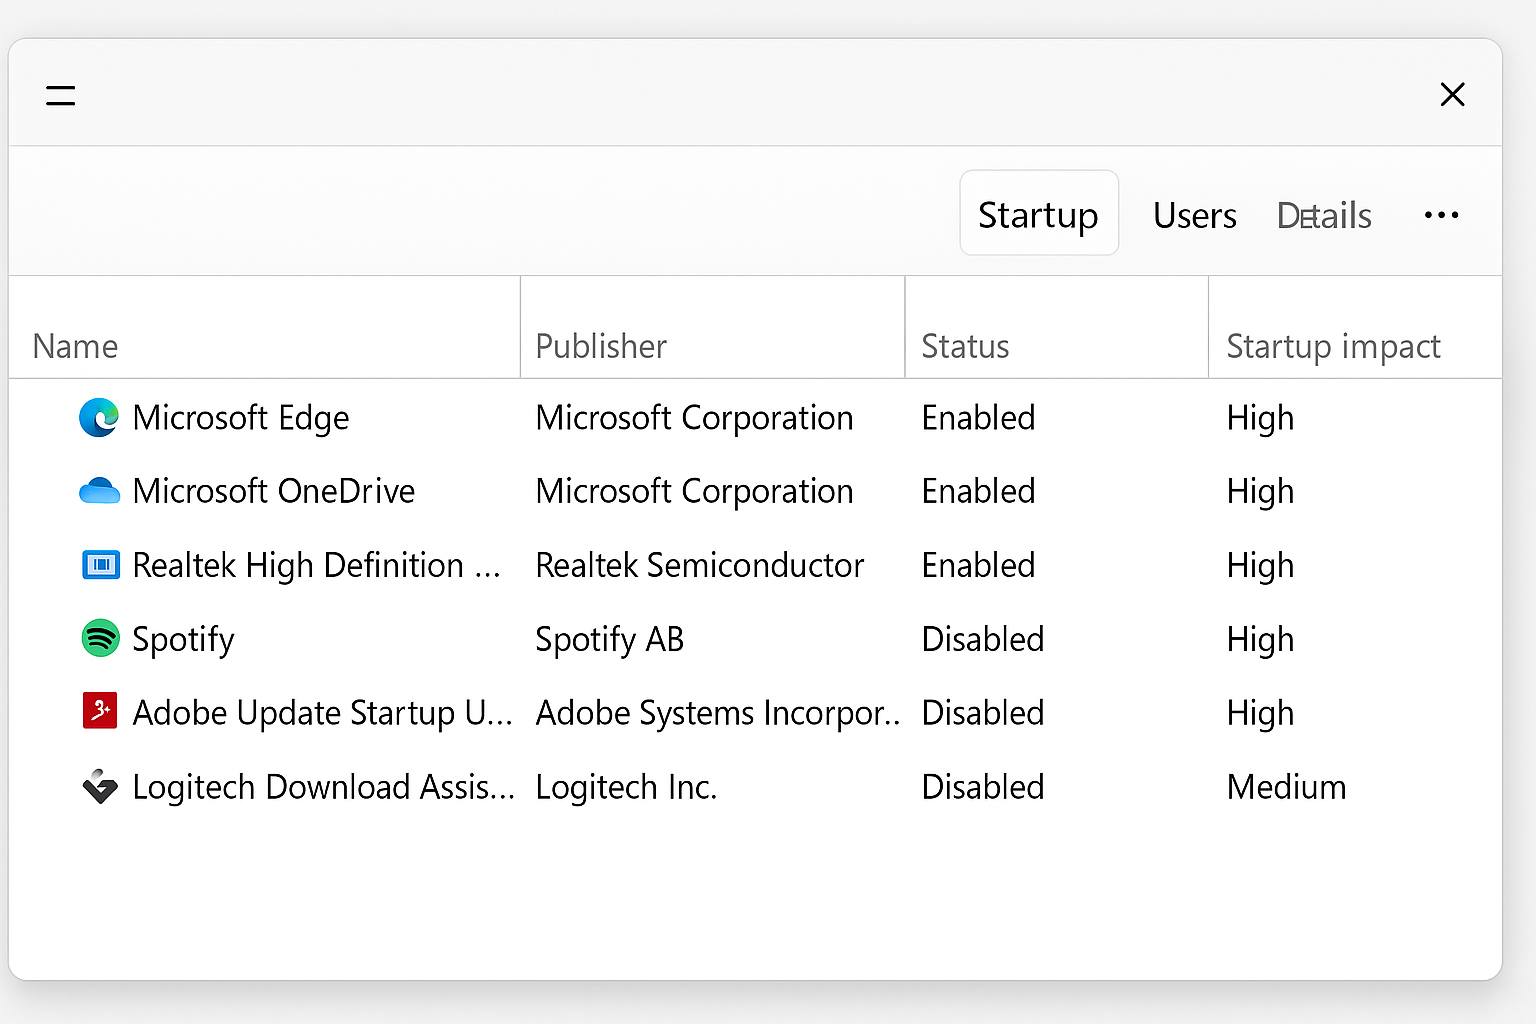
- Navigate to the “Startup” tab where you’ll see a list of all applications that launch when your computer boots up.
- Review each application and disable non-essential programs by right-clicking on them and selecting “Disable,” focusing on items marked as “High impact.”
- Pay special attention to applications you don’t recognize or rarely use, as these often consume resources unnecessarily during startup.
- After disabling unnecessary startup items, restart your computer to experience faster boot times and improved initial performance.
Optimize Windows 11 performance options settings
- Type “Performance” in the Windows search bar and select “Adjust the appearance and performance of Windows” from the results.
- In the Performance Options dialog, select “Adjust for best performance” to disable all visual effects, or choose “Custom” to selectively disable animations.
- Navigate to the “Advanced” tab and ensure that “Programs” is selected under “Adjust for best performance of” to prioritize application responsiveness.
- Under the “Virtual memory” section, click “Change” and verify that your paging file size is system managed or appropriately configured for your system specifications.
- Click “Apply” and “OK” to save these changes, which will reduce the system resources dedicated to visual effects and allocate more to actual performance.
Run Windows 11 performance maintenance tools
- Open the Windows search bar and type “Disk Cleanup” to launch the built-in storage maintenance utility.
- Select your system drive (typically C:) and click “OK” to scan for unnecessary files that can be safely removed.
- Check boxes for “Temporary files,” “Recycle Bin,” and “Previous Windows installations” if applicable, then click “OK” to delete these files.
- Next, type “Defrag” in the search bar and open “Defragment and Optimize Drives” to analyze and optimize your storage drives.
- Select your primary drive and click “Optimize” to improve file access speeds and overall system responsiveness.
Manage Windows 11 power settings for optimal performance
- Search for “Power plan” in the Windows search bar and select “Choose a power plan” from the results.
- Click on “Show additional plans” if available, and select “High performance” to maximize system performance.
- Click “Change plan settings” next to your selected plan, then “Change advanced power settings” for more detailed control.
- Expand “Processor power management” and set “Minimum processor state” to at least 5% and “Maximum processor state” to 100%.
- Apply these changes to ensure your system isn’t throttling performance to conserve power, especially important for desktop computers.
Performance Monitoring and Proactive Maintenance
Establish a regular maintenance schedule using Windows built-in tools to prevent future performance degradation. Enable Storage Sense by navigating to Settings > System > Storage > Storage Sense to automatically clean temporary files, empty the recycle bin, and manage local OneDrive content. Configure it to run monthly or when storage space becomes low to maintain optimal disk performance.
You can also go ahead and use the built in Performance Monitor (perfmon.msc) to create a custom data collector sets that track key metrics like CPU usage, memory consumption, and disk activity over time. This baseline data helps identify performance trends before they become noticeable to end users. Set up alerts for critical thresholds such as sustained CPU usage above 80% or available memory below 20% to proactively address potential issues.
Measure the bottleneck while Windows is slow
Open Task Manager during the slowdown and sort Processes by CPU, Memory, Disk, and Network. Watch the top entries for several minutes and record what remains high. A busy browser tab, low available memory, and sustained system-drive activity require different fixes, so avoid applying a broad cleanup routine first.
Check whether the problem occurs after sign-in, only on battery power, while using a dock, or during one application. Note recent Windows updates, driver changes, new software, and security scans. These comparisons narrow the cause before you disable anything.
Run controlled performance tests
Restart the computer and repeat the same workload. Disconnect optional USB devices and docks for one test. Close nonessential user applications, but do not disable antivirus, encryption, device-management, or business services without approval.
Review Startup apps in Task Manager and disable only items you recognize and do not need immediately. Change a small group, restart, and compare. Confirm free space on the system drive and install approved Windows and manufacturer updates.
A clean boot can identify a background service conflict. Follow Microsoft’s documented procedure, keep a record of the changed services, and restore normal startup after testing. A clean boot is a diagnostic state, not a permanent performance configuration.
Escalate with useful evidence
If the computer becomes hot or slows under load, check ventilation and the manufacturer’s hardware diagnostics. Avoid registry cleaners, memory optimizers, and bulk driver tools because they can create new instability.
For persistent issues, record the time, power mode, active workload, Task Manager readings, temperature symptoms, and any Reliability Monitor or Event Viewer errors. Test another approved Windows profile when only one user is affected.
Make one change at a time and rerun the same task. Keep a change only when the improvement is repeatable. If every account remains slow, provide the hardware model, storage type, memory size, update history, and measurements to support before considering a Windows reset.
Troubleshooting common Windows 11 performance issues
- If your system remains slow after applying the above tweaks, check for high disk usage in Task Manager by sorting processes by the “Disk” column and investigating any process using more than 50% of disk resources consistently.
- When applications freeze frequently, consider updating your device drivers by opening Device Manager, right-clicking on hardware components, selecting “Update driver,” and choosing to search automatically for updated driver software.
- For persistent performance problems after optimization, run the Windows built-in troubleshooter by going to Settings > System > Troubleshoot > Other troubleshooters, and running both the “Performance” and “Windows Update” troubleshooters to identify and fix underlying system issues.
- When all else fails, consider using the “Reset this PC” option found in Settings > System > Recovery, which allows you to reinstall Windows while keeping your personal files intact, often resolving deep-seated performance issues caused by system corruption.