Microsoft Teams can do more than host project conversations. By adding Microsoft Lists as a channel tab, your team gets one shared place to track owners, deadlines, priorities, blockers, and status updates. The tracker stays beside the project’s conversations and files, so people can review and update progress without maintaining a separate spreadsheet.
The challenge of project tracking in Microsoft 365
Project tracking often becomes unreliable when updates are scattered across chats, spreadsheets, and standalone tools. A Lists-based tracker keeps structured project data in the Teams channel your group already uses, with customizable columns, views, rules, and alerts. This guide shows how to build that tracker from scratch; if your work is better managed as assigned tasks, a Planner tab may be a better fit.
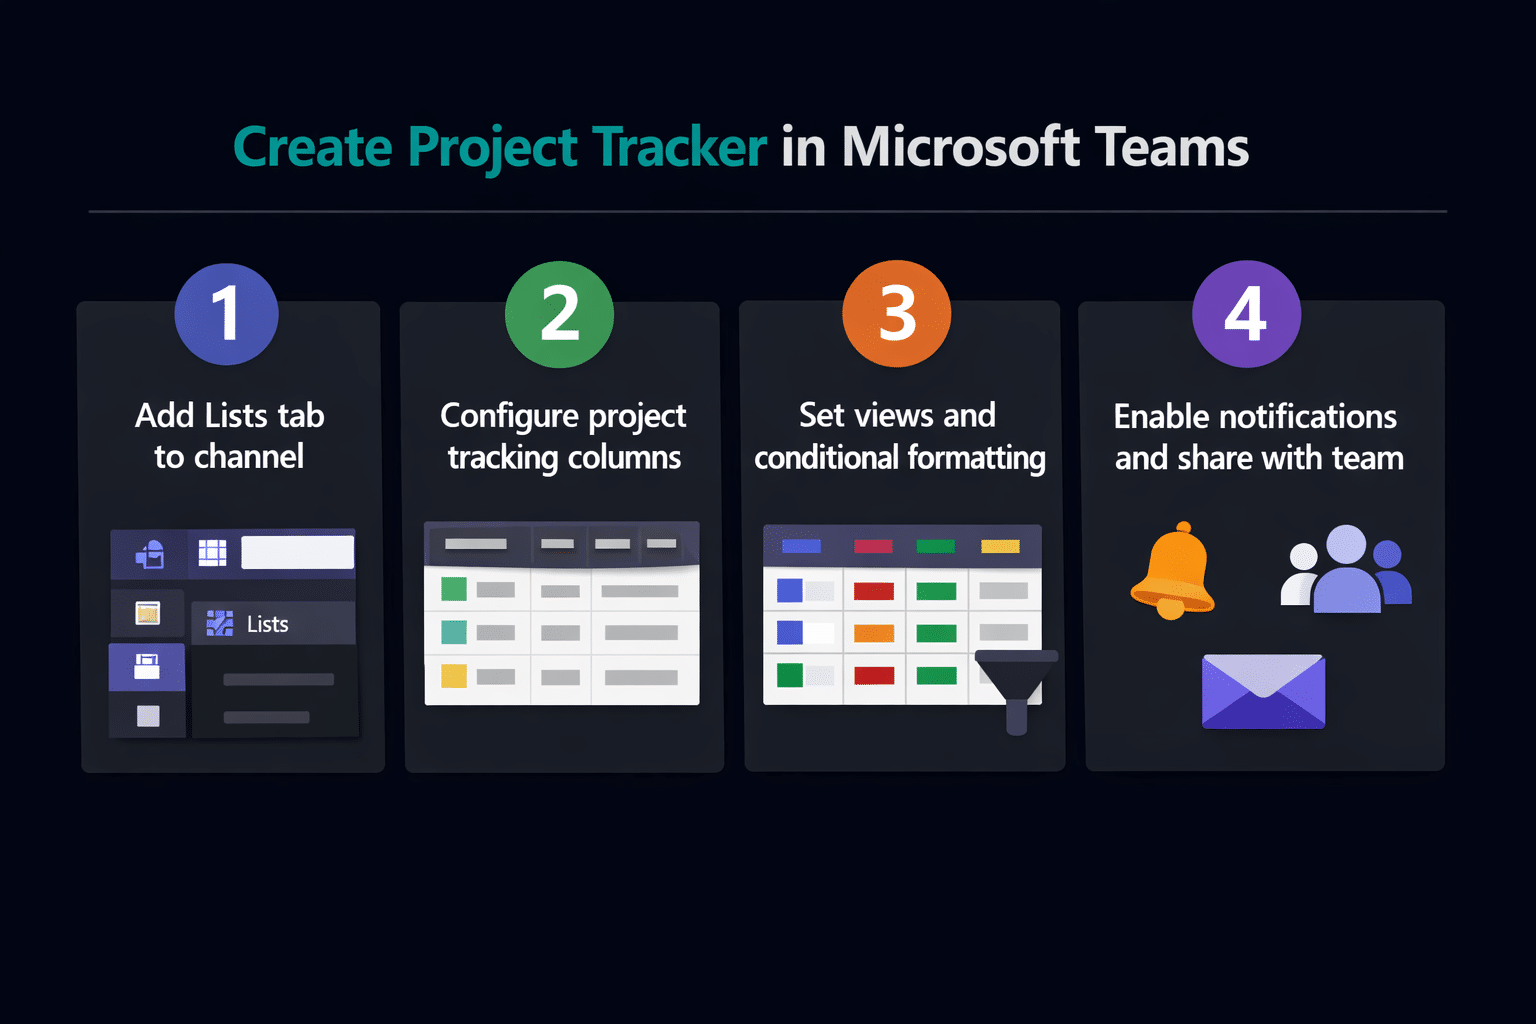
Creating a Microsoft Teams project tracking solution
This tutorial will guide you through creating a customized project tracker directly within Microsoft Teams. We’ll use Lists, a powerful yet user-friendly feature that integrates seamlessly with Teams. By the end, you’ll have a functional progress tracker that your team can access, update, and collaborate on—all without leaving Teams. You’ll need Microsoft 365 subscription with Teams and Lists functionality to follow along.
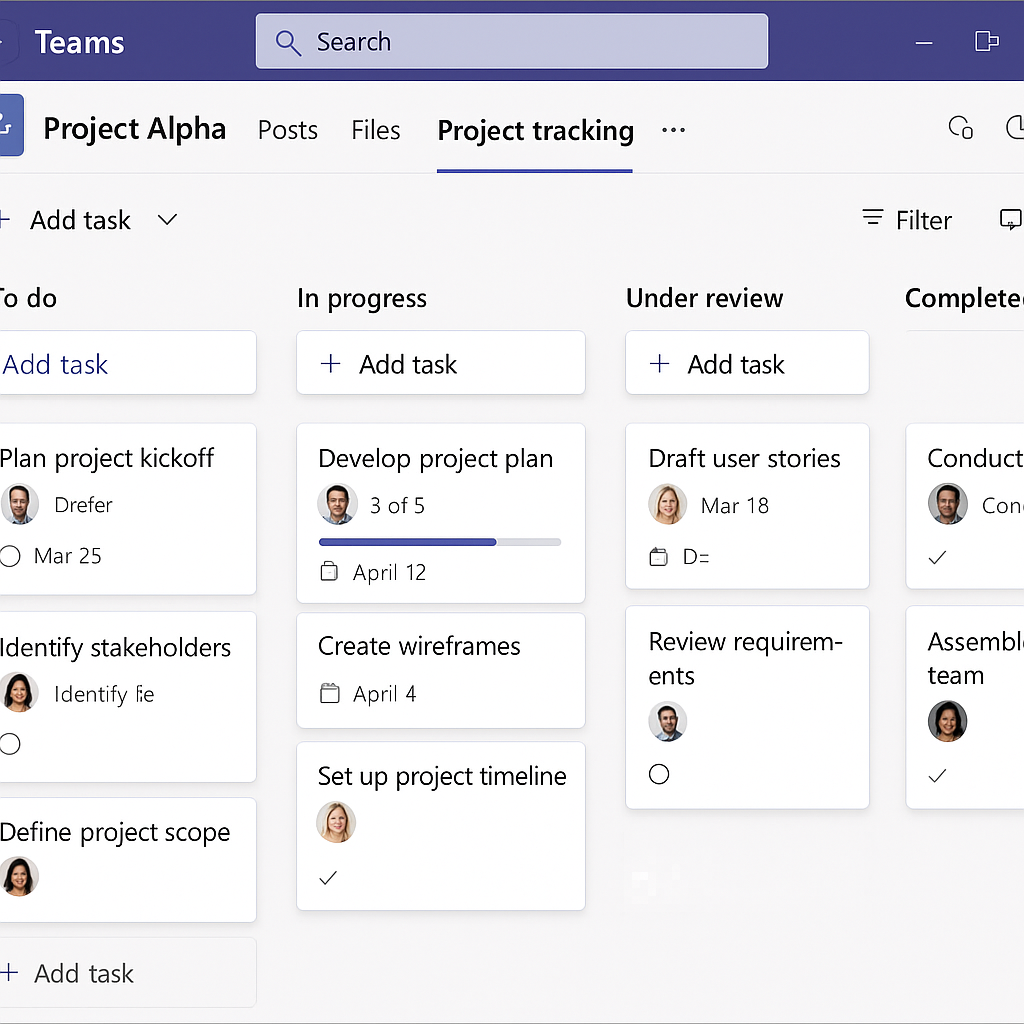
Building your Teams progress tracker
Design a Teams project tracker around ownership and status rules
A reliable Teams Lists tracking result depends on separating user settings, application behavior, data or device state, and organization policy. Record the account, version, and exact symptom, then compare one working and one failing condition.
Run a controlled comparison
Define the list’s source of truth before adding columns. Use a unique item title or ID, one accountable owner, a controlled status choice, target date, health indicator, and a short next-action field so updates remain comparable.
Create views for overdue work, items by owner, and decisions needing attention. Use conditional formatting sparingly and configure alerts or Power Automate notifications around meaningful state changes, not every edit.
Confirm behavior after restart
Test permissions with an ordinary team member and decide who may change structure versus item data. Review stale items during a recurring meeting and archive completed work according to the team’s retention rules.
Preserve security while troubleshooting. Avoid broad permission grants, unencrypted exports, disabled protection, or unofficial installers. A workaround that exposes data or credentials is not a successful repair.
Confirm the result from another intended user’s perspective when the workflow is shared. Technical success for the owner does not prove that recipients have the right access or see the correct result.
Prefer supported controls and current vendor recovery paths. Registry edits, cache removal, driver deletion, profile reset, and reinstallation should follow only after the failing layer is identified. Before a disruptive step, preserve user data, export settings where appropriate, and record how to restore the earlier configuration.
If a destructive repair is proposed, pause to verify backups, recovery keys, certificates, exports, or source data first. Recovery preparation is part of troubleshooting when profiles, encryption, synchronized content, flows, or shared records are involved.
Record the final setting, expected behavior, and one quick verification step for the user. This prevents an unsupported workaround from becoming permanent and makes recurrence easier to diagnose safely.
Create a new list in Microsoft Teams
- Begin by navigating to the team and channel where you want to add your project tracker, ensuring all relevant stakeholders have access to this location.
- Click the “+” button at the top of the channel to add a new tab, then select “Lists” from the available apps to integrate Microsoft Lists directly into your Teams environment.
- Choose “Create a new list” and select the “Blank list” option to build your project tracker from scratch, allowing for complete customization based on your team’s specific needs.
- Name your list something descriptive like “Marketing Campaign Tracker” or “Development Project Progress” to clearly communicate its purpose to all team members.
- Click “Create” to generate your new project tracking list that will be accessible directly within your Teams channel for seamless integration.
Configure your project tracker columns
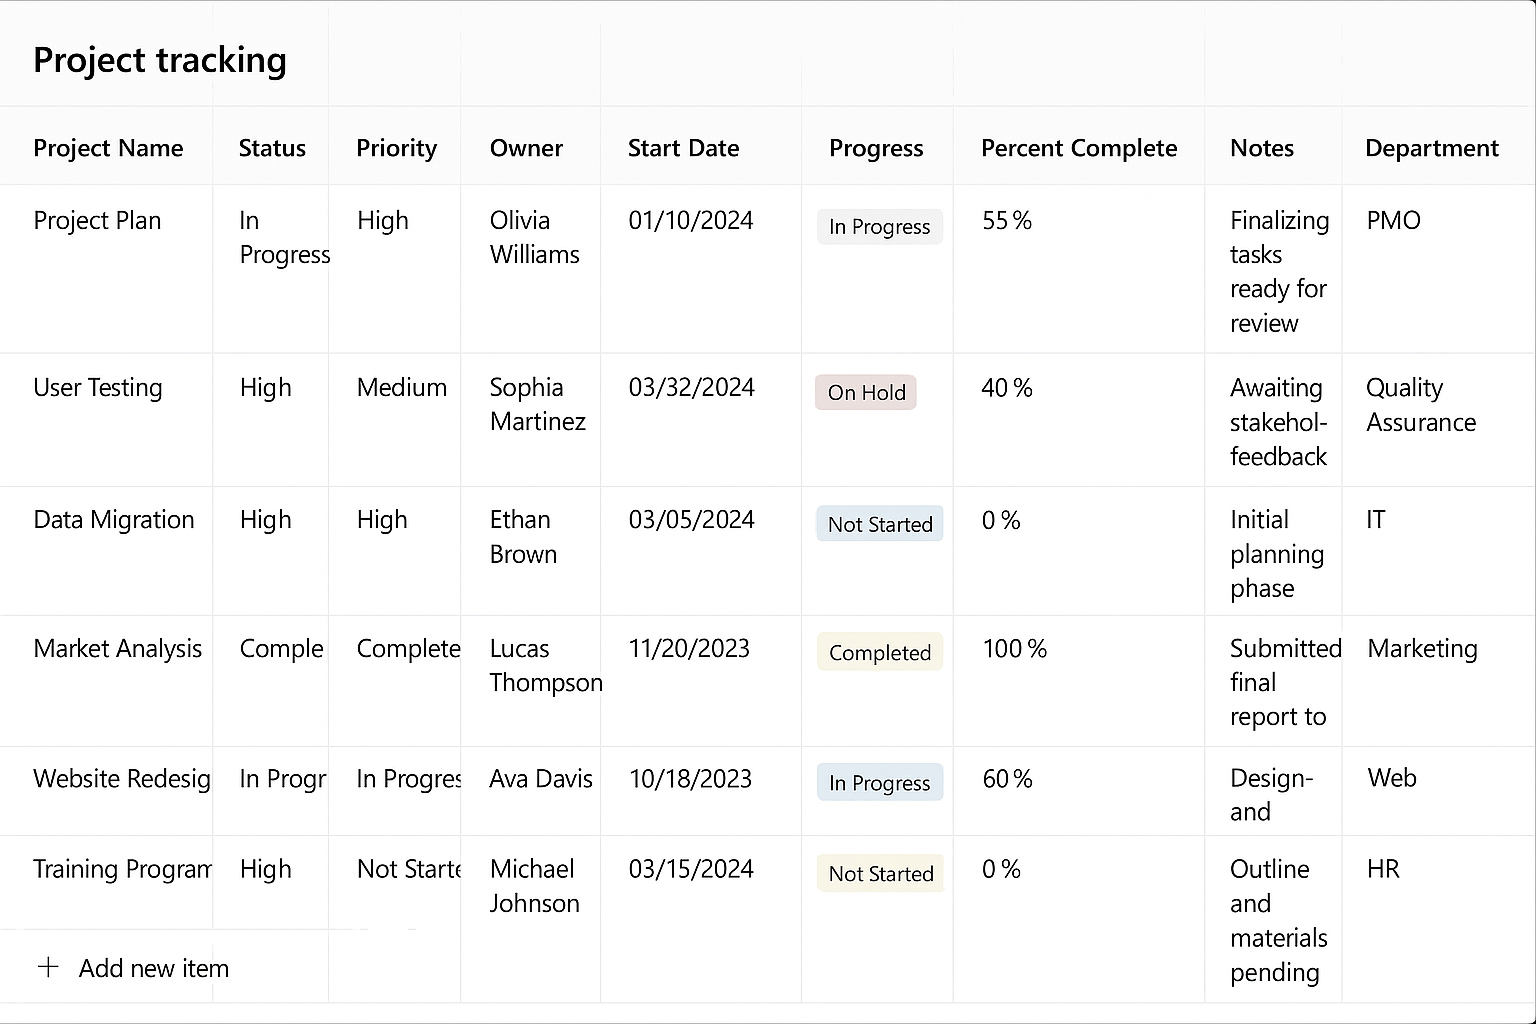
- Start with basic columns like “Project Name,” “Status,” “Priority,” “Owner,” “Start Date,” and “Due Date” to capture essential information for effective project monitoring.
- Add a “Progress” column as a Choice field with options like “Not Started,” “In Progress,” “On Hold,” and “Completed” to provide visual status indicators for each project task.
- Create a “Percent Complete” column as a Number field to track quantitative progress, allowing team members to update completion percentages as work advances.
- Include a “Notes” column as a Multi-line text field where team members can add important details, blockers, or context that others should know about specific tasks.
- Consider adding custom columns specific to your project needs, such as “Department,” “Budget,” or “Deliverables” to further enhance tracking capabilities.
Enhance your Microsoft Teams project tracking tool
- Customize views by clicking “All Items” and selecting “Create new view” to create filtered perspectives like “My Tasks,” “Overdue Items,” or “High Priority Projects.”
- Set up conditional formatting by selecting a column, clicking “Column settings,” and choosing “Format this column” to create visual indicators like red highlighting for overdue tasks.
- Enable in-line editing by simply clicking on any field within your list to make quick updates without opening separate forms, streamlining the update process.
- Configure notifications by clicking the three dots menu, selecting “Alert me,” and defining conditions that trigger alerts when items change, keeping everyone informed of project developments.
- Add the list as a tab in multiple channels if your project spans different teams, ensuring consistent tracking while maintaining appropriate access controls.
Share and collaborate using your Teams progress tracker
- Adjust sharing permissions by clicking the three dots menu and selecting “Manage access” to ensure the right people have view or edit access to your project tracker.
- Encourage team members to use the comments feature by selecting any list item and clicking the comments icon to keep conversations contextual and tied to specific projects. You can also send email to and from Teams channel to ensure all project communications stay within the Teams environment.
- Leverage @mentions in comments to notify specific team members about updates or questions, ensuring important information doesn’t get lost in general channel conversations.
- Schedule regular review meetings directly in the channel where your project tracker lives, using the Meet button to discuss progress with the tracker visible to all participants.
- Train your team on best practices for updating the tracker, emphasizing the importance of keeping information current for effective project management and collaboration.
Pro tip: Consider connecting your Teams project tracker to Power Automate to create automated workflows, such as sending notifications when task statuses change or generating weekly progress reports automatically.
requently Asked Questions About Teams Project Tracking
How do I handle confidential project information in my Teams tracker?
Use private channels within your team to house sensitive project trackers. Private channels in Microsoft Teams restrict access to specific members while maintaining the collaborative benefits of Lists. You can also leverage sensitivity labels if your organization has configured Microsoft Purview Information Protection to classify and protect confidential project data automatically.
Can I track time spent on tasks within my Teams project tracker?
While Lists doesn’t include built-in time tracking, you can add Number columns for “Estimated Hours” and “Actual Hours” to manually track time investment. For more sophisticated time tracking, consider integrating with Microsoft Project for the Web or third-party time tracking apps available in the Teams App Store that sync with your project data.
What happens to my project tracker if team members leave the organization?
Lists automatically handles ownership transfer when users are removed from your Microsoft 365 tenant. However, it’s good practice to assign backup owners in your tracker settings and document access procedures. You can transfer list ownership by going to List Settings > Permissions and adding alternate owners before team changes occur.
How can I create reports from my Teams project data?
Export your Lists data to Excel by clicking the “Export to Excel” option in the command bar, then use Excel’s pivot tables and charts for detailed reporting. For automated reporting, connect your list to Power BI using the Lists connector to create dynamic dashboards that refresh automatically as your team updates project information in Teams.